
Pests
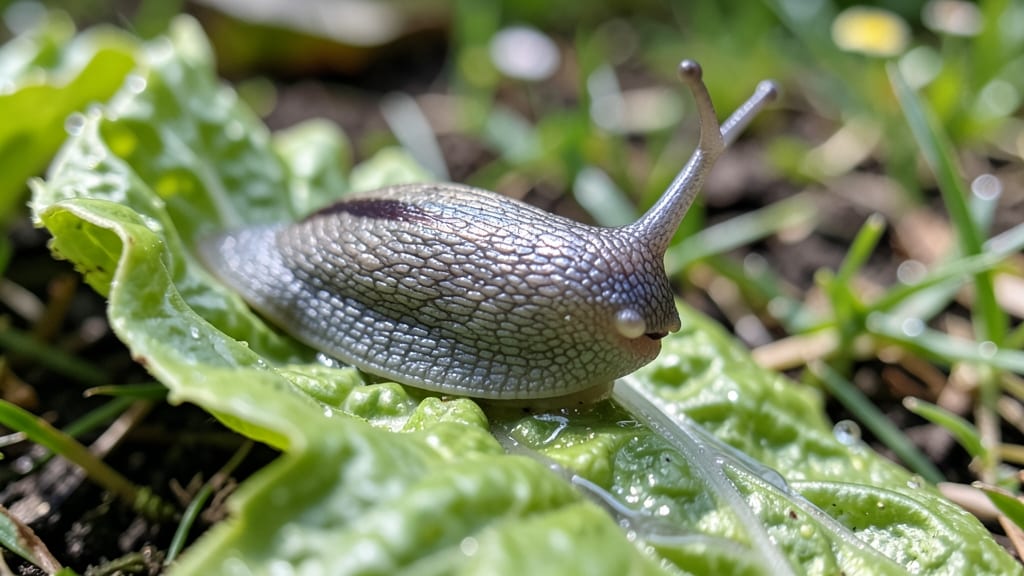
How to deter snails in your garden isn’t about battling drought or pests—it’s those slimy invaders. 🐌 The copper barrier method finally stopped them from devouring my hostas, and it's the simplest solution I've found that works without chemicals or harming beneficial insects. Copper confuses their slime trails, creating a mild electric shock that makes them turn back. You don't need fancy tools—just copper tape, a few hours, and some patience. The best part? It's completely safe for kids, pets, and pollinators while keeping your plants intact. After installation, you'll notice fewer slime trails within days. The barrier lasts multiple seasons with minimal maintenance, and you can even combine it with other methods like crushed eggshells for extra protection. This method works in raised beds, containers, and traditional gardens. Let's get those copper strips in place before the next full moon—when snails get extra active.
📚 In This Guide
- What you need
- Instructions
- Tips and common mistakes
- Wrapping up and next steps
What you need
- ● Copper tape or sheeting: ½-inch to 1-inch wide (for tape) or ¼-inch thick (for sheets). You’ll need enough to wrap around the perimeter of your garden beds, raised planters, or containers. Tip: For small pots, 1–2 feet of tape per container works; for large gardens, measure and cut accordingly!
- ● Measuring tape or ruler: To ensure your barrier is snug and continuous—snails hate gaps!
- ● Scissors or tin snips: For clean cuts on copper tape or sheeting.
- ○ Double-sided tape or strong adhesive (optional but helpful): To secure the copper to rough surfaces like wood or bricks.
- ● Waterproof glue or copper nails (for outdoor use): If attaching copper sheeting to permanent structures like fences or planter edges.
- ● Copper wire: Bendable for tricky corners or uneven edges.
- ● Plastic or metal stakes: To anchor the barrier at the base (especially for raised beds).
- ● Garden twine or zip ties: For temporary setups or securing copper to flexible supports.
- ● Gloves: Copper can be slippery—protect your hands!
Step-by-Step instructions for creating a copper snail barrier
Here's the foolproof method I use to keep my garden free of those pesky garden slugs.
🪴 Step 1: Measure and Mark Your Garden Borders
Start by measuring the perimeter of your garden beds where you want to install the copper barrier. Snails and slugs need a clear, unobstructed path to reach your plants, so focus on the edges. Use a tape measure to determine the length of copper strip needed—1 inch wide is ideal for most gardens.
Mark the perimeter with stakes or a garden hose to visualize where the copper will go. I like to lay out the copper first to check for any tight corners or curves that might need extra attention. This step ensures you won't have gaps where snails can sneak through. If your garden has irregular shapes, cut the copper to fit snugly around every inch.
💧 Step 2: Clean and Prepare the Soil Edge
Before installing the copper, clear away any debris, mulch, or loose soil from the garden bed's edge where the copper will sit. Snails thrive in damp, hidden spaces, so removing these obstacles makes the barrier more effective. Use a small shovel or your hands to create a clean, flat surface along the perimeter.
Pay special attention to the soil's moisture level. If it's overly wet, the copper might not work as well because slugs can still cross damp barriers. If needed, let the soil dry out slightly before proceeding. A dry edge gives the copper its best chance to deter snails naturally.
☀️ Step 3: Install the Copper Strip Securely
Place the 1-inch wide copper strip along the marked perimeter, ensuring it sits flat against the soil edge. The copper should be upright—not buried or buried too deeply—so snails can't crawl underneath it. Secure it with staples or copper-specific clips every 6-12 inches to keep it in place, especially in windy areas.
For corners or tight turns, bend the copper gently to follow the garden's shape. Avoid sharp bends that could create gaps. If you're installing the barrier around pots or containers, wrap the copper around the base and secure it tightly. The key is to create a continuous, unbroken line that snails can't navigate around.
✂️ Step 4: Test and Maintain the Barrier
After installation, test the barrier by placing a few snails or slugs near it to see how they react. You'll notice they hesitate, circle, or even retreat—this is the copper's electric-like effect confusing their slime trails. If you spot any gaps where snails might slip through, reinforce those spots immediately.
Maintenance is minimal but crucial. Check the barrier every few weeks to ensure it's still secure and hasn't been displaced by rain or wind. If the copper starts to tarnish or develop a green patina, that's normal and doesn't affect its effectiveness. However, if it becomes loose or damaged, replace or re-secure it promptly.
🌿 Step 5: Combine With Other Deterrents for Extra Protection
While the copper barrier is highly effective, combining it with other methods can make your garden even more snail-proof. Sprinkle dried coffee grounds or diatomaceous earth around the base of plants for an additional deterrent. These materials irritate slugs' soft bodies and discourage them from crossing the barrier.
Also, consider removing any hiding spots like thick mulch or boards near the garden edges. Snails love to rest during the day, so eliminating their shelter reduces their numbers over time. With the copper barrier in place and these extra steps, you'll see a noticeable drop in snail activity within a few days.
Tips & tricks for perfect copper snail barriers
Here's what nobody tells you about making your copper barrier work even better.
Edge Preparation Matters: In Step 2, when clearing the soil edge, don't just remove debris—focus on creating a clean, slightly elevated ridge about 1/4-inch high along the perimeter. This subtle elevation forces snails to climb over the copper rather than crawl under it. I use the back of a small trowel to create this ridge, and it makes a noticeable difference in effectiveness.
Copper Height is Critical: The instructions mention keeping the copper upright, but here's the detail: the top edge should be at least 1/2-inch above the soil surface. Snails can't climb vertical surfaces easily, but a lower barrier gives them a ramp. If your garden has particularly determined slugs, consider stacking two 1-inch strips to create a 1-inch-tall barrier.
Test Before Full Installation: Before committing to the full perimeter, test a 3-foot section first. Place a few snails near the copper and observe their behavior. If they're still crossing, adjust the height or check for gaps. This small test can save you hours of frustration later—trust me on this.
Combine With Visual Deterrents: While the copper works on its own, adding visual deterrents like reflective CDs or aluminum pie pans near the barrier creates extra confusion for snails. Their slime trails get disrupted by the light reflections, making them even less likely to cross. I place these near high-risk areas like hosta beds where slugs are particularly persistent.
Pro Tips for Deter Snails
- Here's what nobody tells you about making your copper barrier work even better.
- Edge Preparation Matters: In Step 2, when clearing the soil edge, don't just remove debris—focus on creating a clean,...
- Copper Height is Critical: The instructions mention keeping the copper upright, but here's the detail: the top edge s...
Frequently asked questions
Got questions about keeping those slimy snails away? You’re not alone! Here are some of the most common concerns—and answers—to help you tackle the problem like a pro.
Will a copper barrier work on all types of snails?
A copper barrier is highly effective for most garden snails and slugs, thanks to their natural aversion to the metal’s electrical charge. However, some species (like the larger Arion slugs) may be less deterred. For stubborn pests, combine copper with other methods like diatomaceous earth or beer traps for better results.
How long does it take for a copper barrier to work?
Snails usually avoid copper within hours of installation, but full effectiveness may take 1–2 days as they learn to associate the barrier with discomfort. For best results, set it up before snails become a major issue—spring and fall are prime prevention times!
Is a copper barrier more expensive than other snail deterrents?
Upfront, copper tape or wire can cost $10–$30 for a small garden, which might seem pricey. But it’s a long-term solution—unlike beer traps or organic sprays that need frequent reapplication. Think of it as an investment in snail-free peace of mind!
Can I use copper tape around my entire garden?
Copper tape is flexible and can be bent around raised beds, pots, and even tree trunks. Just ensure it’s continuous—even a tiny gap can let snails slip through. For large areas, opt for copper wire buried slightly into the soil for extra security.
What if snails keep climbing over the copper?
If you spot snails on top of the barrier, they’re likely using debris (like leaves or mulch) as a bridge. Keep the area around the copper clean and consider adding a lip of copper (folded outward) to create a steeper climb. A shallow trench filled with wood ash or crushed eggshells below the barrier can also help.
Is copper safe for pets or plants?
Yes! Copper is non-toxic to plants, pets, and humans. However, avoid using copper sulfate (a chemical treatment) near edible plants or water sources. Stick to pure copper tape or wire for a safe, eco-friendly solution.
Wrapping up and next steps
Deterring snails doesn’t have to be a battle—just a clever strategy! 🐌✨ By setting up a simple copper barrier, you’re disrupting their slime trails and sending them packing without harsh chemicals.
Whether you’re protecting your garden, patio, or prized plants, this method is effective, eco-friendly, and easy on your wallet.
Ready to reclaim your space? Grab your supplies, follow the steps, and watch those slimy invaders take the hint! Next up: Monitor your barrier and adjust as needed—your snail-free oasis is just a few steps away! 🌱💪