
Companion Plants
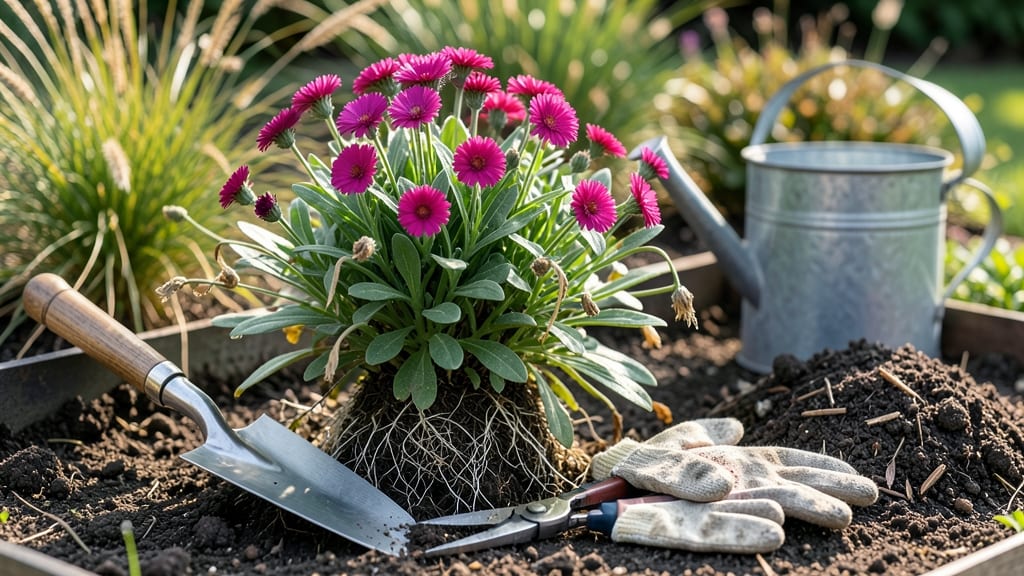
Dividing dianthus plants doubles your blooms in just 30 minutes. ✨ I learned the hard way that waiting too long turns clumps into bare patches—until I discovered this foolproof method that works even for first-timers.
The key? Timing, sharp tools, and knowing exactly where to slice without damaging the roots.
You’ll need clean pruners, a trowel, and a bucket of water for post-division hydration. Spring or early fall are ideal—when the soil is workable but not frozen. Avoid dividing during heatwaves or drought, or you’ll stress the plants before they’ve had a chance to recover.
Start by digging around the plant’s edges to loosen the soil, then gently lift the entire clump. Separate the sections with your hands or pruners, ensuring each piece has 3-5 healthy stems and a good root system.
Replant immediately in well-draining soil, water thoroughly, and watch for new growth in 2-3 weeks.
Common mistakes? Overcrowding the new divisions or skipping the watering step. Space them 12-18 inches apart for airflow, and mulch lightly to retain moisture. With proper care, your divided dianthus will outperform the original—more flowers, stronger stems, and fewer pests. Ready to clone your garden?
📚 In This Guide
- What you need
- Instructions
- Tips and common mistakes
- Wrapping up and next steps
What you need
- ● Healthy Dianthus plants: Mature, 2–3-year-old clumps (avoid flowering plants—focus on established foliage).
- ● Sharp bypass pruners or clean garden shears: 1 pair (sterilized with rubbing alcohol to prevent disease).
- ● Garden trowel or spade: 1 medium-sized (for digging roots).
- ● Well-draining potting mix: 1–2 bags (for repotting; blend with perlite or sand for aeration).
- ● Containers or garden beds: For repotting: 6-inch pots (1 per division) or a nursery tray.
- ● For in-ground planting: Amended soil (add compost + grit for drainage).
- ● Watering can or hose with a gentle spray nozzle: 1 (keep water pressure low to avoid disturbing roots).
- ○ Rooting hormone (optional but recommended): 1 small tube (e.g., Rootone or Clonex for faster growth).
- ● Gloves: 1 pair (to protect hands from thorns or soil).
- ● Mulch: Straw or pine needles (to retain moisture post-division).
- ● Slow-release fertilizer: 1 small bag (e.g., Osmocote) for post-planting nourishment.
- ● Clear plastic dome or humidity tray: 1 (to create a mini greenhouse for cuttings).
- ● Label markers: 1 pack (to track varieties if dividing hybrids).
Step-by-Step instructions for dividing dianthus plants
Here’s how I divide dianthus with minimal stress to the plants—and no more crowded, leggy clumps.
⏰ Step 1: Time the Division for Optimal Success
Divide dianthus in early spring or early fall when temperatures hover around 50-65°F. This timing ensures roots have time to establish before summer heat or winter dormancy sets in. Avoid dividing in mid-summer—plants struggle to recover when stressed by heat and drought.
Look for visual cues: if your dianthus mounds are overcrowded with fewer blooms, it’s time to act. The plants will have thickened basal stems (the woody base near the soil) and root systems pushing outward—these are signs they’ve outgrown their space. Wait until after flowering in spring or before new growth in fall for best results.
🪴 Step 2: Prepare Tools and Workspace
Gather a sharp, sterilized knife or spade, a bucket of clean water, and gloves to protect your hands from the fine hairs on dianthus stems. Sterilize your tools with rubbing alcohol to prevent spreading disease between divisions. Work on a clean, flat surface like a tarp or old sheet—dianthus roots are delicate and break easily.
Water the plants 24 hours before dividing to soften the soil and reduce root damage. The soil should be moist but not soggy—think of it as damp like a wrung-out sponge. This preparation makes the roots more pliable and easier to separate without tearing. Avoid working in dry soil, which can snap roots and shock the plant.
✂️ Step 3: Lift and Separate the Clumps
Use your sterilized knife to slice a ring around the outer edge of the dianthus clump, cutting 1-2 inches deep into the soil. This loosens the root ball without severing it completely. Gently lift the entire plant from the ground, shaking off excess soil to reveal the root structure. You’ll see individual basal rosettes (small clusters of leaves and stems) connected by a network of roots.
Separate the clumps by teasing apart the roots with your fingers—dianthus roots are fibrous and divide easily if handled gently. Aim for 3-5 inch divisions, each with 3-5 healthy basal rosettes and a strong root system. Discard any yellowed, mushy, or hollow stems—these indicate diseased or weakened sections. Keep divisions small; larger clumps take longer to establish.
🌱 Step 4: Replant and Establish New Divisions
Dig holes twice as wide as the root ball but only as deep as the original planting. Space divisions 12-18 inches apart to allow airflow and prevent future crowding. Place each division in its hole, ensuring the basal rosettes sit just below the soil line—burying too deep can cause rot, while planting too shallow exposes roots to drying out.
Backfill with the removed soil, pressing gently to eliminate air pockets. Water deeply until moisture seeps 6 inches down into the soil. Mulch with 1 inch of organic matter (like shredded bark) to retain moisture and suppress weeds. Avoid heavy mulch, which can smother the low-growing stems. New divisions may take 2-3 weeks to show signs of regrowth—be patient.
☀️ Step 5: Care for Divisions Through Establishment
Keep newly divided dianthus consistently moist but not waterlogged for the first 4-6 weeks. You’ll know moisture is right when the top inch of soil feels damp but not saturated. Reduce watering slightly after this period, allowing the top ½ inch of soil to dry out between waterings. Overwatering is the #1 killer of newly transplanted dianthus—roots rot quickly in soggy conditions.
Hold off on fertilizing for 6 weeks to let the roots recover. Once established, apply a balanced, slow-release fertilizer (like 10-10-10) in early spring to encourage strong growth. Deadhead spent blooms to redirect energy into root development rather than seed production. Your divisions should bloom the following year if given proper care—proof that patience pays off.
Tips & tricks for perfect dianthus division
These precision techniques will help you clone your dianthus like a pro—no more guesswork, just thriving new plants.
Timing Secret: The 24-hour watering before division isn't just about softening soil—it's about giving roots a hydration boost. I've found that adding a tablespoon of cornmeal to the water helps prevent fungal issues during this critical preparation period. This small addition creates a protective barrier while keeping roots supple for easier separation.
Root Handling Technique: When teasing apart those fibrous roots in Step 3, think of them like pulling apart wet yarn. Work slowly from the outer edges inward to avoid snapping the delicate root strands. If you encounter stubborn connections, use a sterilized knife to make clean cuts rather than forcing them apart—this minimizes damage and speeds up recovery time for your new divisions.
Planting Depth Precision: That "just below the soil line" guideline for basal rosettes is where the magic happens. To visualize this, imagine the top of the root ball sitting level with the surrounding soil—never bury the crown. I like to use a small stick as a depth marker when planting to ensure consistency across all divisions. Proper depth prevents both rot and desiccation, two common pitfalls that kill new plantings.
Post-Division Care Strategy: The 4-6 week moisture window is your critical establishment period. I've developed a simple trick: place a moisture meter near your divisions to track soil conditions. Set it to alert you when the top inch reaches that perfect "damp sponge" consistency. This eliminates the guesswork and prevents both underwatering (which stresses plants) and overwatering (which drowns roots).
Pro Tips for Divide Dianthus Plants
- These precision techniques will help you clone your dianthus like a pro—no more guesswork, just thriving new plants.
- Timing Secret: The 24-hour watering before division isn't just about softening soil—it's about giving roots a hydrati...
- Root Handling Technique: When teasing apart those fibrous roots in Step 3, think of them like pulling apart wet yarn....
Frequently asked questions
Got questions about dividing dianthus? You’re not alone!
Here are some of the most common concerns—and clear, practical answers to help you clone your plants like a pro.
When is the best time to divide dianthus plants?
Divide dianthus in early spring or early fall when temperatures are mild (50–70°F). Avoid extreme heat or cold—these plants hate stress! Spring division gives them time to establish roots before summer, while fall division allows for root growth before winter dormancy. Pro tip: If you must divide in summer, do it in the morning and keep plants shaded until they recover.
Can I divide dianthus if it’s flowering?
It’s not ideal to divide flowering dianthus, as it can shock the plant and reduce blooms. Wait until after flowering (late spring/early summer) or before new growth starts in spring. If you’re in a rush, you can lightly trim blooms to redirect energy to root growth—but expect fewer flowers that season. Patience pays off for happier, hardier plants!
How do I know if my dianthus is ready to divide?
Look for these signs: overcrowded clumps (roots circling tightly), declining blooms, or bare spots in the center. Healthy dianthus should have 3–5 mature stems per division with at least 3–4 inches of root. If the center looks woody or dead, it’s time to split! Bonus: Dig up a small section to check roots—if they’re dense and white, they’re ready.
What if my divided dianthus doesn’t survive?
Don’t panic! Common issues include root rot (from overwatering) or transplant shock. To troubleshoot:
Yellowing leaves? Likely overwatered—let soil dry slightly between waterings.
Wilted or crispy? Check roots for rot (mushy = bad) or dryness (brown = underwatered).
Slow to grow? Give it time! Mulch lightly and avoid fertilizing for 4–6 weeks to reduce stress.
Pro tip: Divide smaller sections (2–3 stems) for higher success rates—they’re less stressful to transplant!Can I divide dianthus in containers instead of the ground?
Container-grown dianthus can be divided the same way, but choose pots with drainage holes and use well-draining soil (like a mix of potting soil and perlite). After dividing, water lightly and place in partial shade for 1–2 weeks to help roots establish. Warning: Containers dry out faster—monitor soil moisture closely!
Wrapping up and next steps
Dividing your dianthus plants is a rewarding way to expand your garden while keeping your blooms thriving! With the right tools, timing, and care, you can effortlessly clone healthy plants for stunning borders or gifts. 🌸
Now that you’re armed with the know-how, grab your gloves and get ready to multiply those vibrant flowers. Next up: Watch your new divisions take root and flourish—then share the love by swapping cuttings with fellow gardeners! Happy planting! 🌱