
Vegetables
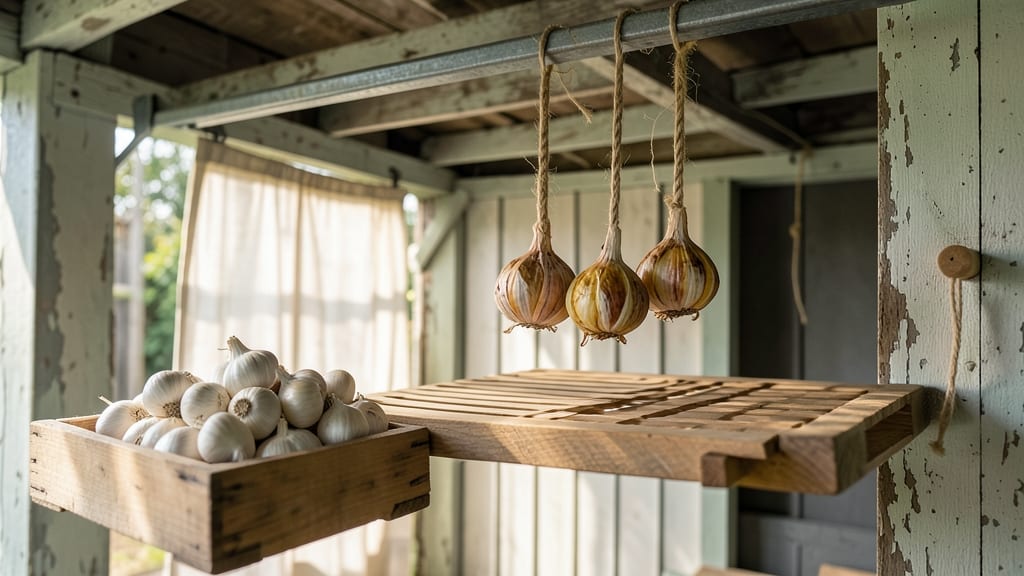
Hanging garlic to cure transforms your harvest into bold, long-lasting cloves. 🌱 The secret lies in patience and perfect conditions—low humidity, steady airflow, and just the right temperature. My first attempt with damp braids ended in mold, but now I get cloves so pungent they flavor dishes for months.
You’ll need only three things: healthy, fully dried garlic bulbs, soft twine or raffia, and a cool, dark spot with good airflow. The braiding method keeps cloves separated for even curing, while proper spacing prevents rot. Most gardeners overlook humidity control—this is where curing fails or succeeds.
By week three, your garlic will develop that signature deep flavor and papery skin. Store the cured bulbs in a mesh bag for 6-12 months of shelf life, or plant them next spring.
The difference between store-bought and home-cured is night and day—richer, more complex, and ready whenever you need it.
Works for softneck and hardneck varieties alike, and adapts to garages, basements, or even a well-ventilated closet. Here’s how to do it right the first time—no more wasted harvests.
📚 In This Guide
- What you need
- Instructions
- Tips and common mistakes
- Wrapping up and next steps
What you need
- ● Fresh garlic bulbs: Choose plump, firm bulbs with unbroken skins (avoid sprouting or moldy cloves). Aim for 1–2 lbs (450–900g) depending on your needs.
- ● String or twine: Use 100% cotton or jute (avoid synthetic fibers that can trap moisture). A 10–15 ft (3–4.5m) length works for most batches.
- ● Drying space: A well-ventilated area (e.g., pantry, garage, or porch) with consistent temps between 60–70°F (15–21°C).
- ○ Optional but helpful: A drying rack (wooden or metal) or hanging mesh bags for airflow.
- ● Sharp knife or garlic separator: For cleanly removing cloves without bruising.
- ● Paper towels or clean cloth: To pat cloves dry before hanging (reduces mold risk).
- ○ Small wooden skewers or toothpicks: (Optional) For piercing stubborn cloves if they resist string.
- ● Air-tight containers or jars: For long-term storage (glass with lids or food-grade buckets).
- ○ Humidity monitor (optional): Ideal for humidity levels below 65%—too much moisture = mold.
- ● ✅ Time: 4–6 weeks for full curing (longer = more pungent flavor!).
- ● ✅ Patience: Avoid rushing—slow drying = better taste.
- ● ✅ Space prep: Ensure your drying area is clean, dust-free, and rodent-proof.
Step-by-step instructions for hanging garlic to cure
Here’s the foolproof method I use every year to dry garlic with bold flavor and perfect texture.
🪴 Step 1: Select and Prepare Whole Garlic Heads
Choose firm, plump garlic bulbs with unbroken skins and no soft spots. Trim the roots to ½ inch but leave the stems intact—this is where the bulb will dry. I like to braid the stems together in small bunches of 4-6 heads using twine, keeping them loose enough for airflow.
Hang the braids in a spot with good air circulation and temperatures between 60-75°F. Avoid direct sunlight—it’ll bleach the skins and make them brittle. If your kitchen is too humid, a dehumidifier or open window helps speed drying without risking mold.
☀️ Step 2: Hang and Monitor for Even Drying
Use a sturdy hook or string to suspend the garlic 6-12 inches off the ground. The stems should dangle freely, not touch walls or ceilings. Check weekly for even drying—cloves should feel light when lifted and skins should wrinkle slightly but not crack.
If any stems break, don’t panic—just rehang the loose bulb. Uneven drying leads to moldy cloves, so rotate the braids quarter-turn daily if possible. You’ll know it’s ready when the papery skins turn parchment-thin and the cloves rattle when shaken.
⏰ Step 3: Test for Perfect Dryness and Store Properly
After 3-4 weeks, pluck a clove and peel back the skin. If it’s dry but still slightly pliable (not hard or crumbly), keep hanging. Once the cloves feel light and brittle, they’re fully cured. Remove the braids and let them air out for 24 hours in a dry, dark place before storing.
Store cured garlic in a paper bag or mesh sack (plastic traps moisture and spoils flavor). Keep it in a cool, dark pantry—50-60°F is ideal. Properly dried garlic stays fresh for 6-12 months, with peak flavor in the first 3 months.
🌱 Step 4: Troubleshoot Common Issues Mid-Cure
If you see white fuzz (mold), remove the affected bulb immediately and increase airflow. Soft spots mean overwatering—trim the clove and dry the rest separately. For uneven drying, separate the braids and hang individual bulbs to improve circulation.
Real talk: If your kitchen is too humid, skip the braiding and hang single bulbs. The extra airflow prevents mold and speeds up drying. I’ve cured garlic in everything from a closet fan to a garage—just keep it dry and patient.
Tips & tricks for perfectly cured garlic
Here's what I've learned over years of curing garlic—these details make all the difference between good and extraordinary results.
Selection is Everything: Look for bulbs with tight, unbroken skins and no green sprouts. The tighter the skin, the better the cloves will hold together during drying. I've ruined batches with bulbs that had even the slightest soft spot—trust me, it's worth inspecting each one carefully.
Braiding Technique Matters: When braiding your garlic stems, keep them loose enough that air can circulate between bulbs. Too tight, and you'll trap moisture; too loose, and they might swing into each other. I aim for about 3-4 inches between bulbs in each braid. This consistent spacing is what prevents mold and ensures even drying throughout the 3-4 week process.
Temperature Control: The 60-75°F range in your instructions is perfect, but here's the secret: consistency matters more than the exact number. If your space fluctuates (like a garage that gets hot during the day), move your garlic to a cooler spot at night. I've had batches where the temperature crept above 80°F during the day, and while they still dried, the skins became brittle faster than ideal.
Storage Wisdom: After your 24-hour air-out period, store your cured garlic in a paper bag rather than a plastic container. The paper allows just enough moisture exchange to prevent clumping while keeping out humidity. Place a small piece of chalk in the bag—it absorbs any excess moisture that might develop over those 6-12 months of storage.
Pro Tips for Hang Garlic To Cure
- Here's what I've learned over years of curing garlic—these details make all the difference between good and extraordi...
- Selection is Everything: Look for bulbs with tight, unbroken skins and no green sprouts. The tighter the skin, the be...
- Braiding Technique Matters: When braiding your garlic stems, keep them loose enough that air can circulate between bu...
Frequently asked questions
Got questions about curing garlic? You’re not alone!
Here are answers to the most common queries to help you master the art of hanging garlic for long-term storage and bold flavor.
How long does it take for garlic to fully cure when hung?
Curing garlic typically takes 4–6 weeks in a dry, well-ventilated space. The cloves should feel light and papery when gently squeezed—if they’re still damp or heavy, they need more time. Patience pays off for maximum flavor and shelf life!
Can I speed up the curing process?
No, you can’t rush curing—it’s a natural process! However, you can optimize conditions by ensuring consistent airflow (no humidity) and a steady temperature of 60–70°F. Avoid heat sources like ovens or direct sunlight, which can dry garlic too quickly and weaken its flavor.
What if my garlic starts to mold or spoil while hanging?
If you spot green or fuzzy spots, remove the affected bulb immediately to prevent spreading. Mold thrives in moisture, so check for condensation or dampness in your storage area. Once mold appears, the garlic is no longer safe to eat—discard it and try again with better airflow next time!
How should I store cured garlic after hanging?
Once fully cured, store garlic in a cool, dark place (like a pantry) with good airflow. Avoid plastic bags—opt for mesh bags or paper sacks to prevent sweating. Properly stored, cured garlic can last 6–12 months while retaining its pungent kick!
What’s an alternative if I don’t have space to hang garlic?
No problem! If hanging isn’t an option, you can air-dry garlic on a tray in a single layer for 2–3 weeks in a warm, dry spot. Just flip the bulbs daily. For extra speed, use a dehydrator (140°F for 2–3 hours), but monitor closely to avoid over-drying.
Wrapping up and next steps
Hang-drying garlic is a simple yet rewarding way to preserve its bold flavor and medicinal properties for months! By following these steps—selecting plump bulbs, braiding or hanging them properly, and storing them in a cool, dark place—you’ll enjoy garlic that’s more pungent, versatile, and long-lasting than store-bought.
Whether you’re a home cook, herbalist, or prepping enthusiast, this method is your ticket to fresh-tasting garlic anytime. 🌿
Ready to elevate your pantry? Try curing a small batch this season—your future recipes (and immune system!) will thank you. 😊