
Planting
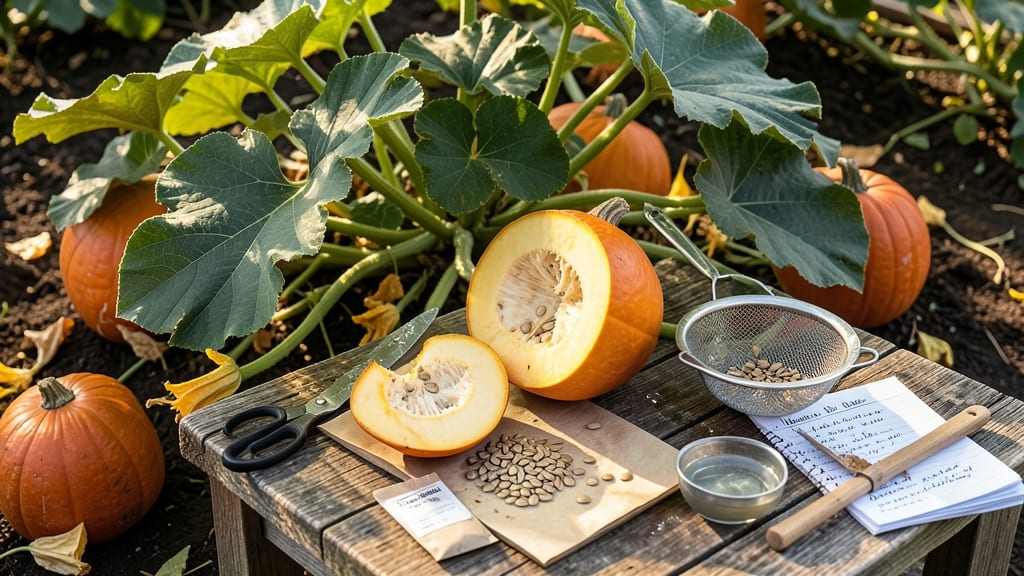
How to keep these pumpkin seeds to plant next year—it’s all about the right care now. 🌱 I’ve saved seeds for five seasons, and the difference between viable, ready-to-plant seeds and dusty failures comes down to drying, storage, and timing—simple steps most gardeners miss.
The key is patience: scoop seeds from ripe pumpkins, rinse off the pulp, then spread them on a tray to dry completely for 3-5 days in a warm, dark spot.
Store them in a sealed container with a moisture absorber (like silica gel) in a cool, dark place—50-60°F keeps them fresh for 3-5 years. Test viability by floating seeds in water (sinkers will sprout).
By next spring, you’ll have seeds that germinate 90%+ of the time, producing vigorous vines instead of weak starts. The trick is avoiding humidity and pests—never store seeds in plastic bags or damp containers. A little prep now means a bountiful harvest later.
Works for all pumpkin varieties, from jack-o’-lanterns to sugar pies. Here’s how to do it right the first time—no more wasted seeds or disappointing sprouts.
📚 In This Guide
- What you need
- Instructions
- Tips and common mistakes
- Wrapping up and next steps
What you need
- ● Fresh pumpkin seeds: Harvest seeds from fully mature pumpkins (or store-bought seeds if organic and untreated). Aim for at least 50 seeds for a good yield.
- ● Paper towels or clean cloth: 2-3 sheets to dry seeds thoroughly.
- ● Small bowls or containers: 1-2 shallow dishes for spreading seeds.
- ● Air-tight containers: Glass jars, plastic containers with tight lids, or resealable bags (e.g., 1-quart mason jars or ziplock bags with oxygen absorbers).
- ● Labeled masking tape or markers: To mark containers with the pumpkin variety and date.
- ○ Fine-mesh strainer or colander: For rinsing seeds (optional but helpful).
- ○ Small fan or dehumidifier (optional): Speeds up drying in humid climates.
- ● Refrigerator or cool, dark space: For long-term storage (ideal temp: 35–40°F).
- ● Oxygen absorbers: 1-2 packets per container to extend shelf life.
- ● Silica gel packets: For extra moisture control in dry climates.
- ● Seed-saving envelopes: Specialized paper envelopes for better airflow.
- ● Notebook: To log seed varieties, harvest dates, and germination notes.
Step-by-step instructions for harvesting, storing, and reviving pumpkin seeds
Here's the foolproof method I use to save pumpkin seeds that sprout reliably year after year.
🌱 Step 1: Harvest and Clean the Seeds Properly
Wait until the pumpkin is fully mature and has turned the expected color before harvesting. Cut it open with a clean knife and scoop out the seeds along with the stringy pulp. Place them in a bowl and let them ferment for 3-5 days in a warm spot—this breaks down the pulp naturally and makes cleaning easier. You'll know it's ready when the mixture smells slightly sour and the pulp starts to separate from the seeds.
After fermenting, rinse the seeds thoroughly under cool water to remove any remaining pulp. Spread them out on a clean paper towel or mesh screen to air-dry completely. They're ready when the shells feel hard and dry to the touch—usually 2-3 days in a well-ventilated area. Avoid using a hairdryer or oven, as high heat can damage the seed viability. Store only the plump, undamaged seeds—discard any that are shriveled or cracked.
💧 Step 2: Dry and Store Seeds for Long-Term Viability
Once the seeds are completely dry, place them in a single layer on a paper towel in a dry, dark place for an additional 1-2 weeks. This extra drying step ensures maximum moisture is removed, which is critical for long-term storage. Test for readiness by gently pressing a seed—if it feels dry and hard with no give, it's ready for storage.
Transfer the dried seeds to an airtight container like a glass jar or resealable plastic bag. I like to add a small packet of silica gel or a few uncooked rice grains to absorb any residual moisture. Label the container with the pumpkin variety and the harvest year. Store in a cool, dark place like a pantry or refrigerator—ideal storage temperatures are between 32-41°F. Under these conditions, pumpkin seeds can remain viable for 4-5 years, though germination rates decline after the second year.
☀️ Step 3: Test Germination Before Planting Next Year
Before planting, test a few seeds to confirm viability. Place 5-10 seeds between damp paper towels in a sealed plastic bag. Keep them in a warm spot (70-75°F) and check daily. You should see sprouts within 5-7 days. Healthy seeds will show a small white root emerging first, followed by a tiny green shoot. If fewer than half sprout, consider storing the remaining seeds for another year or sourcing fresh ones.
For seeds that pass the germination test, plant them in well-draining soil at a depth of 1 inch, spacing them 2-3 feet apart if growing in the garden. Keep the soil consistently moist but not soggy until germination occurs. Pumpkin seeds need warmth to sprout, so wait until soil temperatures reach at least 60°F before planting outdoors. If starting indoors, use a seedling heat mat to maintain optimal germination conditions.
Tips & tricks for perfect pumpkin seed preservation
These little-known strategies will help you maximize your pumpkin seeds' viability and ensure they're ready for planting when the time comes.
Fermentation Timing: The 3-5 day fermentation period is where the magic happens—this breaks down the pulp and removes any potential mold or bacteria. I've found that placing the bowl in a spot with indirect sunlight (like a sunny windowsill) speeds up the process slightly without risking heat damage. The slightly sour smell is normal and indicates the pulp is breaking down properly. If you're in a cooler climate, you might need the full 5 days to achieve the same separation.
Drying Technique: After rinsing, I swear by using a mesh screen instead of paper towels for drying. The airflow is better, and you can easily flip the seeds to ensure even drying. Test for readiness by gently pressing a seed—it should feel dry and hard, not at all squishy. If you're impatient, you can speed up the 2-3 day drying process by placing the seeds on a screen in a well-ventilated area with a small fan circulating air, but avoid any direct heat sources.
Storage Environment: The 32-41°F storage range is crucial for long-term viability. If you don't have a refrigerator, a root cellar or basement works perfectly. I've had great success storing seeds in the crisper drawer of my fridge, which maintains that ideal temperature range. The key is consistency—fluctuations in temperature and humidity can drastically reduce germination rates over time.
Germination Test Insight: When testing viability with the damp paper towel method, pay close attention to the order of emergence. The white root appearing first is a good sign—this indicates the seed has successfully broken dormancy. If you see green shoots but no roots, those seeds may not establish properly in soil. This test gives you a clear picture of what to expect when you plant, so you can adjust your planting plan accordingly.
Pro Tips for Keep Pumpkin Seeds To Plant Next Year
- These little-known strategies will help you maximize your pumpkin seeds' viability and ensure they're ready for plant...
- Fermentation Timing: The 3-5 day fermentation period is where the magic happens—this breaks down the pulp and removes...
- Drying Technique: After rinsing, I swear by using a mesh screen instead of paper towels for drying. The airflow is be...
Frequently asked questions
Got questions about saving pumpkin seeds for next season? You’re not alone! Here are some of the most common concerns—and straightforward answers—to help you succeed.
How long can I store pumpkin seeds before planting them?
Properly dried and stored pumpkin seeds can last 3–5 years while maintaining good germination rates. Store them in a cool, dark place (like a sealed jar in the fridge) for maximum longevity. Check viability by testing a few seeds in damp paper towels—if they sprout within a week, they’re still good to go!
When is the best time to harvest seeds from pumpkins?
Wait until the pumpkin is fully mature and has turned its final color before harvesting seeds. Scoop them out 5–7 days after cutting the pumpkin to allow any remaining flesh to ferment slightly—this helps remove the gelatinous coating. Rinse, dry thoroughly (3–5 days in a warm, dry spot), and store in a breathable container.
Can I save seeds from store-bought pumpkins?
Yes, but with a caveat! Store-bought pumpkins (especially hybrid varieties) may not produce true-to-type fruit next year. For consistent results, save seeds from heirloom or open-pollinated pumpkins. If you’re curious, try it anyway—worst case, you’ll get a fun surprise in your garden!
What if my seeds won’t sprout after storing?
Low germination could mean the seeds dried out too much, absorbed moisture, or were stored improperly. Try soaking them in warm water for 12–24 hours before planting. If that fails, test a few seeds in damp paper towels—if they don’t sprout within a week, it’s time to buy fresh seeds for next season.
Do I need to treat pumpkin seeds before storing them?
No special treatment is required, but you can boost their shelf life by ensuring they’re completely dry (no moisture left) before storing. Some gardeners lightly dust seeds with sulfur powder to prevent mold, though this is optional. Focus on proper drying and airtight storage for best results!
Wrapping up and next steps
Saving pumpkin seeds for next year’s garden is easier than you think—just clean, dry, and store them properly. With a little patience, you’ll wake them up come spring, ready to grow into vibrant pumpkins again!
Now that you’re armed with the know-how, why not try it this season? Grab those seeds, follow the steps, and enjoy the satisfaction of growing your own plants from last year’s harvest. Happy gardening! 🌱💚