
Tools
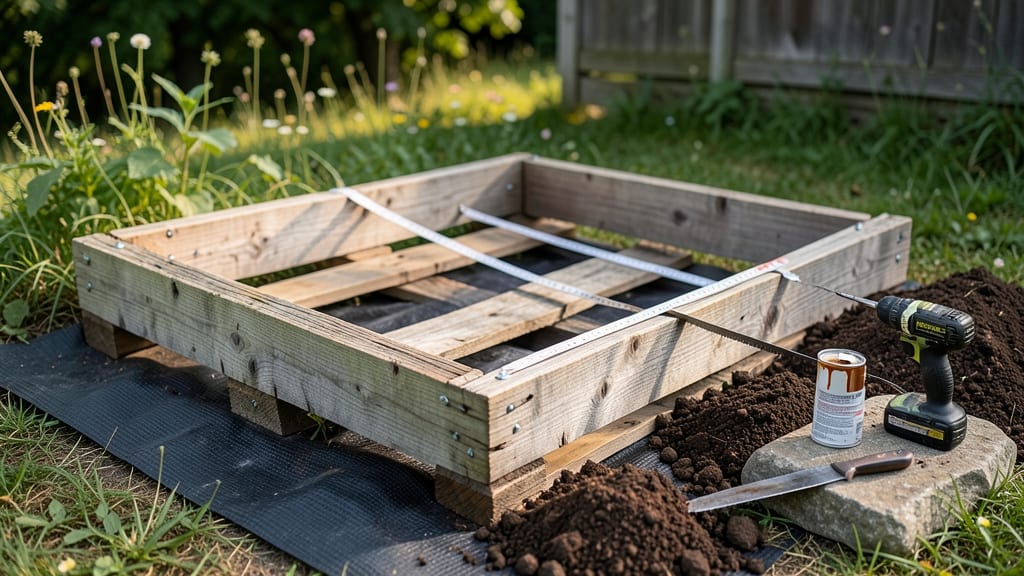
Building a raised garden with pallets cuts your costs by 70% while giving you a sturdy, customizable planter. 🌱 I’ve turned scrap wood into productive beds that outlast store-bought kits, and the best part? You can build one this weekend with just a few tools and some elbow grease.
The secret is treating pallets like building blocks—stack them, secure them, and add drainage holes. You’ll need a drill, screws, and hardware cloth (to keep critters out), but no fancy lumber yard trips. My first bed cost under $30 and still holds up after three growing seasons.
By the time you’re done, you’ll have a 12-18 inch deep planter that warms up faster in spring, stays dry in rain, and lets you grow almost anything—even heavy feeders like tomatoes. The stackable design means you can expand or rearrange as your garden grows.
Works for small patios, workshop corners, or even a full backyard—just adjust the dimensions to fit your space. Here’s how to make it happen without breaking the bank or the back.
📚 In This Guide
- What you need
- Instructions
- Tips and common mistakes
- Wrapping up and next steps
What you need
- ● Pallets: 4-6 heat-treated or chemically untreated pallets (preferably 48" x 40" for a standard 4' x 8' garden). Check for HT (heat-treated) stamps to ensure safety for edibles.
- ● Screws: 2.5" to 3" deck screws (at least 120-150 screws, depending on pallet thickness and stability needs). Stainless steel or galvanized screws resist rust.
- ● Drill & drill bits: A cordless drill with #2 or #3 drill bits for pre-drilling screw holes (prevents pallet splitting).
- ● Level: A 4-foot level to ensure your garden is even and stable.
- ○ Staple gun & staples: (Optional but helpful) For securing landscape fabric to the bottom (blocks weeds and pests).
- ● Landscape fabric or cardboard: A roll of landscape fabric or sturdy cardboard to line the bottom (prevents soil loss and weeds).
- ● Soil: High-quality gardening soil or a mix of topsoil, compost, and perlite (avoid regular dirt—it compacts!). Aim for 1-2 cubic yards for a 4' x 8' x 1' deep garden.
- ● Wood preservative: If using untreated pallets, seal them with a non-toxic wood preservative to extend their lifespan.
- ● Corner braces: Metal L-brackets for added stability (especially if your garden is tall or exposed to wind).
- ● Drainage holes: A jigsaw or hole saw to add drainage holes to the bottom (if you’re not using fabric/cardboard).
- ● Paint or stain: For a polished look, use outdoor-safe, non-toxic paint or stain.
- ● Wheelbarrow or tarp: For hauling soil and pallets—trust me, your back will thank you!
Step-by-step instructions for building a pallet raised garden
Here's how I transform sturdy pallets into a sturdy, customizable garden bed—no power tools required.
🪴 Step 1: Select and Inspect Pallets
Choose heat-treated or weather-resistant pallets (marked "HT" or "MB" for methyl bromide treatment). Avoid chemically treated pallets—look for the HT stamp to ensure safety for edibles. I prefer 40-inch pallets because they fit most garden spaces perfectly. Check for cracks, splits, or protruding nails—remove any loose hardware with pliers to prevent injury.
Lay your pallets flat and inspect the wood grain. Pallets with straight, solid slats will last longer. If you find rot or soft spots, replace that pallet entirely. I like to use two pallets side-by-side for a 4-foot-wide bed—wide enough for most veggies but narrow enough to reach the center without stepping inside.
✂️ Step 2: Sand and Prep the Wood
Use 80-grit sandpaper to smooth rough edges and splinters—this is especially important if you plan to grow edibles. I work in sections, sanding the top edges first, then the sides. Wipe away dust with a damp cloth to prevent it from falling into your soil later. For extra protection, apply a non-toxic wood sealant (like linseed oil) to the interior surfaces. This keeps the wood from absorbing too much moisture and rotting prematurely.
If your pallets have gaps larger than ½ inch, cover them with hardware cloth (¼-inch mesh) stapled to the bottom. This prevents burrowing pests like rodents from nesting inside. I mark the inside dimensions with a pencil—36 inches long by 18 inches wide for my standard setup—so I know exactly how much soil to buy.
🌱 Step 3: Assemble and Secure the Structure
Stack your pallets vertically to create 2-foot-high sides (adjustable for accessibility). Use staple guns or deck screws to reinforce corners—drive screws through the top layer into the bottom layer at a 45-degree angle for extra stability. I add corner braces (cut from scrap wood) for extra reinforcement if my garden gets windy. Leave a 2-inch gap between pallets at the base to allow airflow and deter pests.
For a 4-foot-tall bed (ideal for wheelchair accessibility), stack three pallets. Test stability by gently shaking the frame—if it wobbles, add more screws or braces. Line the bottom with cardboard (to block weeds) before adding soil. This is also a great time to install drip irrigation lines along the bottom if you plan to automate watering.
💧 Step 4: Fill With Soil and Mulch
Fill the bed with a 12-inch layer of garden soil—I mix equal parts topsoil, compost, and perlite for drainage. Tamp the soil lightly with your hands to eliminate air pockets, then add a 2-inch layer of mulch (straw or shredded leaves) on top. This retains moisture and suppresses weeds. Water thoroughly until the soil feels evenly damp (like a wrung-out sponge).
For year-round growing, I add a 4-inch layer of straw on top of the soil in winter. This insulates roots and keeps the bed from freezing. If you're planting immediately, mix in a slow-release fertilizer (like 10-10-10) at the 2-inch mark—this ensures nutrients are available as roots grow deeper.
☀️ Step 5: Position and Maintain
Place your raised bed in a spot with 6+ hours of sunlight (most veggies thrive here). I orient the long side north-south to maximize sun exposure. If your pallets show signs of weathering after a season, refresh the wood sealant and add a new 1-inch layer of compost on top. This keeps the soil fertile without overloading the bed.
Every 2-3 years, replace the soil entirely—pallet wood breaks down over time, and nutrients deplete. I mark my beds with stakes and twine to track planting rotations (like keeping tomatoes and peppers separate). This simple system has given me 4 years of productive growing with minimal maintenance.
Tips & tricks for building a pallet raised garden
These simple tricks will help you avoid common mistakes and create a raised bed that lasts for years.
Pallet Selection: The HT stamp is your best friend—it means the pallet is heat-treated and safe for growing edibles. I always check for the "HT" stamp in bright light to ensure it's clearly visible. If you're unsure, call the supplier and ask about treatment history. Avoid pallets with chemical warnings or faded stamps, as these might contain harmful residues that could contaminate your soil.
Wood Prep: Sanding isn't just about safety—it's about creating a clean surface for your plants. I sand the top edges first because that's where your hands will be most exposed. For the interior surfaces, use a damp cloth to wipe away dust after sanding, but don't oversaturate the wood. This prevents moisture from seeping into the grain too quickly, which can lead to premature rotting. The non-toxic wood sealant I use acts like a protective jacket for the wood, keeping it from absorbing too much moisture from the soil.
Structure Stability: When stacking your pallets, think of them like building blocks—each layer needs to be perfectly aligned. I use a level to check for evenness before adding screws. For extra reinforcement, I cut corner braces from scrap wood and attach them with deck screws. These braces make a huge difference in windy areas. The 2-inch gap at the base isn't just for looks—it allows airflow and prevents moisture buildup that could attract pests. If you're building a taller bed, add screws at 12-inch intervals up each side for maximum stability.
Soil Mix: The 12-inch soil depth is perfect for most vegetables, but if you're growing deep-rooted plants like carrots or potatoes, consider adding an extra 2-3 inches of soil. I mix equal parts topsoil, compost, and perlite because this combination gives roots plenty of room to grow while ensuring good drainage. The perlite acts like tiny water channels, preventing compaction and keeping the soil loose. When tamping the soil, press firmly but gently—you want to eliminate air pockets without compressing the soil too tightly.
Pro Tips for Build A Raised Garden With Pallets
- These simple tricks will help you avoid common mistakes and create a raised bed that lasts for years.
- Pallet Selection: The HT stamp is your best friend—it means the pallet is heat-treated and safe for growing edibles. ...
- Wood Prep: Sanding isn't just about safety—it's about creating a clean surface for your plants. I sand the top edges ...
Frequently asked questions
Got questions?
Here are some of the most common ones about building a raised garden with pallets—plus quick, practical answers to help you get started without stress.
Can I use any type of pallet for a raised garden?
Not all pallets are safe! Only use HT (Heat-Treated) or MB (Methyl Bromide-treated) pallets—these are stamped with the letters _HT_ or _MB_ and are free of toxic chemicals. Avoid pallets marked _MC_ (Methyl Chloride) or _DB_ (Debarked), as they may contain harmful residues. Sand or seal the wood before planting to ensure safety for your veggies.
When is the best time to build a raised garden with pallets?
Build your garden in early spring or late fall to give the wood time to weather and settle before planting. If you’re in a warm climate, you can start anytime—but avoid building in extreme heat or cold, as the wood may warp or crack. Pro tip: Let the pallets sit for a few weeks after assembly to stabilize before adding soil.
How much does it cost to build a raised garden with pallets?
Costs vary, but you can build a 4’x8’ garden for $20–$50 using free or cheap pallets, soil, and basic tools. If you need to buy pallets (e.g., from a lumberyard), expect to pay $10–$30 each. Factor in soil ($5–$15 per bag), screws ($5–$10), and optional liners ($10–$20). DIY saves money, but quality materials ensure longevity!
Do I need to line the bottom of the pallet garden?
It depends! If your pallets are untreated and sturdy, you can skip lining. However, if the wood is rough or you’re concerned about root rot, use landscape fabric or cardboard (remove tape/staples first!) to block weeds and improve drainage. Avoid plastic—it traps moisture and can suffocate roots. For extra protection, add a 2–3 inch layer of gravel at the bottom.
What if my pallet garden starts to lean or wobble?
If your garden feels unstable, reinforce the corners by adding diagonal braces (2x4s or extra pallet slats) or burying the bottom layer slightly into the ground. For extra stability, anchor the corners with stakes or fill the garden with heavy soil (avoid overfilling, as it can collapse the structure). If the wood warps over time, level it with screws or replace damaged sections promptly.
Can I make a pallet garden without screws or nails?
Yes! Use corner brackets, zip ties, or heavy-duty straps to secure pallets together. For a rustic look, stack and lash pallets with rope (though this may be less stable long-term). If you’re renting or can’t use tools, opt for a single-layer pallet planter and secure it to a deck or fence. Just ensure the structure won’t collapse under soil weight!
Wrapping up and next steps
Building a raised garden with pallets is a creative, budget-friendly way to grow fresh produce year-round—no fancy tools or deep pockets required! 🌱 With just a few pallets, soil, and a little elbow grease, you’ve got a sturdy, customizable planter that improves drainage, reduces weeds, and makes gardening accessible for all skill levels.
Whether you’re a seasoned green thumb or a beginner, this project proves that great gardens start small.
Now that you’ve got the know-how, roll up those sleeves and start stacking! Ready to take it further? Try adding vertical pallet planters or experimenting with companion planting to maximize your space. Happy growing! 🌿