
Flowers
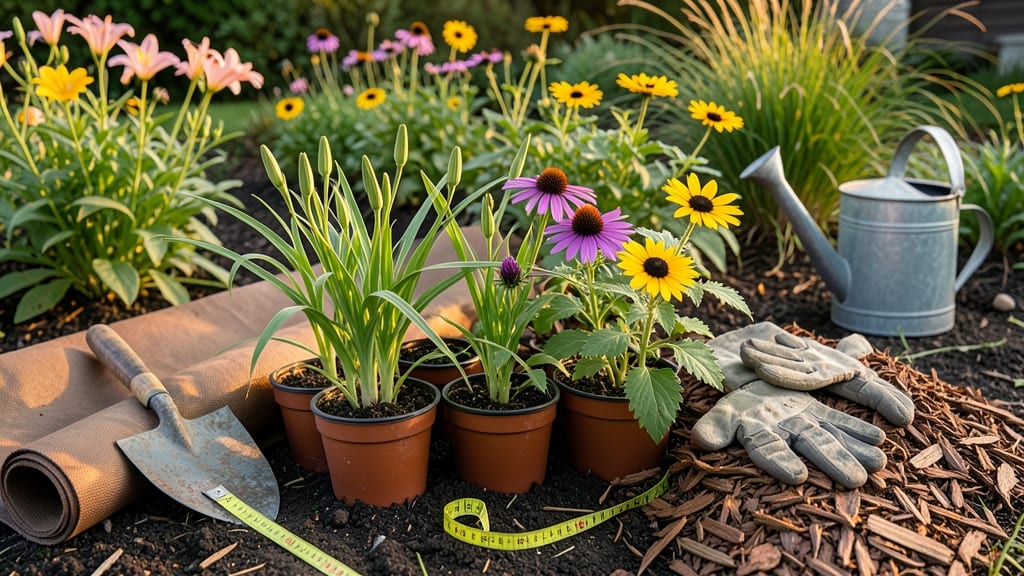
That first shovel of dirt reveals everything. 🌱 Creating a new flower bed isn't just about digging a hole—it's about building a thriving ecosystem where every plant has room to shine. I've designed dozens, and the ones that last start with soil layers that feed roots for years, not weeks.
The secret lies in blending native soil with compost and organic matter to create a fertile base that holds moisture but drains well. Most people skip this step and wonder why their plants struggle—don't be one of them.
We'll focus on sun exposure, plant spacing, and seasonal color waves that keep your bed vibrant from spring through frost. By the end, you'll have a low-maintenance design that attracts pollinators, repels weeds naturally, and gives you that "I planned this" confidence. The best part?
You'll reuse the same principles for every bed after this—once you master the layers, the rest is easy. This works for front yard borders, backyard retreats, or even container gardens on patios. Let's get that shovel moving!
📚 In This Guide
- What you need
- Instructions
- Tips and common mistakes
- Wrapping up and next steps
What you need
- ● Garden shovel or spade – A sturdy, 5-6 inch-wide shovel for digging and turning soil.
- ● Garden fork or tiller – Helps loosen compacted soil (rent one if needed for large beds).
- ● Rake (bow or leaf rake) – Smooths soil and removes debris (8-12 inch teeth work best).
- ● Wheelbarrow or large bucket – For hauling soil, compost, or mulch (aim for 3+ cubic feet capacity).
- ● Measuring tape – Marks dimensions and ensures precision.
- ● Gloves (heavy-duty) – Protects hands from thorns, dirt, and sharp tools.
- ● Knee pads or pad – Saves your joints during long digging sessions!
- ● Topsoil or garden soil – 2-3 cubic yards (depends on bed size; check local suppliers for "flower bed mix").
- ● Compost – 1-2 bags (2 cubic feet each) for nutrient-rich soil.
- ○ Organic matter (optional but recommended): Peat moss or coconut coir (1 bag) – Improves drainage.
- ● Perlite or vermiculite (small bag) – Adds aeration.
- ○ Edging material (optional but stylish): Metal, plastic, or stone edging (varies by bed size).
- ● Bricks, pavers, or landscape fabric (for weed control).
- ● Mulch – 2-3 bags (2 cubic feet each) (pine bark, shredded leaves, or straw).
- ○ Landscape fabric (optional) – 1 roll (5’ x 25’) to suppress weeds.
- ● Soil pH test kit – Ensures your soil is ideal for your chosen flowers.
- ● Slow-release fertilizer – 1 bag (20-30 lb) for a nutrient boost.
- ● Drip irrigation kit – Automates watering for low-maintenance growth.
Step-by-Step instructions for designing a thriving flower bed
Here’s how I create a flower bed that stays vibrant all year—no guesswork, just layers of success.
🪴 Step 1: Mark and Prepare the Space
Sketch your flower bed shape on paper first—rectangular or freeform, but keep edges clean. Use a garden hose or spray paint to outline the area directly in the yard. This prevents overdigging and helps visualize the final look. I mark the center with stakes to guide depth, aiming for 8-12 inches deep for healthy roots.
Remove grass and weeds within the marked area using a garden fork or sod cutter. For stubborn roots, I score the soil with a shovel and pull them out by hand. This step is critical—leaving grass will compete with your flowers and smother new roots. Once cleared, rake the soil smooth to prep for layering.
🌱 Step 2: Build the Soil Layers
Start with a 2-inch layer of coarse sand or gravel at the bottom to improve drainage. This prevents waterlogging, especially in clay-heavy soil. Next, add a 3-inch layer of composted manure or aged compost—this feeds roots for months. Mix in a handful of bone meal for phosphorus if planting perennials.
Top with 6 inches of high-quality topsoil, blending it with the existing soil to create a loose, crumbly texture. Avoid garden soil from your yard—it’s often compacted and nutrient-poor. For clay soil, mix in 1 part perlite or vermiculite per 3 parts soil to lighten it up. Press lightly with your hands to settle the layers.
☀️ Step 3: Plan and Plant for Seasonal Color
Group plants by height and bloom time: tall perennials (like coneflowers) at the back, mid-height (like black-eyed Susans) in the middle, and low-growing annuals (like pansies) in front. I sketch a quick layout to avoid crowding—aim for 12-18 inches between mature plants for airflow and sunlight access.
Dig holes twice as wide as the root ball but only as deep as the container’s base. Loosen roots gently if potbound, then backfill with native soil mixed with compost. Water deeply to settle roots, then add a 1-inch layer of mulch (like shredded bark) to retain moisture and suppress weeds. Keep mulch 2-3 inches away from stems to prevent rot.
💧 Step 4: Water and Maintain for Long-Term Beauty
Water immediately after planting to help roots establish, then 1-2 times weekly for the first month, adjusting for rainfall. Deep watering encourages roots to grow downward, making plants drought-resistant. Use a rain gauge to track moisture—1 inch per week is ideal for most flowers.
Fertilize lightly in spring with a balanced, slow-release formula (like 10-10-10). Deadhead spent blooms regularly to prolong flowering and prevent self-seeding where you don’t want it. I also rotate plants every 3-5 years to refresh the bed and prevent disease buildup in the soil.
Tips & tricks for perfect flower bed design
Creating a stunning flower bed isn't just about planting—it's about setting up your garden for long-term success. Here's what I've learned from years of trial and error.
Layering is Everything: When building your soil layers in Step 2, don't skimp on the drainage layer. That 2-inch sand or gravel foundation prevents waterlogging that can rot roots. I've seen flower beds fail spectacularly when this step was rushed—roots need room to breathe! For clay-heavy soil, consider adding a third layer of coarse perlite between your sand and compost to create even better drainage channels.
Plant Placement Pro Tip: In Step 3, when arranging your plants by height, think vertically too. Place taller plants toward the center of your bed if it's circular, or along the back if rectangular. This creates natural "walls" that protect smaller plants from wind damage. I always sketch my layout on graph paper first—it saves time and prevents overcrowding that leads to disease.
Mulch Like a Pro: That 1-inch layer of mulch in Step 3 isn't just decoration—it's a living part of your flower bed ecosystem. Apply it after watering so it settles properly against the soil. For extra protection, I use a combination of shredded bark and straw in colder climates. The bark retains moisture while the straw provides additional insulation during winter freezes. Just remember to keep it 2-3 inches away from stems to prevent rot.
Watering Wisdom: The 1-2 times weekly watering in Step 4 works best when done consistently. I set a timer on my hose nozzle for 10 minutes per section to ensure even coverage. Early morning watering (before 8 AM) prevents fungal diseases that thrive in damp leaves. For new plantings, I actually water twice daily for the first week to help roots establish—just reduce to the recommended schedule after that initial period.
Pro Tips for Create A New Flower Bed
- Creating a stunning flower bed isn't just about planting—it's about setting up your garden for long-term success. Her...
- Layering is Everything: When building your soil layers in Step 2, don't skimp on the drainage layer. That 2-inch sand...
- Plant Placement Pro Tip: In Step 3, when arranging your plants by height, think vertically too. Place taller plants t...
Frequently asked questions
Got questions about crafting the perfect flower bed? You’re not alone! Here are answers to the most common concerns—so you can dig in with confidence and create a blooming masterpiece.
When is the best time to start a new flower bed?
The ideal time depends on your climate! In cool regions, spring (after the last frost) or early fall (6-8 weeks before winter) are best—soil is workable, and plants establish roots before extreme temps. In warm climates, aim for early spring or late summer to avoid peak heat. Pro tip: Test your soil first! Amend it 2-4 weeks before planting for optimal results.
How do I keep weeds from taking over my new flower bed?
Weeds are sneaky, but you’ve got options! Start with a thick layer of mulch (2-3 inches)—straw, wood chips, or shredded leaves work great—to smother weeds and retain moisture. For extra defense, lay down landscape fabric before adding mulch (just poke holes for plants!). Water deeply but infrequently to encourage strong roots that outcompete weeds.
Can I use just topsoil, or do I need special soil for flower beds?
Plain topsoil often lacks the nutrients and drainage flowers crave! Mix it with compost (20-30%) and, if your soil is heavy clay or sandy, add perlite or peat moss for texture. For containers or high-maintenance plants, consider a pre-mixed flower bed soil with added fertilizer. Test your soil’s pH too! Most flowers thrive in 6.0–7.0.
What if pests or diseases appear after planting?
Stay vigilant! Prevention is key: Rotate plant families yearly, space plants for airflow, and water at the base (not overhead). If pests strike, try neem oil or insecticidal soap first. For fungal issues (like powdery mildew), remove infected leaves and improve drainage. Healthy soil = resilient plants! If problems persist, consult your local cooperative extension service for tailored advice.
How can I make my flower bed look more polished without spending a lot?
Small tweaks make a big impact! Define edges with bricks, stones, or even bent rebar for a clean look. Use contrasting mulch colors (e.g., dark brown for warm flowers, light gray for cool tones). Add DIY stepping stones (concrete + mosaic tiles) or repurpose old pots as planters. Odd-number groupings of plants (3, 5, or 7) create natural, balanced designs.
Still stumped? Drop your question in the comments—we’re happy to help your flower bed flourish!
Wrapping up and next steps
Creating a new flower bed is a rewarding way to transform your outdoor space into a vibrant, thriving garden! By following the layered soil approach and choosing the right plants, you’ll enjoy year-round color and texture while keeping maintenance simple. 🌸
Now that you’re ready to dig in, take the next step—sketch your design, gather your tools, and start layering! Whether you’re a beginner or a seasoned gardener, every shovel of soil brings you closer to a stunning, flourishing flower bed. Happy gardening! 🌱