
Flowers
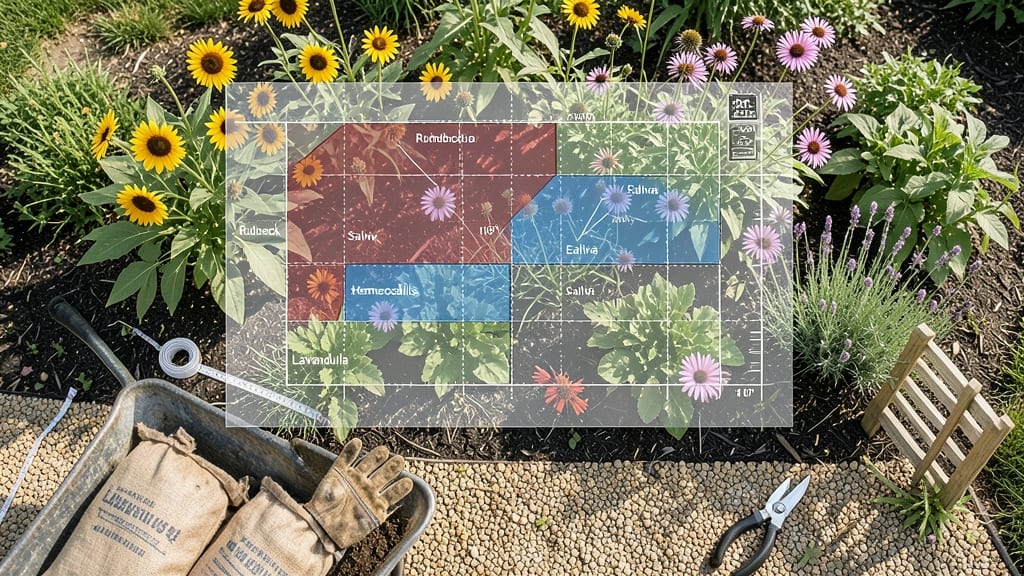
Designing a flower bed layout that feels like a masterpiece—not just a patch of plants—starts with a simple truth: symmetry and layers create magic. 🌸 I’ve turned my front yard from a chaotic mess of flowers to a showstopper by learning just three principles: color blocks that pop, height layers that frame views, and spacing that lets everything breathe.
The best part? You don’t need a green thumb—just a sketch pad and an eye for balance.
First, grab a tape measure and a notebook. Sketch your bed’s shape, then divide it into three height zones: tall back (like delphiniums or hollyhocks), mid-height (daisies or daylilies), and low front (ajuga or creeping thyme).
Color comes next—group plants in 3-5 bold hues (think purple, yellow, and white) to avoid visual clutter. My biggest mistake? Crowding perennials too close; now I use the "reach rule"—no plant should touch when mature.
By the time you’re done, you’ll have a bed that looks intentional, not accidental. The tallest plants anchor the back, mid-heights fill the middle, and low growers spill over edges for a soft, finished look.
Even better, this layout makes maintenance easier—weeding and watering become a breeze. And when spring rolls around? Every walk by will feel like a stroll through a curated garden.
Pro tip: Start small. Test your layout with annuals first—they’re cheap, flexible, and let you tweak before committing to perennials. Once you see what works, you’ll never look at a flat bed of dirt the same way again. Ready to transform that blank space? Let’s sketch it out.
📚 In This Guide
- What you need
- Instructions
- Tips and common mistakes
- Wrapping up and next steps
What you need
- ● Measuring tape (25 ft or longer) – For precise spacing and dimensions.
- ● String or garden twine – To mark out layouts before digging.
- ● Stakes or flags (wooden or plastic) – 10–20 pieces, depending on bed size, to outline edges.
- ● Shovel or spade – For digging and soil prep (heavy-duty if soil is rocky).
- ● Garden gloves – A pair to protect your hands from thorns and dirt.
- ● Soil amendments (compost, peat moss, or perlite) – 2–3 bags (50 lbs each) to enrich garden soil.
- ● Mulch (shredded bark, pine straw, or gravel) – 1–2 cubic yards to retain moisture and suppress weeds.
- ● Watering can or hose with spray nozzle – For post-planting hydration.
- ● Pruners (bypass or anvil) – To trim plants for shape and health.
- ● Plant labels (wooden or metal) – 20–50 labels to track varieties.
- ● Edging tools (plastic, metal, or stone) – To define clean borders.
- ● Knee pads or cushion – For comfort during long planting sessions.
- ● Wheelbarrow – For hauling soil, mulch, or tools.
- ● Planting grid or stencil – For geometric or repeating patterns.
- ● Slow-release fertilizer (granular or spikes) – To boost early growth.
- ● Decorative rocks or stepping stones – For pathways or accents.
- ○ Sunlight meter (optional but handy) – To check light exposure before planting.
Step-by-step instructions for designing a stunning flower bed layout
Here's how I create layouts that pop with visual impact—no fancy degree required.
🌿 Step 1: Measure Your Space and Define the Shape
Grab a tape measure and sketch your flower bed on paper first. I always start by marking the exact dimensions—whether it's a 4-foot square, a 6-foot rectangle, or a curved border. Use spray paint or a garden hose to outline the shape directly in the yard so you can visualize the scale. This prevents buying too many plants or realizing halfway through that your 8-inch spacing won't fit.
Pro tip: Walk through the space at different times of day. Morning light casts different shadows than afternoon sun, and you'll notice how the bed interacts with your house or patio. If this area gets 6+ hours of direct sun, plan for sun-loving annuals like zinnias or marigolds. For shadier spots, hostas or impatiens will shine.
☀️ Step 2: Plan Height Layers for Visual Drama
Start by grouping plants by height—tallest in the back, medium in the middle, and shortest in front. I like to use 3 distinct tiers: tall (3-4 feet), medium (1-2 feet), and short (6-12 inches). Place your tallest plants (like delphiniums or hollyhocks) at the back or center of the bed, where they won’t block sunlight for shorter varieties. Medium-height plants (like salvia or black-eyed Susans) go in the middle, and low growers (like ajuga or creeping thyme) frame the edges.
Sketch a simple diagram labeling each plant’s mature height. If you’re unsure, check the plant tag or look up the variety online. Here’s the thing—if your tallest plant is 3 feet, don’t place it against a fence or wall. It’ll look cramped and overwhelming. Step back and imagine the bed from your porch or driveway. That’s your viewing angle.
🎨 Step 3: Create Color Blocks for Cohesion
Pick 3-5 colors that harmonize—think of a painter’s palette, not a rainbow. I often use one dominant color (60% of the bed), one secondary (30%), and one accent (10%). For example, a bed of purple salvia, white daisies, and hot pink zinnias creates a bold, unified look. Avoid mixing too many colors in one small space—it’ll look chaotic. Stick to 3 shades max for a clean, polished effect.
Place your accent color strategically—maybe as a single row of red flowers along one edge or as clusters of three near seating areas. This draws the eye and adds visual interest without overwhelming the design. If you’re unsure about color combos, snap a photo of a garden you love and use it as inspiration. Most professional layouts use analogous colors (shades next to each other on the color wheel) for a natural, cohesive feel.
✂️ Step 4: Arrange Plants in Odd Numbers for Balance
Odd numbers (3, 5, or 7 plants) look more natural and inviting than even groupings. Start by placing your tallest plants first—space them 18-24 inches apart (check their mature width on the tag). Then fill in the gaps with medium and short plants, keeping 6-12 inches between them. I like to use the "rule of thirds" for placement: divide your bed into a 3x3 grid mentally, then place key plants where the lines intersect for a dynamic, balanced look.
Step back often and squint—this helps you see the big picture instead of getting bogged down in details. If one side looks bare, add a single bold plant (like a snapdragon or ornamental grass) to anchor it. Avoid symmetry unless you’re going for a formal look—most gardens benefit from asymmetrical balance, where both sides feel equally weighted but not identical.
🪴 Step 5: Add Finishing Touches for Texture and Movement
Once your main plants are in, fill any empty spots with filler plants—these are the small, fast-growing varieties that tuck into gaps and create a lush, full look. Think of sweet alyssum, lobelia, or calibrachoa for trailing or spilling over edges. Add 3-5 ornamental grasses (like fountain grass or maiden grass) for movement and texture—they sway in the breeze and add height variation.
Finally, consider mulch or ground cover to tie the bed together. A 2-inch layer of shredded bark keeps weeds down and adds a polished finish. For a pop of color, try purple or silver mulch—it contrasts beautifully with bright flowers. Water everything in deeply, and you’re ready to sit back and admire your work. Real talk: the first few days might look a little sparse, but give it 2-3 weeks, and your bed will fill in and look like a pro-designed garden.
Tips & tricks for perfect flower bed design
Creating a stunning flower bed takes more than just planting flowers—it's about thoughtful design that makes your garden pop.
Visualize Before You Plant: Sketch your design on paper first! I always use graph paper where each square represents 1 foot of space. This helps me map out color blocks and height layers before digging. Trust me, it saves hours of replanting later. The key is to step back and look at your sketch from different angles—morning light reveals different contrasts than afternoon sun.
Color Harmony Hacks: Use a color wheel to create visual harmony. I like to group plants in 3-color families—like purples, blues, and whites together—to create cohesive blocks. For instant contrast, pair complementary colors like deep purple salvia with bright yellow coreopsis. Pro tip: Take photos of your favorite gardens and analyze their color schemes—you'll start noticing patterns everywhere.
Height Layering Secrets: The 12-18 inch spacing between plants isn't just about mature growth—it's about creating visual layers. I think of it like building a stage: tall plants (like delphiniums) are your "back row," mid-height (black-eyed Susans) are your "middle," and low growers (ajuga) are your "foreground." This creates depth that makes your bed look professionally designed.
Test Your Layout Like a Pro: Before digging, lay down cardboard or burlap to simulate your final design. Place plants (or even just their pots) in their spots and walk around your space. This is your chance to spot imbalance—like if one side looks too empty or one color dominates. I always take photos from different angles to review. This step alone prevents costly replanting mistakes.
Pro Tips for Design Flower Bed Layout
- Creating a stunning flower bed takes more than just planting flowers—it's about thoughtful design that makes your gar...
- Visualize Before You Plant: Sketch your design on paper first! I always use graph paper where each square represents ...
- Color Harmony Hacks: Use a color wheel to create visual harmony. I like to group plants in 3-color families—like purp...
Frequently asked questions
What’s the best time of year to design and plant a flower bed?
The ideal time depends on your climate! In mild winters, plant in early spring or fall to avoid extreme heat or cold. In harsh winters, spring planting (after the last frost) is best. Pro tip: Research your USDA hardiness zone for precise timing!
How do I choose a color scheme for my flower bed?
Start with your home’s colors or the vibe you want (calm, bold, etc.). Use the 60-30-10 rule: 60% dominant color, 30% secondary, and 10% accent. For harmony, stick to plants with similar color families (e.g., purples + blues). Tools like Adobe Color can help!
Can I mix perennials and annuals in one flower bed?
Perennials (like coneflowers) provide structure and return yearly, while annuals (like marigolds) add seasonal pops of color. Key tip: Place annuals in front for easy swaps and perennials in the back for long-term growth. Balance their blooming seasons for year-round interest!
What if my soil is poor? How do I improve it for flower beds?
Test your soil first (kits are cheap!). Amend with compost (2–3 inches) or organic matter like peat moss. For clay soil, add sand or perlite; for sandy soil, mix in compost. Pro move: Mulch after planting to retain moisture and suppress weeds.
How do I keep pests and weeds out of my flower bed?
Prevention is key! Use landscape fabric under mulch to block weeds, and plant pest-resistant varieties (e.g., dahlias over roses). Encourage beneficial insects like ladybugs with native plants. Quick fix: Hand-pull weeds early and avoid overwatering.
Wrapping up and next steps
Designing a stunning flower bed layout is all about balancing symmetry, color, and height—plus a dash of creativity! Whether you’re a beginner or a seasoned gardener, these principles will help you craft a space that’s both functional and breathtaking.
Start small, experiment with different arrangements, and don’t forget to have fun with seasonal changes.
Ready to bring your vision to life? Grab your tools, sketch a rough plan, and take the first step today—your garden will thank you! 🌸✨