
Pests
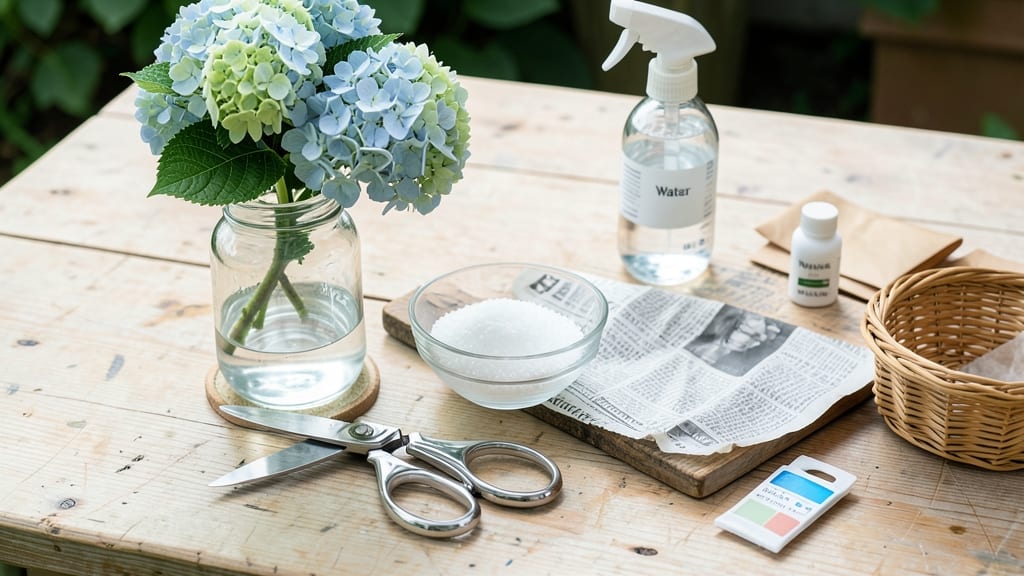
How to dry hydrangeas to keep their color is easier than you think—just follow a few simple steps to preserve that stunning blue or pink hue. ✨ The key is picking blooms at peak freshness—when they're just starting to fade but still hold their signature color. Most people rush this step, and that's when the magic fades along with the color.
You'll need just three things: fresh hydrangeas, a clean workspace, and patience. Air-drying is the simplest method—hang stems upside down in a dry, dark place for 2-3 weeks.
For faster results, try silica gel (but only for mophead varieties—the delicate lacecaps can get damaged). The goal is to preserve that vibrant color while keeping the petals intact.
Once dry, you'll have blooms that look like they were plucked yesterday, not months ago. Store them in an airtight container away from sunlight to keep their color rich for years.
The difference between a good dry hydrangea and a great one? Choosing the right blooms and drying them properly from the start.
This method works for both mophead and lacecap varieties, though lacecaps need extra gentle handling. Avoid common mistakes like using blooms that are already wilting or drying them in direct sunlight—both will fade that stunning color you worked so hard to preserve.
📚 In This Guide
- What you need
- Instructions
- Tips and common mistakes
- Wrapping up and next steps
What you need
- ● Fresh hydrangea blooms: Harvest fully open, vibrant flowers (avoid buds—they won’t dry well). Choose mophead or lacecap varieties for best results.
- ● Newspaper or parchment paper: 2–3 sheets (for cushioning and moisture absorption).
- ● String or rubber bands: 1–2 pieces (to bundle stems).
- ● Scissors or pruning shears: Sharp and clean (to trim stems at a 45° angle).
- ● Air-drying space: A dry, dark, well-ventilated area (like a closet, pantry, or porch with shade).
- ○ Floral preservative spray: 1 bottle (optional, to slow color fading).
- ● Cardboard or drying tray: 1–2 pieces (to elevate flowers for better airflow).
- ● Hair dryer (cool setting): 1 (for speeding up drying time—use sparingly!).
- ● Glass jars or vases: 1–2 (for storing dried flowers long-term).
Step-by-Step instructions for drying hydrangeas while preserving their color
Here’s my foolproof method to dry hydrangeas so they stay as vibrant as the day you picked them.
🌿 Step 1: Harvest at the Perfect Time
Pick your hydrangeas when the blooms are fully open but still firm to the touch—usually in late summer or early fall. Avoid cutting stems when they’re wet, as moisture speeds up bacterial growth and dulls color. Use sharp pruners to make a clean cut, leaving about 6 inches of stem attached. This extra length helps with drying stability.
Here’s the thing—if you harvest in the morning, the blooms will have absorbed the least water overnight, which means they’ll dry faster and retain more color. Bundle the stems together with a rubber band or twine and store them in a cool, dark place (like a garage) for 2-3 hours before drying. This brief rest helps them adjust before the drying process begins.
💧 Step 2: Prepare for Air Drying
Fill a clean bucket or vase with 2-3 inches of warm water and add a few drops of white vinegar or a floral preservative. The vinegar helps prevent bacterial growth, which can cause spots or discoloration. Trim the stems at a 45-degree angle just before placing them in the water—this increases surface area for absorption and keeps them hydrated longer.
Change the water every 24 hours to keep it fresh. You’ll see the blooms start to wilt slightly as they lose moisture, but don’t panic—this is normal. Once the petals feel slightly crispy to the touch (about 3-5 days in water), they’re ready for the final drying phase. At this point, remove the blooms from the stems and gently pat them dry with a paper towel.
☀️ Step 3: Complete the Drying Process
Lay the hydrangeas flat on a wire cooling rack or a piece of parchment paper in a dry, well-ventilated area. Avoid direct sunlight, as UV rays can fade the color over time. Place the rack in a spot with indirect light and good airflow, like a pantry or a covered porch. This step takes about 2-4 weeks, depending on humidity levels.
Check the blooms every few days to ensure they’re drying evenly. If you notice any petals curling or browning, gently flip them over to expose the underside to air. Once fully dry, the petals should crumble slightly when touched but still hold their shape. You’ll know they’re ready when the edges feel papery and the color looks rich and deep—not faded or dull.
🪴 Step 4: Store and Display Your Dried Hydrangeas
Store your dried hydrangeas in an airtight container, like a cardboard box or a resealable plastic bag with a silica gel packet to absorb moisture. Keep them in a cool, dark place to prevent color fading. They’ll stay vibrant for 6-12 months, depending on how well they were dried and stored.
To display, arrange them in a vase with other dried flowers or use them in craft projects like wreaths, potpourri, or framed art. If you’re framing them, place a layer of acid-free tissue paper between the blooms and the glass to prevent moisture buildup, which can cause mold or discoloration over time. Real talk: the best part is seeing them hold their color for months—it’s like capturing summer in a vase!
Tips & tricks for perfectly preserved hydrangeas
Confession: I ruined my first batch of dried hydrangeas when I skipped these key details—don't make my mistake!
Timing Secret: That 2-3 hour rest period after harvesting is non-negotiable. It lets the blooms stabilize before drying begins. I learned this the hard way after watching petals darken when I rushed straight to drying. If you're short on time, even 1 hour helps, but the full 2-3 hours makes all the difference for that vibrant color retention.
Water Quality Matters: In Step 2, use room-temperature water—not cold. Cold water can shock the blooms and cause premature wilting. Also, always change that water every 24 hours as directed, but here's what nobody tells you—if your tap water has high chlorine content, let it sit out uncovered for 24 hours first to allow chlorine to evaporate before using it on your hydrangeas.
Drying Environment: For Step 3, humidity is your enemy. If your home feels muggy, consider using a small fan on low setting near the drying rack to improve airflow. I've found that placing a bowl of silica gel packets around the drying area helps absorb excess moisture in the air. The goal is to mimic that perfect balance of airflow and low humidity that preserves those rich colors for weeks.
Color Preservation Hack: When your hydrangeas are fully dried, store them with a small piece of chalk or a chalk dusting on the petals. The alkaline nature of chalk helps neutralize any remaining acidity in the petals, which can cause fading over time. This is especially helpful if you're storing them for the long term—up to that 12-month mark mentioned in Step 4.
Pro Tips for Dry Hydrangeas To Keep Their Color
- Confession: I ruined my first batch of dried hydrangeas when I skipped these key details—don't make my mistake!
- Timing Secret: That 2-3 hour rest period after harvesting is non-negotiable. It lets the blooms stabilize before dryi...
- Water Quality Matters: In Step 2, use room-temperature water—not cold. Cold water can shock the blooms and cause prem...
Frequently asked questions
Got questions about drying hydrangeas while keeping their stunning colors? You’re not alone! Here are some of the most common concerns—and straightforward answers—to help you nail the process.
How long does it take to dry hydrangeas completely?
Drying times vary, but most hydrangeas take 2–4 weeks to fully dry, depending on your method. Air-drying (hanging or laying flat) is the slowest but most gentle, while silica gel or oven-drying (at low heat) can speed it up to 1–3 days. Patience is key—rush it, and colors may fade!
Why are my dried hydrangeas losing their color?
Color loss usually happens from heat, light, or moisture. Avoid direct sunlight (use indirect light or shade), skip high oven temps (stay below 200°F), and ensure stems are fully dry before storing. Blue hydrangeas are trickier—opt for air-drying or silica gel to preserve their hue.
Can I dry hydrangeas in the microwave? Is it safe?
Microwaving hydrangeas is not recommended—it can cook the blooms, turn them brittle, and bleach colors. If you’re in a hurry, a low-heat oven (150–200°F) is a better alternative. For best results, stick to air-drying or silica gel for vibrant, long-lasting flowers.
What’s the best way to store dried hydrangeas to keep them fresh?
Store dried hydrangeas in a cool, dark place (like a closet or drawer) in a paper bag or breathable fabric to prevent moisture buildup. Avoid plastic—it traps humidity and speeds up decay. With proper storage, they’ll stay beautiful for 1–2 years!
Can I dry hydrangeas with green leaves still attached?
Yes, but trim leaves after drying—they can harbor moisture and cause mold. If you must keep them, remove lower leaves first and hang stems upside down. Once fully dry, snip any remaining leaves for a clean, polished look.
Wrapping up and next steps
Drying hydrangeas to preserve their stunning colors is simpler than you think—just follow the right steps! Whether you choose air-drying, silica gel, or microwave methods, the key is patience and proper technique. With a little care, your blooms will stay vibrant for years, making beautiful keepsakes or elegant decor.
Ready to turn your garden into a treasure trove of dried beauty? Grab your hydrangeas, gather your supplies, and get started today! 🌸✨ Your future dried arrangements are waiting!