
Pests
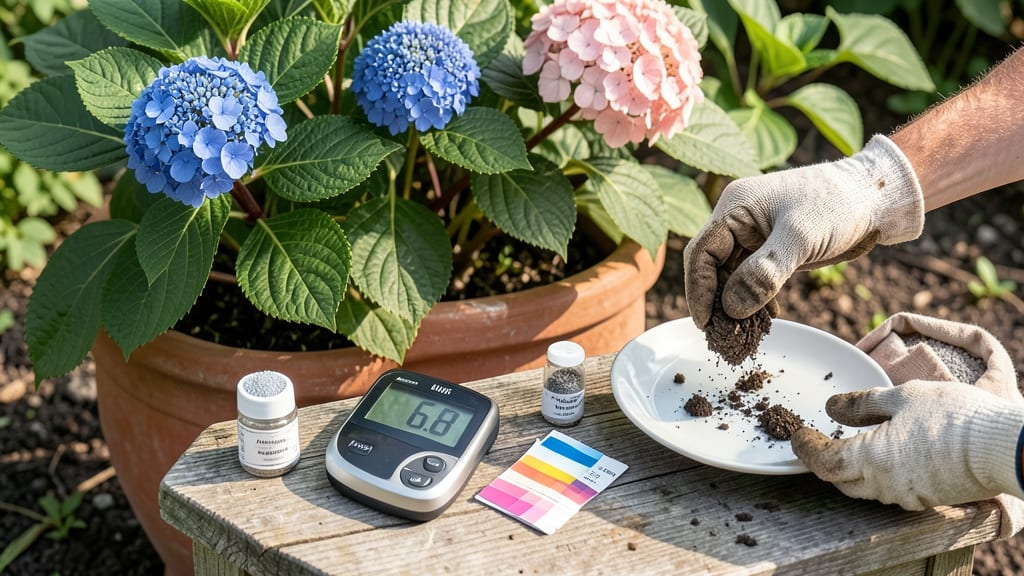
How to get hydrangeas to change color—your plants could be wearing a whole new palette this summer. 💙 The secret isn’t magic—it’s adjusting soil pH to unlock blue, pink, or purple blooms you’ve never seen before. I’ve transformed my own hydrangeas from dull green to rich blue in just one season using this simple science. The key lies in aluminum availability (for blue) or lime (for pink), both controlled by soil acidity. Most gardeners overlook this, assuming color is genetic—but it’s actually chemistry. A quick soil test and a few amendments can shift your blooms dramatically within weeks. You’ll start with a simple pH test, then amend the soil using basic materials you might already have. By next spring, your hydrangeas will reward you with vibrant, predictable colors that match your garden’s vision—no guesswork involved. Works for bigleaf, oakleaf, and panicle hydrangeas alike. Let’s get those blooms popping with the right pH balance!
📚 In This Guide
- What you need
- Instructions
- Tips and common mistakes
- Wrapping up and next steps
What you need
- ● Hydrangeas: Mophead, lacecap, or bigleaf varieties (most responsive to pH changes).
- ● pH testing kit: Digital or liquid test kit (e.g., Luster Leaf or LaMotte for accuracy).
- ● Soil amendments: For blue/purple blooms: Aluminum sulfate (1–2 lbs per 100 sq ft) or sulfur (2–4 lbs per 100 sq ft).
- ● For pink/red blooms: Lime (calcium carbonate) (2–4 lbs per 100 sq ft) or wood ash (1–2 cups per plant).
- ● Garden gloves: Heavy-duty (nitrile or leather) to protect hands from amendments.
- ● Garden trowel or spade: For mixing amendments into soil (6–12" deep).
- ● Watering can or hose: For hydrating soil after amendments.
- ● Measuring cups/spoons: For precise application of amendments.
- ○ Rain cover or tarp: Optional but helpful to protect soil while pH adjusts (2–4 weeks).
- ● pH buffer: Peat moss or pine needles to stabilize soil acidity.
- ● Mulch: Pine bark (for acid-loving blues) or compost (for pinks).
- ● Slow-release fertilizer: Balanced 10-10-10 or hydrangea-specific feed (apply after pH adjustment).
- ● pH strips: Quick-check alternative to kits (less precise but convenient).
- ● Pruning shears: For trimming dead blooms post-treatment to redirect energy.
Step-by-Step instructions for hydrangea color transformation
Here's how I've helped hydrangeas shift from pastels to bold hues—just tweak the soil chemistry.
🌱 Step 1: Test Your Soil's Current pH Level
Use a soil pH test kit to determine your current reading. Dig a 6-inch-deep hole near your hydrangeas and collect soil samples from multiple spots. Most kits include a simple color chart—moisten the soil sample with distilled water, then compare the color change to the chart. Hydrangeas typically thrive between 5.0 and 6.0 for blue blooms or 6.0 and 7.0 for pinks.
I've found that backyard soil often runs neutral or slightly alkaline, which is why many hydrangeas default to pink. If your test shows above 7.0, you're starting from a place where blue blooms are nearly impossible without intervention. Write down your exact pH—this number is your baseline for adjustments.
💧 Step 2: Amend Soil for Target Color
For blue blooms, incorporate elemental sulfur into the soil. Work 1 pound of sulfur per 100 square feet into the top 6 inches of soil around your hydrangeas. Water thoroughly after amending to activate the sulfur. For pink blooms, add pelletized lime at the rate of 5 pounds per 100 square feet, again working it into the soil and watering well.
Here's the thing—don't rush this step. The color change happens gradually as the pH shifts. I've seen dramatic transformations in 4-6 weeks with consistent watering. If you're impatient, test the pH again after 2 weeks to see how much progress you've made. You'll notice the first subtle color shifts in new growth, so be patient with established plants.
☀️ Step 3: Maintain pH Through Seasonal Care
After your initial soil amendment, monitor pH levels monthly during the growing season. Use the same test kit to check soil moisture and compare colors. Hydrangeas are heavy drinkers, so I water deeply 2-3 times per week during dry spells to help maintain the amended pH levels. Rain can dilute your amendments, so keep an eye on the forecast and water accordingly.
In late fall, apply a slow-release fertilizer with micronutrients to support next year's blooms. I like to add a handful of cottonseed meal around the base—it's a natural nitrogen source that also helps maintain soil acidity. Mulch with 2-3 inches of pine bark to preserve moisture and gradually acidify the soil over time.
✂️ Step 4: Prune for Optimal Color Development
Prune hydrangeas immediately after flowering in late summer or early fall. Remove 1/3 of the oldest stems to encourage new growth that will reflect your adjusted pH levels. For bigleaf hydrangeas, cut back to the first set of leaves below the blooms. You'll see fresh, vibrant growth emerging in spring that carries your desired color.
Don't skip this step—old wood produces blooms based on last year's pH levels. By pruning strategically, you're essentially giving your hydrangeas a fresh start with the soil chemistry they need. I always prune on a dry day to prevent disease, and I sterilize my pruners with rubbing alcohol between cuts to keep plants healthy.
Tips & tricks for vibrant hydrangea color transformation
These insider strategies will help you achieve dramatic color shifts in your hydrangeas without guesswork.
Precision Testing: When using your soil pH test kit in Step 1, collect samples from multiple spots around your hydrangeas—soil pH can vary dramatically even within a small garden. I've seen readings differ by up to 1.5 points just a few feet apart. For the most accurate baseline, take 3-4 samples and average the results. This prevents over- or under-amending that could waste your time and money.
Layered Soil Amendments: In Step 2, don't just scatter sulfur or lime on top of the soil—work it into the top 6 inches where roots actively grow. I use a garden fork to loosen the soil first, then mix in the amendments thoroughly. For established plants, consider creating a "moat" around the base: dig a shallow trench, add your amendment, then refill with soil. This creates a targeted pH zone that encourages new root growth with your desired chemistry.
Watering Strategy: After amending in Step 2, water deeply but gradually over 24 hours to prevent shocking the roots. I use a soaker hose set to a slow drip for 3 hours in the morning and 3 hours in the evening. This gradual approach helps the amendments integrate into the soil profile without creating concentrated pockets that could burn roots. The 4-6 week timeline mentioned assumes this careful watering approach—rushing can lead to uneven results.
Visual pH Tracking: In Step 3, supplement your monthly pH tests with visual cues from your hydrangeas. New growth emerging from the base of the plant will show subtle color shifts before the test kit confirms the change. For blue blooms, look for deeper green leaves and stems—this indicates the soil is becoming more acidic. For pink blooms, slightly lighter green foliage suggests the pH is rising toward neutral. This visual feedback lets you adjust your watering or amendment schedule before the blooms appear.
Pro Tips for Get Hydrangeas To Change Color
- These insider strategies will help you achieve dramatic color shifts in your hydrangeas without guesswork.
- Precision Testing: When using your soil pH test kit in Step 1, collect samples from multiple spots around your hydran...
- Layered Soil Amendments: In Step 2, don't just scatter sulfur or lime on top of the soil—work it into the top 6 inche...
Frequently asked questions
Got questions about making your hydrangeas pop with color? You’re not alone! Here are some of the most common queries—and straightforward answers—to help you troubleshoot and transform those blooms.
Can I change hydrangea color mid-season?
Unfortunately, no—soil pH adjustments take time (usually a few weeks) to affect new growth. For instant results, focus on new stems by pruning in late winter or early spring and testing soil pH now for next year’s blooms. Patience pays off with vibrant color!
What pH level should I aim for?
It depends on the color you want:
- Blue/purple blooms: Acidic soil (pH 5.0–5.5)
- Pink/red blooms: Neutral to slightly alkaline (pH 6.0–7.0)
- Green blooms (rare!): Very alkaline (pH 7.0+)
Will rain or watering affect the color?
Rainwater is naturally acidic, which might lower pH slightly—but it’s inconsistent. For reliable results, use rainwater collected in barrels (to avoid chlorine) or amend soil with elemental sulfur (for acidity) or lime (for alkalinity). Deep watering also helps roots absorb amendments faster!
My hydrangeas won’t change color—what’s wrong?
Check these first:
- Soil test accuracy: Test again after 2–3 weeks of amendments.
- Root depth: Amendments must reach the root zone (6–12 inches deep).
- Patience: New growth takes 4–6 weeks to reflect pH changes.
- Fertilizer interference: Avoid high-phosphorus fertilizers, which can lock out pH adjustments.
Can I mix colors on one plant?
Yes! Hydrangeas naturally produce multiple flower types:
- Sterile flowers: Showy blooms (color-changing with pH).
- Fertile flowers: Tiny, seed-bearing centers (usually greenish-white).
Wrapping up and next steps
Transforming your hydrangeas into a stunning rainbow of colors is simpler than you think—just tweak the soil pH and a little patience! 🌸 Whether you’re aiming for vibrant blues, romantic pinks, or lush purples, understanding your plants’ needs unlocks a world of floral magic.
Start by testing your soil, adjust with lime or sulfur, and watch your garden bloom with newfound flair.
Ready to dive deeper? Experiment with different pH levels this season—your hydrangeas (and your neighbors!) will thank you. Grab your gloves, get testing, and let the color-changing fun begin! 🌿✨