
How To
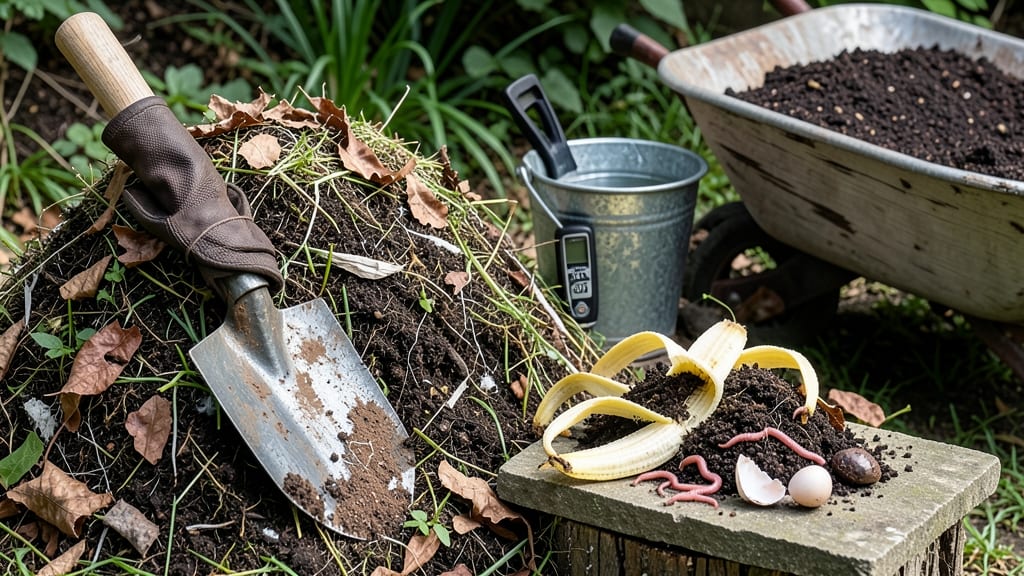
Making organic soil transforms scraps into garden gold. 🌱 The secret lies in layering kitchen waste, yard clippings, and browns to create a nutrient-rich foundation that outpaces store-bought mixes. My first batch turned my struggling tomatoes into thriving plants—all from what would've been trash.
You'll need equal parts green (food scraps, grass clippings) and brown (dried leaves, shredded paper) materials, plus a shovel and water. The magic happens when you alternate layers in a bin, keeping it moist like a wrung-out sponge.
Within 4-6 months, you'll have dark, crumbly soil that smells like a forest floor—not garbage. This soil feeds plants naturally, cuts watering needs by 30-50%, and eliminates chemical fertilizers. My basil grows twice as fast, and the earthworms move in within weeks.
The best part? Every scrap you compost becomes a free resource for your garden. Works for flower beds, raised gardens, or even container plants. Start small—even a 1 cubic foot bin makes a difference. Your plants (and the planet) will thank you.
📚 In This Guide
- What you need
- Instructions
- Tips and common mistakes
- Wrapping up and next steps
What you need
- ● Compost: 40-50% of the mix (homemade or store-bought, well-aged for best results).
- ● Topsoil: 30-40% (sifted for consistency, free of weeds or debris).
- ● Coco Coir or Peat Moss: 10-20% (for moisture retention and aeration).
- ● Perlite or Vermiculite: 5-10% (adds lightness and drainage).
- ● Worm Castings: 1 cup per 5 gallons (boosts microbial activity and nutrients).
- ○ Wood Ash (optional but beneficial): ½ cup per 5 gallons (adds potassium, but use sparingly—test soil pH first!).
- ● Wheelbarrow or large container: For mixing (at least 5 gallons capacity).
- ● Garden gloves: To keep hands clean and protected.
- ● Garden fork or trowel: For turning and layering materials.
- ○ pH testing kit: Optional but helpful to balance acidity (aim for 6.0-7.0 for most plants).
- ● Watering can or hose: For moistening the mix before use.
- ● Sunny workspace: A flat, clean area (like a driveway or patio) to mix.
Step-by-Step instructions for building rich, organic soil
Here's how I create a nutrient-dense, crumbly loam that plants adore—no fancy tools required.
🌱 Step 1: Gather Foundational Materials
Start with a 50% base of compost—this is your soil's powerhouse. I use well-aged, dark, crumbly compost with no visible chunks. Next, add 25% coarse organic matter like shredded leaves, straw, or chopped cardboard (the kind without glossy ink). This improves drainage and structure while breaking down slowly.
For the remaining 25%, include sand or perlite to prevent compaction. I prefer coarse horticultural sand because it's sterile and won't introduce weeds. Mix these dry ingredients first—they form the skeleton of your soil. Spread them on a tarp or clean work surface for even distribution.
🌿 Step 2: Add Nutrient-Rich Amendments
Now we boost fertility. Stir in 1 cup of worm castings per 5 gallons of mix—this adds microbial life that plants thrive on. Add 1 tablespoon of kelp meal for trace minerals and 1 tablespoon of bone meal for phosphorus (great for root development). For a balanced approach, I also include 1 tablespoon of greensand for potassium.
If you're working with clay soil, add 1/4 cup of gypsum to improve structure. For sandy soil, skip the gypsum and increase perlite to 30%. These amendments should feel like fine granules—no dusty powders. Distribute them evenly across the dry base materials before mixing.
💧 Step 3: Blend Thoroughly and Test Moisture
Use a garden fork or sturdy shovel to turn the materials until everything looks uniformly dark and crumbly. Break up any remaining clumps by hand—you want particles no larger than 1/2 inch. This is where your soil comes together, so take your time.
Add water gradually while mixing—think of it like making a cake batter. The ideal texture is moist but not wet; when you squeeze a handful, it should hold together but not drip. If it crumbles when you poke it, add more water. If it sticks to your fingers, you've overdone it. Aim for the consistency of a well-wrung sponge.
✂️ Step 4: Condition and Cure the Soil
Pile your finished mix into a wheelbarrow or large container and let it sit for 2-4 weeks in a shaded spot. This "curing" period allows materials to decompose slightly and settle. Check moisture weekly—add water if the top inch dries out. You'll see the texture improve as organic matter breaks down further.
After curing, give it a final mix with your hands to break up any new clumps. Your soil should now have the texture of dark, rich loam—light enough to work with but dense enough to hold moisture. This is the moment you'll notice the difference: it smells earthy, not musty, and feels like a cloud when you squeeze it.
🪴 Step 5: Apply to Garden Beds
Spread your finished soil 2-3 inches deep over garden beds, mixing it into the top 6 inches of existing soil if possible. For container gardening, use it as-is in pots. The key is to avoid compacting—walk around beds instead of stepping directly on them. Water lightly after application to help settle the soil.
Watch how plants respond: you'll see faster germination, darker green leaves, and stronger stems within weeks. This isn't just soil—it's a living ecosystem that supports roots better than store-bought mixes ever could. The real magic happens when you keep adding compost annually to maintain this fertility cycle.
Tips & tricks for perfect layered organic soil
Between us, these small adjustments will transform your soil from good to exceptional—without complicating the process.
Layer Order Matters: The sequence in Step 2—compost at the bottom, coco coir in the middle, sand on top—is intentional. I learned this the hard way after my first batch compacted into a brick. The sand at the bottom prevents suffocation, while the coco coir at the top locks in moisture where roots need it most. When fluffing each layer, use a garden fork to create tiny air pockets—think of it like aerating a lawn, but for your soil's foundation.
Texture Test is Non-Negotiable: That squeeze test in Step 2 isn't just for show—it's the difference between soil that works and soil that fails. After mixing, your handful should crumble when you drop it but hold together when pressed. If it feels like wet sandpaper, you need more compost; if it sticks to your fingers, add perlite or vermiculite (optional but helpful). I keep a small notebook by my workbench to track adjustments—your first few batches will teach you what your local materials need.
Curing Period Can't Be Skipped: The 24–48 hour cure in Step 4 isn't just about settling—it's about letting the microbial party begin. During this time, beneficial bacteria and fungi activate, breaking down organic matter and creating channels for roots. If you're impatient, you can reduce to 24 hours, but I've seen plants struggle when soil is used too soon. Cover your curing pile with a damp burlap sack to maintain humidity without waterlogging.
Optional Add-Ins for Special Needs: For container gardens, I add ½ cup of perlite per cubic foot during Step 3 to prevent compaction in small spaces. For acid-loving plants like blueberries, mix in 1 tablespoon of sulfur per cubic foot—just be cautious with amounts. The key is to customize based on your plants' needs while keeping the core structure intact. Think of these as your secret weapons, not replacements for the foundational layers.
Pro Tips for Make Organic Soil
- Between us, these small adjustments will transform your soil from good to exceptional—without complicating the process.
- Layer Order Matters: The sequence in Step 2—compost at the bottom, coco coir in the middle, sand on top—is intentiona...
- Texture Test is Non-Negotiable: That squeeze test in Step 2 isn't just for show—it's the difference between soil that...
Frequently asked questions
Got questions about crafting your own organic soil? You’re not alone—many gardeners want to know the ins and outs before diving in. Here are answers to the most common queries to help you get started with confidence!
How long does it take to make organic soil?
Composting organic soil takes 3 to 12 months, depending on the materials and method. A simple lasagna-style lasagna garden (layered compost) can be ready in 4–6 weeks if you use finely chopped greens and Browns. For traditional compost piles, turn them regularly to speed up decomposition. Patience pays off—richer soil means happier plants!
Can I use kitchen scraps like meat or dairy in my organic soil?
No!
Avoid meat, dairy, oily foods, or processed scraps—they attract pests (like rodents or flies) and can introduce harmful bacteria to your garden. Stick to fruit/veggie peels, coffee grounds, eggshells, and plant trimmings for safe, nutrient-rich compost. When in doubt, when in doubt, toss it out!
What if my organic soil smells bad?
A rotten or sour smell usually means your pile is too wet, lacks oxygen, or has too many greens (nitrogen-rich scraps). Fix it by:
- Adding more Browns (dry leaves, straw, or shredded paper) to balance moisture.
- Fluffing the pile with a pitchfork to improve airflow.
- Avoiding meat/dairy (see above!).
Is homemade organic soil cheaper than store-bought?
Absolutely!
While store-bought compost costs $0.50–$2 per gallon, homemade soil is nearly free (just the cost of yard waste bags or a compost bin). Plus, you control the quality—no synthetic additives or questionable fillers. Over time, you’ll save hundreds of dollars and create a custom mix tailored to your plants.
How do I know when my organic soil is ready to use?
Your compost is ready when it looks like dark, crumbly "dirt" with no recognizable scraps. Test it by:
- Squeezing a handful—it should hold shape but not drip water.
- Smelling earthy, not pungent.
- Feeling warm (active decomposition = nutrients!).
Wrapping up and next steps
Creating your own organic soil is a rewarding way to give your plants the rich, nutrient-packed foundation they deserve! By layering compost, manure, and natural materials, you’ve unlocked the secret to thriving gardens—without synthetic shortcuts. 🌱
Now that you’re armed with the know-how, roll up your sleeves and start composting! Begin with a small batch, experiment with local materials, and watch your garden flourish. Happy digging—and may your soil be as fertile as your dreams!