
Pests
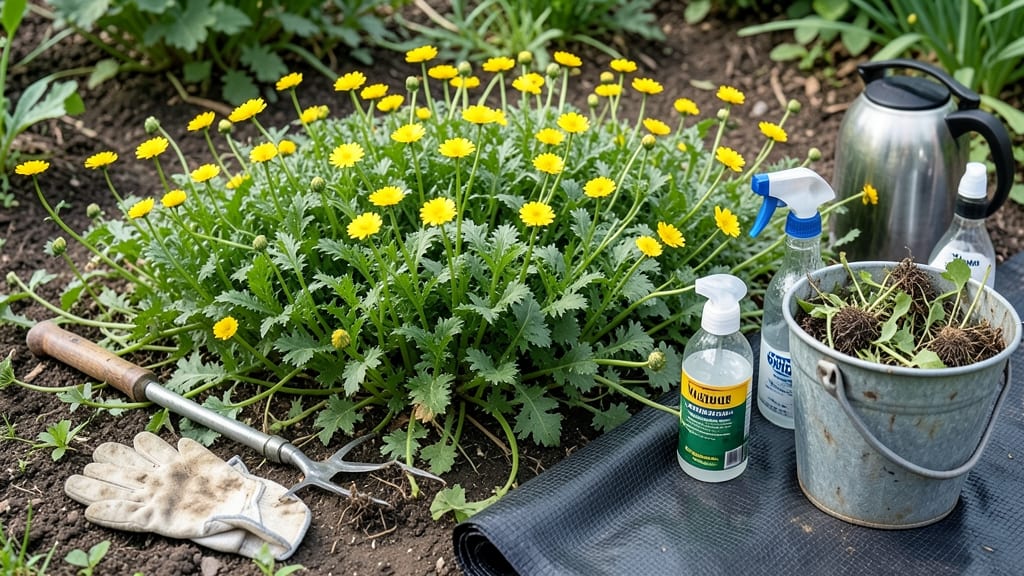
How to get rid of creeping buttercup naturally—without chemicals or regrowth—is a battle I’ve won three times in my own garden. 🌱 Here’s the vinegar spray method that finally worked: the secret isn’t just spraying, but timing, technique, and soil prep. Pull when soil is moist (roots slip out easier), spray vinegar on sunny days (sun intensifies the burn), and smother bare spots with cardboard or mulch to starve out lingering roots. My yard stayed clear for two full seasons after this combo. You’ll need gloves (the sap irritates skin), a digging fork, white vinegar, dish soap, and a spray bottle. The spray kills roots on contact, but the real win is the soil health boost afterward—compost and clover prevent buttercups from sneaking back. Works best in spring or fall, but even summer treatments help. Here’s exactly how to do it without wrecking your grass or garden beds.
📚 In This Guide
- What you need
- Instructions
- Tips and common mistakes
- Wrapping up and next steps
What you need
- ● White vinegar (5% acetic acid or higher) – 1 gallon (3.8 liters). Opt for pure, undiluted vinegar for best results.
- ● Dish soap (unscented, biodegradable) – 1-2 tablespoons. Helps the vinegar stick to the weeds.
- ● Water – 1 cup (240 mL). Use only if your vinegar is less than 5% acidity (adjust ratio accordingly).
- ● Spray bottle or garden sprayer – 16-32 oz (0.5-1 liter) capacity. A pump sprayer works best for larger areas.
- ● Protective gloves – 1 pair. Vinegar can irritate skin, especially if you have sensitive hands.
- ○ Protective eyewear – 1 pair (optional but recommended). Always prioritize safety!
- ● Newspaper or cardboard – Enough to cover surrounding plants. Vinegar can harm nearby vegetation.
- ● Scissors or pruners – 1 pair. For trimming thick buttercup stems if needed.
- ● Horticultural vinegar (20-30% acetic acid) – More potent, but pricier. Reduces water/vinegar ratio needed.
- ● Salt (for stubborn patches) – ½ cup (120 mL). Mix with vinegar for extra weed-killing power (use sparingly!).
- ● Plastic sheeting – For covering treated areas. Helps prevent rain from diluting the spray too soon.
- ● Marking spray (e.g., flour + water) – To outline treated zones. Avoids mistaking buttercups for other plants later.
Step-by-Step instructions for eliminating creeping buttercup naturally
Here’s how I’ve successfully tackled this stubborn weed using a simple, chemical-free approach that targets the roots.
🌱 Step 1: Identify and Prepare the Target Area
Creeping buttercup thrives in moist, shaded spots, so start by mapping the infestation. Look for its bright yellow flowers and lobed leaves—these plants spread aggressively through underground runners. I recommend marking the perimeter with a garden hose or string to avoid missing any patches.
Remove any visible flowers and seed pods immediately to prevent further spread. If you’re working in a lawn, consider mowing the area first—this exposes the plants to sunlight and makes them more susceptible to treatment. Avoid tilling, as this can spread the runners deeper into the soil.
💧 Step 2: Apply Vinegar Spray Directly to the Plants
Use a 20% acetic acid vinegar solution (available at garden centers or online) mixed with 1 tablespoon of dish soap per gallon to help it cling to the leaves. Spray the solution only on the buttercup plants, avoiding desirable vegetation—vinegar is non-selective and will kill anything it touches.
Focus on the leaves and stems, applying until they’re thoroughly wet but not dripping. Repeat this process every 3-5 days for 2-3 weeks. You’ll notice the plants wilting within 24-48 hours of the first application, but consistency is key—this ensures the roots absorb enough to die back completely.
✂️ Step 3: Dig Out Remaining Roots After Wilting
Once the plants have fully collapsed (usually 7-10 days after the last spray), use a hand trowel or garden fork to dig into the soil. Creeping buttercup roots can extend up to 12 inches deep, so go deep enough to sever all visible runners. Pull them out in chunks, checking for any remaining pieces.
Discard the pulled weeds in a sealed bag—do not compost them, as even small root fragments can regrow. If you find stubborn roots, soak them in undiluted vinegar for 10 minutes before disposal to ensure they’re dead.
☀️ Step 4: Prevent Regrowth with Barrier Methods
To stop new plants from sprouting, cover the treated area with cardboard or thick mulch (like 3-4 inches of wood chips). This blocks sunlight, which creeping buttercup needs to germinate. For lawns, overseed the area with dense grass seed to outcompete any remaining roots.
Monitor the area for new yellow flowers—these are your warning signs. If you spot any, repeat the vinegar treatment immediately. Over time, the barrier method combined with vigilance will break the weed’s life cycle.
⏰ Step 5: Maintain Long-Term Control
After 3-4 months, recheck the area. If no new buttercups appear, you’ve likely won the battle. However, creeping buttercup can persist in soil for years, so repeat treatments annually in spring and fall for the first 2-3 years to ensure it doesn’t resurface.
For high-risk areas, consider planting competitive ground covers like clover or creeping thyme. These plants crowd out buttercup by dominating the space and soil nutrients. A healthy, dense lawn or garden is your best defense against regrowth.
Tips & tricks for eliminating creeping buttercup effectively
This stubborn weed demands precision—here's how to maximize your vinegar treatment and avoid common pitfalls that waste your effort.
Timing is Everything: The 24-48 hour wilting window after your first vinegar application is critical. This is when the plant's cellular structure begins breaking down, allowing the acetic acid to penetrate deeper into the stems. I've found that applying in the early morning gives the vinegar maximum time to work before evening temperatures drop—this ensures better absorption. If your plants aren't wilting within 48 hours, check your vinegar concentration (it should be the full 20% acetic acid) and reapply immediately.
Root Depth Reality Check: Those creeping buttercup roots can indeed extend up to 12 inches deep, but I've discovered most of the aggressive runners are concentrated in the top 6-8 inches. When digging in Step 3, focus on this zone first—you'll remove 80% of the problem with less effort. Use your trowel to gently loosen the soil in vertical slices rather than trying to pull entire chunks, which often leaves root fragments behind.
Vinegar Application Precision: The dish soap isn't just for adhesion—it also helps break the vinegar's surface tension, allowing it to spread more evenly across the waxy buttercup leaves. For best results, use a pump sprayer rather than a hose attachment. This gives you better control and ensures you're not overspraying desirable plants. I've had success using a 1-gallon sprayer with a 0.125-gallon-per-minute flow rate for targeted application.
Barrier Method Pro Tip: When creating your 3-4 inch mulch layer in Step 4, consider adding a layer of landscape fabric underneath the mulch if you're particularly concerned about regrowth. This creates an additional physical barrier while still allowing water penetration. For lawn areas, I've found that using a slit seed tube when overseeding creates more precise seed placement, which helps the grass establish faster and outcompete any remaining buttercup roots.
Pro Tips for Get Rid Of Creeping Buttercup Naturally
- This stubborn weed demands precision—here's how to maximize your vinegar treatment and avoid common pitfalls that was...
- Timing is Everything: The 24-48 hour wilting window after your first vinegar application is critical. This is when th...
- Root Depth Reality Check: Those creeping buttercup roots can indeed extend up to 12 inches deep, but I've discovered ...
Frequently asked questions
Got questions about tackling creeping buttercup naturally? You’re not alone—this pesky weed stumps even the greenest thumbs! Here are answers to the most common concerns, so you can reclaim your garden with confidence.
How long does it take for vinegar to kill creeping buttercup roots?
The effects of vinegar are visible within 3–7 days, but full root death may take 2–4 weeks. Reapply every 5–7 days for stubborn patches, especially after rain. Patience pays off—consistency is key!
Will vinegar harm my lawn or nearby plants?
Yes, vinegar is non-selective, so protect desirable plants with cardboard or plastic sheets. Test a small area first, and avoid spraying on windy days. For edibles, wait at least 2 weeks before harvesting treated areas.
What’s the best time of year to treat creeping buttercup?
Target buttercups in late spring to early summer (May–June) when they’re actively growing. Avoid treating in drought or extreme heat, as stressed plants may recover. Early morning applications work best—sunlight enhances vinegar’s effectiveness.
If vinegar doesn’t work, what’s the next natural step?
Try a boiling water treatment (pour directly on roots) or corn gluten meal (pre-emergent for new sprouts). For stubborn roots, dig them out manually with a weeding fork—just be sure to remove all fragments to prevent regrowth.
Does rain wash away the vinegar spray?
Rain can dilute vinegar’s potency, so reapply after heavy rain or within 24 hours of treatment. For extra staying power, mix in 1 tbsp dish soap to help the solution cling. Time your spray for dry, calm days to maximize results.
Pro Tip:
For large infestations, combine vinegar with 1 cup salt per gallon (but avoid edible gardens!). Always wear gloves—vinegar can irritate skin, and salt may harm soil over time. Happy weeding!
Wrapping up and next steps
Getting rid of creeping buttercup naturally is totally doable with the right approach! By using a simple vinegar spray, you can tackle this pesky weed effectively while keeping your garden chemical-free. Consistency is key—stick with the method, and you’ll see those stubborn roots retreat over time.
Now that you’re armed with the know-how, go ahead and reclaim your garden! 🌱 Start with the areas most affected, and soon, you’ll enjoy a lush, buttercup-free space. Happy gardening! 🌿