
Propagation
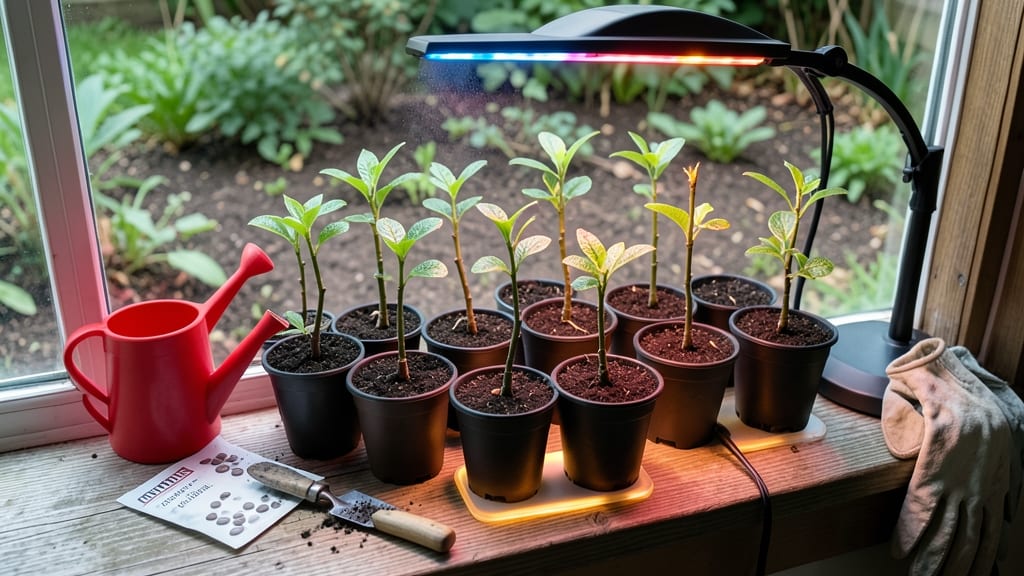
That first sweet-smelling cherry plum seed can wait years before it grows. 🌱 I’ve watched my own seeds take two full winters to finally crack open—this isn’t a quick project, but the reward of homegrown fruit makes every step worth it.
The key starts with proper seed collection and a little winter magic called stratification.
You’ll need just three things: fresh seeds, a damp paper towel, and a cold fridge. No fancy equipment—just patience. Most seeds need 90-120 days of cold treatment before they’ll even think about sprouting. That’s why timing matters: start this process in late fall for spring planting.
By the time you see that first tiny shoot, you’ll have already won half the battle. Those delicate seedlings need gentle care—no harsh sunlight or overwatering.
With the right approach, you could be harvesting plums in 3-5 years, their tart-sweet flavor a reminder of how good slow gardening can taste.
Even if some seeds never sprout, every attempt teaches you more about the rhythm of nature. The real secret? Starting now. Your future tree will thank you for the wait.
📚 In This Guide
- What you need
- Instructions
- Tips and common mistakes
- Wrapping up and next steps
What you need
- ● Cherry plum seeds: 3–5 fresh, viable seeds (harvested from ripe, healthy fruit). Pro tip: Store seeds in a cool, dry place until ready to plant!
- ● Small pots or seed trays: 4–6 individual pots (4–6 inches deep) or a seed tray with drainage holes.
- ● Well-draining potting mix: A high-quality seed-starting mix (avoid garden soil—it can harbor disease). 💡 Add perlite or vermiculite (20–30%) for aeration!
- ● Plastic wrap or humidity dome: To retain moisture while seeds germinate.
- ● Spray bottle: For gentle watering (avoid over-saturating seeds).
- ● Grow lights or sunny windowsill: A south-facing window or LED grow lights (12–16 hours/day) for seedlings.
- ○ Fertilizer (optional but helpful): A balanced, water-soluble fertilizer (5-5-5 or 10-10-10) diluted to half-strength for young seedlings.
- ● Knife or scissors: For carefully slicing seeds (if stratification is needed).
- ● Refrigerator (for stratification): If your seeds require cold treatment (check your climate zone!).
- ● Transplanting tool: A small trowel or spoon for moving seedlings to larger pots.
- ● Larger containers (6–12 inches): For transplanting seedlings after 4–6 weeks.
- ● Patience (and a notebook!) 📖: Track germination dates, growth milestones, and care adjustments.
- ● Heating mat (70–75°F) to speed up germination.
- ● pH test kit to ensure soil is slightly acidic (6.0–6.8).
- ● Mulch (straw or shredded leaves) to retain moisture in outdoor plantings.
- ● Pruning shears for shaping young trees as they grow.
Step-by-Step instructions for growing cherry plums from seed
Here's the method I've used to grow strong, healthy cherry plum seedlings from seed.
🌱 Step 1: Harvest and Prepare the Seeds
Collect ripe cherry plums in late summer or early fall when they're deep red and slightly soft to the touch. Remove the pits and let them dry completely for 3-5 days in a warm, dry place. This prevents mold and prepares them for stratification.
Once dry, place the pits in a paper towel and fold it so they're snug but not crushed. Store them in a sealed plastic bag in the refrigerator for 8-12 weeks. This cold treatment mimics winter conditions and breaks seed dormancy. I check on them monthly to ensure no mold develops.
🌱 Step 2: Plant the Stratified Seeds
After stratification, fill small pots or seed trays with sterile potting mix and moisten it until damp but not soggy. Plant each seed about 1 inch deep in its own pot to avoid crowding. I use 4-inch pots for each seed to give roots room to develop.
Place the pots in a warm location with temperatures between 65-75°F. Keep the soil consistently moist but never waterlogged. You'll see sprouts in 2-4 weeks, but some seeds may take longer. Patience is key—don't give up if germination takes a few extra weeks.
☀️ Step 3: Provide Light and Care for Seedlings
Once the seedlings emerge, move them to a location with bright, indirect light. A south-facing window works well, but supplement with a grow light if natural light is insufficient. Seedlings need 12-14 hours of light daily to grow strong and sturdy.
Water the seedlings when the top inch of soil feels dry to the touch. Avoid overwatering, as this can cause root rot. Fertilize lightly with a balanced, water-soluble fertilizer diluted to half strength every 4-6 weeks to encourage healthy growth.
🪴 Step 4: Transplant Seedlings to Larger Pots
When the seedlings reach 6-8 inches tall and have developed their first true leaves, transplant them into larger pots or directly into the ground. Choose a location with full sun and well-draining soil. Cherry plums thrive in slightly acidic to neutral soil with a pH of 6.0-7.0.
Dig a hole slightly larger than the root ball and place the seedling in, ensuring the top of the root ball is level with the soil surface. Backfill the hole with soil and water thoroughly. Mulch around the base of the plant with 2-3 inches of organic mulch to retain moisture and suppress weeds.
⏰ Step 5: Prune and Maintain for Fruit Production
In the first year, focus on establishing a strong root system. Prune any dead, damaged, or crossing branches to encourage an open canopy. Remove suckers that grow from the base of the tree to direct energy into the main trunk.
Cherry plums typically take 3-5 years to bear fruit from seed. During this time, continue to water deeply during dry periods and fertilize annually with a balanced fertilizer. Monitor for pests and diseases, and treat any issues promptly to keep your tree healthy and productive.
Tips & tricks for growing cherry plum seedlings
Growing fruit trees from seed takes real patience—but these little tricks will help you avoid common pitfalls and give your cherry plums the best possible start.
Seed Selection Matters: Not all cherry plum varieties grow true from seed, meaning your tree might not produce fruit identical to the parent. For best results, use seeds from heirloom varieties known for good seed germination. I've had the most success with European plum seeds, which tend to be more reliable than some native varieties. The ripeness of the fruit also matters—wait until plums are fully colored and slightly soft before harvesting.
Stratification Check: During your 8-12 week cold treatment in Step 1, place a small piece of tape with the date on your seed bag. This helps track exactly when your stratification period ends. Some seeds may germinate faster than others, so having this record prevents you from thinking they've failed when they're actually just taking their time. I've seen germination times vary from 2 weeks to 6 weeks after stratification—patience really is key!
Lighting Strategy: For the 12-14 hours of light seedlings need in Step 3, I recommend using a simple LED grow light on a timer rather than relying solely on natural light. Place it about 6 inches above the seedlings and adjust as they grow. Morning sunlight is ideal for seedlings, but afternoon sun can be too intense—watch for wilting, which indicates they need some shade during hotter parts of the day.
Transplanting Tip: When transplanting your 6-8 inch seedlings in Step 4, water them thoroughly the day before moving them to their new location. This helps reduce transplant shock by keeping roots hydrated. If planting directly outdoors, do it on a cloudy day or in the late afternoon to minimize stress from direct sunlight. The 2-3 inches of organic mulch you add will help maintain consistent moisture and suppress weeds, but make sure to keep it 2-3 inches away from the trunk to prevent rot.
Pro Tips for Grow Cherry Plums From Seed
- Growing fruit trees from seed takes real patience—but these little tricks will help you avoid common pitfalls and giv...
- Seed Selection Matters: Not all cherry plum varieties grow true from seed, meaning your tree might not produce fruit ...
- Stratification Check: During your 8-12 week cold treatment in Step 1, place a small piece of tape with the date on yo...
Frequently asked questions
Got questions about growing cherry plums from seed?
Here are some of the most common ones—plus answers to help you avoid pitfalls and maximize success!
How long does it take for cherry plum seeds to germinate?
Germination can take anywhere from 3 to 6 months (sometimes longer!) due to the seed’s natural dormancy. Soak seeds in water for 24 hours first, then plant them in moist, well-draining soil. Patience is key—keep the soil consistently damp and warm (around 60–70°F) to encourage sprouting.
Should I stratify cherry plum seeds before planting?
Yes! Stratification mimics winter conditions and breaks dormancy. Place seeds in a damp paper towel, seal them in a plastic bag, and refrigerate for 6–12 weeks. Check periodically for mold—if you see any, discard the seeds and start fresh. This step dramatically improves germination rates.
Will cherry plum trees grown from seed produce fruit?
While possible, seed-grown trees may not fruit for 5–10 years (or ever!) because they’re not genetically identical to the parent plant. For reliable fruit, consider grafting a known variety onto your seedling later. If you’re okay with the wait, seed-grown trees can still yield delicious, unique fruit—just be patient!
What pests or diseases should I watch for when growing cherry plum seedlings?
Young seedlings are vulnerable to aphids, spider mites, and fungal diseases like powdery mildew. Keep plants in bright, indirect light and avoid overwatering. If pests appear, spray with neem oil or insecticidal soap. Ensure good airflow around seedlings to prevent mold.
Can I grow cherry plums from seed indoors?
Start seeds indoors in 4–6 weeks before the last frost in a sunny window or under grow lights. Use a small pot with drainage holes and keep the soil warm. Once seedlings are 3–4 inches tall and hardened off, transplant them outdoors in spring. Just remember—indoor seedlings need extra care to avoid legginess!
Wrapping up and next steps
Growing cherry plums from seed is a rewarding journey that combines patience, care, and a dash of gardening magic! 🌱 By following these steps—from seed selection to transplanting—you’re not just nurturing a plant, but cultivating a future harvest of sweet, juicy fruit.
While it may take years for your tree to bear fruit, every stage is a lesson in nature’s generosity.
Ready to take the next step? Once your seedlings are thriving, consider transplanting them into larger pots or your garden and exploring pruning techniques to shape their growth. Happy growing—your future cherry plum harvest awaits! 🍒✨