
Size
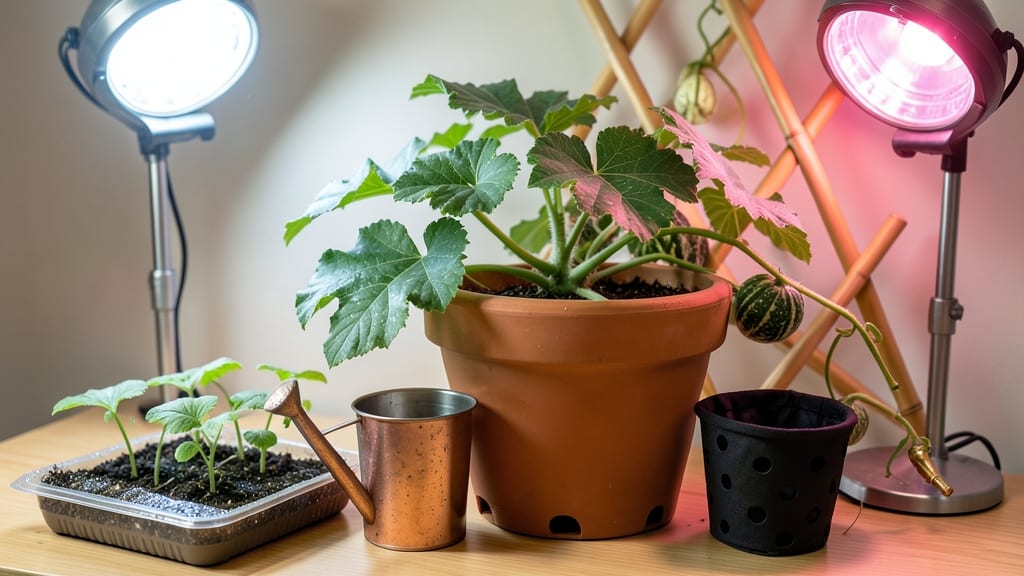
How to grow watermelon inside isn't just possible—it's a balcony game-changer for small-space gardeners. 🌱 I've grown watermelons in 5-gallon containers on my city patio, and while they won't be 20-pound monsters, they're sweet, manageable, and ready to harvest in just 80 days. The secret? Picking the right variety and mimicking summer conditions indoors.
You'll need a large container (at least 5 gallons), a compact watermelon variety like 'Sugar Baby' or 'Tiny Tim', and a grow light that provides 12-14 hours of light daily.
The soil should be well-draining but moisture-retentive—think potting mix with added compost. Humidity is key too; misting leaves or using a humidity tray helps prevent the dry-air struggles common indoors.
Expect vines that climb and spread, so plan for vertical training or a trellis to save space. Your first fruit will be small—think 1-3 pounds—but the flavor will be concentrated and delicious.
The real magic happens when you watch those little yellow blooms turn into fruit while sipping morning coffee on your balcony.
Common challenges? Pollination is the biggest hurdle indoors, so you may need to hand-pollinate with a paintbrush. Pests are rare but watch for spider mites in dry air. With these adjustments, you'll be harvesting watermelon indoors—something most people think is impossible. Ready to try?
📚 In This Guide
- What you need
- Instructions
- Tips and common mistakes
- Wrapping up and next steps
What you need
- ● Watermelon Seeds: Choose compact or dwarf varieties like 'Sugar Baby,' 'Tiny Tim,' or 'Black Diamond' (they thrive in containers!). Aim for 2-3 seeds per pot (thin to the strongest sprout later).
- ● Containers: Minimum 5-gallon pots (18+ inches deep) for small varieties, or 10+ gallons for larger types.
- ● Drill drainage holes if not pre-made (or use fabric grow bags).
- ○ Optional: Self-watering containers to keep moisture consistent.
- ● High-Quality Potting Mix: Use a well-draining, sterile mix (avoid garden soil!). A blend of 60% potting soil + 30% perlite + 10% compost works great.
- ● Grow Lights: A full-spectrum LED grow light (12–16 hours/day) or sunlight near a south-facing window (watermelons need 8+ hours of direct light daily!).
- ● Support System: A trellis, cage, or sturdy stakes (watermelons can vine 6–10 feet—secure them early!).
- ● Fertilizer: Balanced liquid fertilizer (10-10-10 or 5-5-5) for seedlings.
- ● Bloom booster (high in phosphorus/potassium) when flowers appear.
- ● Humidity Dome: A clear plastic tent over seedlings to retain moisture (remove after sprouts emerge).
- ● pH Test Kit: Keep soil pH between 6.0–6.8 (watermelons love slightly acidic soil!).
- ● Oscillating Fan: Place near plants to strengthen stems (prevents leggy growth).
- ● Thermometer/Hygrometer: Monitor temps (70–90°F ideal; below 50°F stalls growth).
- ● Pollination Aid: A soft paintbrush to hand-pollinate flowers if indoors (no bees = no fruit!).
Step-by-step instructions for growing watermelons in containers indoors
Growing watermelons indoors isn't just possible—it's a rewarding challenge that yields sweet surprises.
🪴 Step 1: Select the Right Containers and Drainage System
Watermelons need room to spread, so choose a 5-gallon container or larger with multiple drainage holes—at least three. I use fabric grow bags because they allow roots to breathe while preventing waterlogging. If using plastic, drill extra holes along the sides to mimic natural root aeration. Place a 2-inch layer of gravel or perlite at the bottom to create a reservoir for excess water.
Watermelons hate soggy roots, so this drainage layer is non-negotiable. Fill the container halfway with a lightweight potting mix (never garden soil—it compacts and suffocates roots). Tap the container gently to settle the soil without compacting it. You'll know it's right when the surface feels firm but still crumbles easily between your fingers.
☀️ Step 2: Choose a Sun-Loving Spot and Set Up Supplemental Light
Watermelons demand 6-8 hours of direct sunlight daily, so position your container near the southernmost window or under grow lights. A full-spectrum LED grow light on a 14-hour timer works best. Suspend it 12-18 inches above the plant and adjust as the vine grows. Without enough light, vines stretch weakly, and fruits stay small and bland.
Here's the thing—natural light varies wildly. If your window gets only 4-5 hours of sun, supplement with CFL bulbs (they emit less heat but still provide the spectrum watermelons need). Watch for yellowing leaves—that’s your cue to move closer to the light or extend the grow light’s runtime. Strong, dark green leaves mean you’re golden.
🌱 Step 3: Plant Seeds or Transplants at the Right Time
Start with 2-3 seeds per container (only one will thrive, but extras ensure success). Plant them 1 inch deep after the last frost date—or now, if you're in a warm climate. Press the seeds gently into the soil, then water lightly until the surface is damp but not soggy. Cover the container with clear plastic wrap to retain warmth and humidity, then place it in a warm spot (75-85°F).
Germination takes 7-14 days, depending on temperature. Once sprouts appear, remove the plastic immediately—trapped moisture invites damping-off, a fungal disease that collapses seedlings overnight. Thin to the strongest seedling when it’s 2 inches tall, snipping the others at the soil line. Avoid pulling, or you’ll disturb the roots of your winner.
💧 Step 4: Water Deeply and Train the Vine Early
Watermelons need consistent moisture, but their roots despise soggy conditions. Water deeply every 2-3 days until water runs freely from the drainage holes. Let the top 1-2 inches of soil dry slightly between waterings—this prevents root rot while keeping the plant hydrated. Use a moisture meter for accuracy, especially in dry climates.
Train the main vine along a trellis or sturdy stake as soon as it’s 6 inches tall. Watermelons are heavy, so secure the trellis to a wall or sturdy frame. Gently weave the vine upward, tying it with soft plant ties every 12 inches. This saves space and prevents the fruit from rotting on the floor. You’ll see small yellow flowers in 4-6 weeks—that’s your first sign of progress.
✂️ Step 5: Prune, Pollinate, and Harvest for Sweet Success
Once the vine reaches the top of the trellis, prune side shoots to focus energy on one main fruit. Leave 2-3 female flowers (they have tiny watermelons at their base) and remove the rest. Hand-pollinate by transferring pollen with a soft paintbrush from male (long stems) to female (swollen base) flowers in the morning when blooms are fresh.
Harvest when the underneath turns cream-colored and the stem detaches easily from the vine. Lift the melon gently—don’t drag it, or you’ll tear the vine. A ripe indoor watermelon will weigh 3-5 pounds and have a dull, not shiny, rind. Cut open to check for deep red flesh and black seeds—that’s your reward for patience.
Tips & tricks for perfect indoor watermelon cultivation
Here's what I've learned after growing watermelons indoors—these tricks make all the difference between a struggling plant and a thriving vine.
Container Selection: Fabric grow bags are my go-to because they allow roots to breathe while preventing compaction. If using plastic, drill extra drainage holes along the sides—roots need aeration just as much as they need water. The 5-gallon minimum is non-negotiable; smaller containers will stunt your vine's growth and limit fruit size. I've tried 3-gallon pots, and while they work for smaller varieties, you won't get that satisfying 3-5 pound watermelon.
Lighting Strategy: That 6-8 hours of direct sunlight is critical, but natural light varies wildly. If your southern window only gets 4-5 hours, supplement with CFL bulbs—they provide the right spectrum without overheating. Position your grow light 12-18 inches above the plant and adjust as it grows. I've seen plants stretch toward light sources, creating weak, leggy vines that struggle to support fruit. The key is consistency: watermelons need reliable light, not just occasional bright spots.
Germination and Thinning: Don't be tempted to plant more than 2-3 seeds per container hoping for better results. Overcrowding stresses seedlings and increases competition for nutrients. When thinning to your strongest seedling at the 2-inch mark, use clean scissors to snip at soil level—pulling risks damaging the remaining plant's roots. I've learned this the hard way after seeing perfectly good seedlings collapse from root disturbance during thinning.
Pruning for Success: Once your vine hits the trellis top, prune side shoots ruthlessly. You want all that plant's energy focused on developing one main fruit. Leave just 2-3 female flowers (the ones with tiny watermelon shapes at their base) and remove everything else. This might seem harsh, but it's what produces that 3-5 pound melon we're all after. I've tried letting plants develop multiple fruits, and while you get more watermelons, they're always smaller and less flavorful.
Pro Tips for Grow Watermelon Inside
- Here's what I've learned after growing watermelons indoors—these tricks make all the difference between a struggling ...
- Container Selection: Fabric grow bags are my go-to because they allow roots to breathe while preventing compaction. I...
- Lighting Strategy: That 6-8 hours of direct sunlight is critical, but natural light varies wildly. If your southern w...
Frequently asked questions
Got questions about growing watermelons indoors? You’re not alone—this method is still a novelty for many! Here are answers to the most common queries to help you crush your container harvest like a pro.
What’s the best temperature range for indoor watermelon growth?
Watermelons thrive in 70–90°F (21–32°C) during the day and 60–70°F (15–21°C) at night. Use a grow light with a timer (14–16 hours/day) and a thermometer to monitor temps. If your space drops below 50°F (10°C), growth slows—consider a heat mat for roots or relocate to a sunniest spot.
How long does it take to grow a watermelon indoors?
Expect 70–90 days from seed to harvest, depending on the variety. Dwarf or container-specific types (like ‘Sugar Baby’ or ‘Tiny Tan Rind’) mature faster (60–75 days). Patience is key—rushing with heat or light can stress plants. Track progress with a growth journal to adjust care as needed!
Can I grow watermelons in small pots or buckets?
Yes! Use containers at least 5 gallons (bigger = better for vines). Opt for fabric grow bags or self-watering buckets with drainage holes. Watermelons need 12–18 inches of depth for roots. If space is tight, prune excess vines (after flowering) to focus energy on fruit development.
What should I do if my indoor watermelon plant gets pests?
Common culprits: aphids, spider mites, or fungus gnats. Start with neem oil spray (mix 1 tsp per quart of water) or insecticidal soap. For gnats, let the soil dry slightly between waterings. Beneficial nematodes (for soil pests) or yellow sticky traps (for flying insects) work too. Quarantine new plants to prevent outbreaks!
Why aren’t my watermelons ripening indoors?
Likely culprits: insufficient light (upgrade to full-spectrum LED grow lights), low humidity (use a humidifier or pebble tray), or nutrient deficiencies (switch to a balanced fertilizer like 5-5-5). Check for male flowers only—hand-pollinate with a paintbrush if needed. If fruits stay small, thin to 1–2 per plant to avoid overcrowding.
Wrapping up and next steps
Growing watermelons indoors isn’t just possible—it’s a rewarding way to enjoy fresh, homegrown sweetness even in small spaces! With the right containers, lighting, and a little patience, you’ll soon be savoring juicy slices straight from your balcony.
Start small, stay consistent, and don’t hesitate to experiment—your first harvest could be just around the corner! 🌱
Ready to dive in? Pick your favorite variety, gather your supplies, and get planting today—your future watermelon feast awaits! Recap the essentials here before you begin.