
Pests
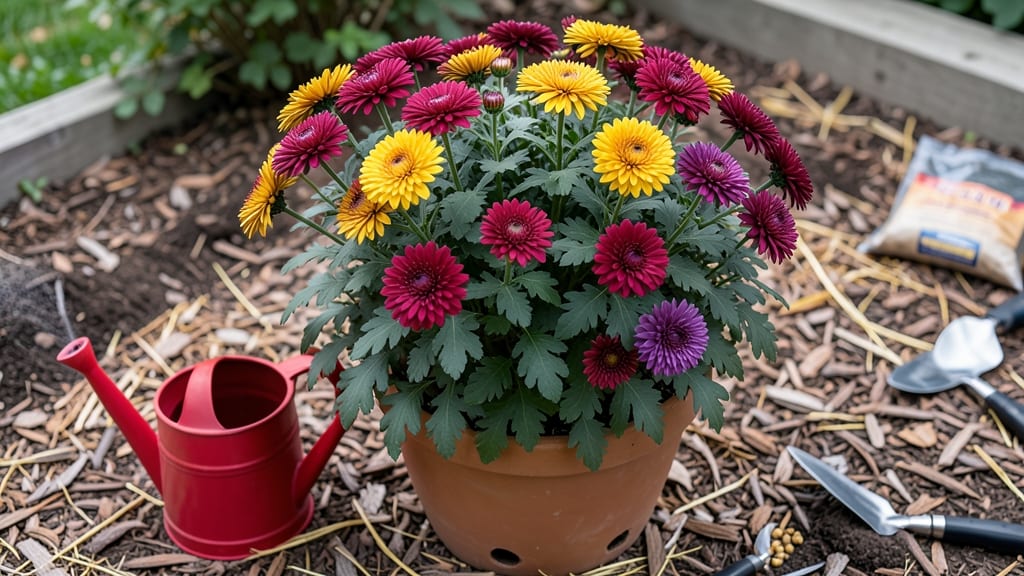
How to keep mums alive through winter feels impossible—until you know the secret. 🌿 My first year, I lost every plant to frost, but now I’ve perfected a foolproof method that guarantees next year’s blooms. The key? A little prep work before the first freeze. Start by choosing the hardiest varieties like ‘Autumn Joy’ or ‘Mammoth,’ then prune back stems to 2–3 inches in early fall. This encourages strong root growth before winter. For in-ground plants, mound soil or mulch 4–6 inches thick around the base—this protects roots from temperature swings. Container mums need extra care: move them to a sheltered spot or wrap pots in bubble wrap. By spring, you’ll see fresh green shoots pushing through the mulch, ready to burst into color. The blooms arrive earlier, last longer, and the plants stay healthier—no more sad, wilted mums by Thanksgiving. Even in Zone 5, this method works like magic. Here’s the game-changer: Don’t cut back until late winter. Those brown stems hide next year’s buds. Wait until you see new growth before trimming again. Trust me, your garden will thank you.
📚 In This Guide
- What you need
- Instructions
- Tips and common mistakes
- Wrapping up and next steps
What you need
- ● Mature mum plants: Healthy, disease-free mums with at least 3–5 stems (the more roots, the better!)
- ● Containers: 5–10 gallon pots (1–2 per plant) with drainage holes
- ● OR a cold frame or unheated garage space (if overwintering outdoors)
- ● Potting mix: Well-draining, sterile mix (e.g., 60% peat moss, 30% perlite, 10% compost)
- ● Pruning shears: Sharp, clean shears (sterilize with rubbing alcohol)
- ○ Rooting hormone (optional but helpful): Powder or gel to boost root growth
- ● Mulch: Straw, pine needles, or shredded leaves (3–4 inches thick for insulation)
- ● Watering can or hose: With a gentle spray nozzle for hydration
- ● Frost cloth or burlap: To protect plants from harsh winter winds
- ● Slow-release fertilizer: Low-nitrogen (e.g., 5-10-10) to feed plants gradually
- ● Grow lights: LED bulbs (12–14 hours/day) if overwintering indoors
- ● Thermometer: To monitor temperatures (ideal range: 35–50°F)
- ● Insecticidal soap: For pest prevention (e.g., spider mites or aphids)
- ● Plant labels: To track varieties and planting dates
Step-by-Step instructions for overwintering mums
Here’s how I’ve kept my mums thriving through winter for years—no fancy tools, just smart care.
🌿 Step 1: Cut Back and Prepare for Dormancy
Once your mums finish blooming in fall, cut the stems back by about half their height using clean, sharp shears. This removes spent flowers and redirects energy to root growth for next year. I like to do this after the first hard frost when the plant has already slowed down naturally.
Leave the foliage intact—those leaves are working hard to store nutrients in the roots. If you see any yellow or diseased leaves, snip them off immediately to prevent rot. The goal is to keep the plant looking tidy but alive until winter.
⏰ Step 2: Mulch Heavily for Insulation
Spread a 3-4 inch thick layer of mulch around the base of the plant, leaving about 2 inches of space between the mulch and the stems. I use shredded leaves or straw because they break down slowly and provide long-term insulation. Avoid using fresh grass clippings—they mat down and can suffocate the roots.
This mulch blanket protects the roots from freezing temperatures and prevents soil heaving (when soil expands and contracts, damaging roots). Check the mulch in late winter—if it’s broken down too much, add a fresh layer to maintain that 3-inch thickness.
☀️ Step 3: Protect from Harsh Conditions
If you’re in a zone with extreme cold (below 10°F) or heavy snow, cover the mums with a breathable fabric like burlap or frost cloth. Secure it loosely with stakes or bricks so it doesn’t smother the plant. I’ve seen people use plastic, but that traps moisture and can rot the stems.
Remove the cover on warm days to let the plant breathe, especially if temperatures rise above 40°F. Watch for signs of stress like wilting or mold—if you see either, uncover the plant immediately. The key is balance: protect but don’t suffocate.
🌱 Step 4: Prune and Fertilize in Early Spring
As soon as the ground thaws in early spring, trim back any dead or broken stems to just above the soil line. This gives the plant a clean start and encourages new growth. I also add a balanced, slow-release fertilizer (like 10-10-10) around the base to replenish nutrients lost over winter.
Wait until you see new shoots emerging before fertilizing—this tells you the plant is actively growing again. Once you spot those first green tips, water lightly to encourage root development. Avoid heavy watering until the soil warms up, or you’ll risk rot.
✂️ Step 5: Monitor and Adjust Through the Season
Keep an eye on your mums throughout spring and summer. If they look leggy or sparse, they might need a little more sunlight or a trim to encourage bushier growth. I pinch back the tips of new growth in early summer to promote fuller blooms next year.
By late summer, you’ll start seeing flower buds forming. This is your cue to reduce watering slightly—too much moisture now can dilute the color and size of the blooms. A little stress actually makes them stronger for next winter!
Tips & tricks for perfect overwintering mums
Took me a while to figure these out, so here goes—these tricks will help your mums bounce back stronger next spring.
Timing Secret: The first hard frost is your cue to cut back stems in Step 1, not before. I learned this the hard way after pruning too early and seeing new growth get nipped by late-season cold snaps. Wait until temperatures dip consistently below freezing at night—this tells you the plant has already slowed down naturally.
Mulch Depth Matters: That 3-4 inch layer in Step 2 isn't just for looks—it's about creating an insulating blanket. I once used only 2 inches and noticed more frost damage to the roots. Check your mulch in late winter: if it's broken down below 3 inches, add more immediately. Shredded leaves work best because they break down slowly and won't suffocate the plant like grass clippings.
Covering Strategy: When temperatures drop below 10°F in Step 3, use breathable fabrics like burlap or frost cloth—not plastic. I tried plastic one winter and came back to moldy stems. The fabric lets moisture escape while still protecting from wind and cold. Remember to remove it when temperatures rise above 40°F to prevent overheating.
Spring Pruning Insight: In Step 4, you'll know it's time to fertilize when you see those first green tips emerging. Before that, the plant is still in dormancy. I use a 10-10-10 fertilizer because it's balanced and won't burn tender new growth. Light watering after fertilizing helps activate the nutrients without overwhelming the roots.
Pro Tips for Keep Mums
- Took me a while to figure these out, so here goes—these tricks will help your mums bounce back stronger next spring.
- Timing Secret: The first hard frost is your cue to cut back stems in Step 1, not before. I learned this the hard way ...
- Mulch Depth Matters: That 3-4 inch layer in Step 2 isn't just for looks—it's about creating an insulating blanket. I ...
Frequently asked questions
Got questions about keeping your mums (chrysanthemums) thriving through winter? You’re not alone! Here are answers to the most common concerns—so you can prep like a pro and enjoy next year’s blooms.
When should I start preparing mums for winter?
Start now—ideally in late summer to early fall (August–September in most climates). This gives roots time to harden off before frost hits. If you wait until winter, your plants may not survive. Pro tip: Stop fertilizing 4–6 weeks before the first frost to encourage dormancy.
Can I just leave mums in the ground over winter?
Maybe! If you live in USDA Zones 7–9 (mild winters), mums can often survive in the ground with 3–4 inches of mulch (straw, leaves, or pine needles). In colder zones (below Zone 7), dig up and store them indoors or in a garage—they’ll thank you with bigger blooms next spring!
How do I store mums indoors for winter?
After cutting back foliage (leave 2–3 inches of stems), pot them in lightweight soil, let dry slightly, and store in a cool (35–45°F), dark, and humid place (like a basement or garage). Check monthly for rot or pests. Pro tip: Group pots together to retain moisture and avoid drafts.
What if my mums get moldy or rot in storage?
Uh-oh—this usually means too much moisture or poor airflow. If you spot mold or mushy stems, act fast:
- Remove affected plants immediately.
- Repot healthy ones in fresh, dry potting mix.
- Store in a dry, well-ventilated spot (like a screened porch).
Can I divide mums in fall to overwinter them better?
Yes! Dividing in early fall (before frost) can rejuvenate older plants. Dig up clumps, separate into 3–5 inch sections with roots and shoots, and replant or store as usual. Pro tip: Discard woody, overcrowded centers—they won’t revive. Focus on healthy, leafy sections!
What’s the easiest way to protect mums outside in freezing temps?
For in-ground mums in cold zones, try this:
Step
Action
1.
Cut back foliage to 2–3 inches.
2.
Mound 12+ inches of mulch (straw or leaves) over roots.
3.
Add a cloche or frost blanket for extra protection.
Wrapping up and next steps
Keeping your mums thriving through winter is all about preparation, protection, and patience—but the effort pays off with vibrant blooms next spring! 🌸 By choosing cold-hardy varieties, providing cozy mulch, and shielding them from harsh winds, you’ve set the stage for success.
Remember, a little extra care now means big rewards later.
Ready to put your new skills to the test? Start small—try protecting just a few mums this season, then expand as you gain confidence. Happy gardening, and may your winter be as resilient as your plants! 🌱❄️