
Fertilization
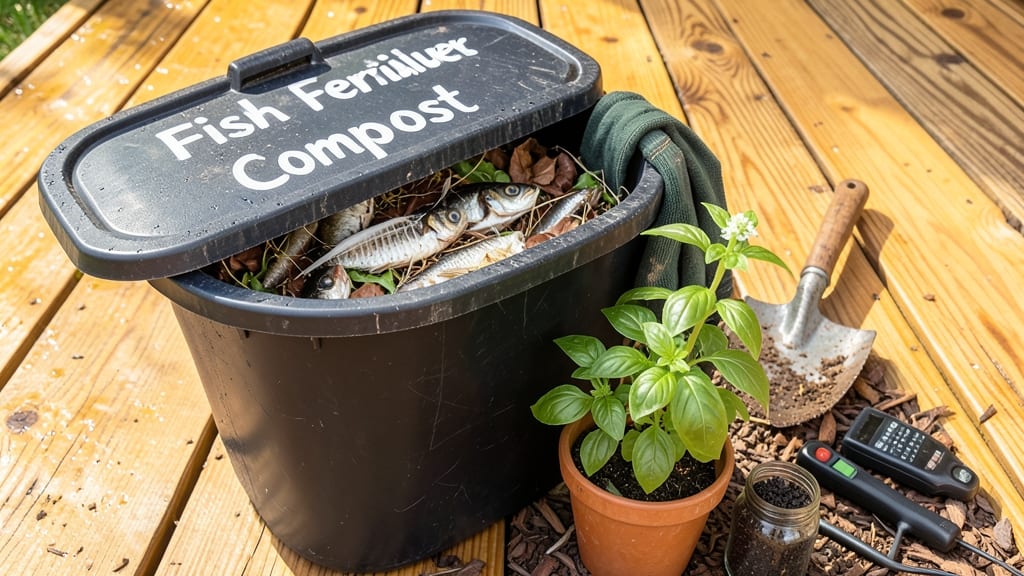
How to make fish fertilizer for plants from your kitchen scraps could turn them into liquid gold for your garden. 🌱 Making fish fertilizer from scraps like heads, bones, and frames is one of those gardening secrets that delivers fast, nutrient-packed results without breaking the bank. The process is simpler than you’d think—no fancy equipment, just a bucket, some water, and patience. Within 2-4 weeks, you’ll have a rich, ammonia-laced brew packed with nitrogen, phosphorus, and trace minerals that plants crave. It’s like a supercharged version of compost tea, but way more potent. Your plants will reward you with darker green leaves, stronger stems, and bigger blooms—all while reducing kitchen waste. Plus, it’s a game-changer for houseplants, vegetables, and even struggling lawns that need a quick boost. Fair warning: the smell is strong (like a fish market on a hot day), but the payoff is worth it. Let’s get started with the foolproof method!
📚 In This Guide
- What you need
- Instructions
- Tips and common mistakes
- Wrapping up and next steps
What you need
- ● Fish scraps or waste: 1–2 lbs (fresh or frozen fish heads, bones, or whole small fish—avoid oily fish like salmon for best results).
- ● Water: 5 gallons (use rainwater or dechlorinated tap water for optimal plant health).
- ● Container: A 5-gallon bucket with a lid (plastic or food-grade metal). Pro tip: Drill small holes in the lid to reduce pressure buildup!
- ○ Breaking tool: Hammer, mallet, or rolling pin to crush bones/heads (optional but speeds up decomposition).
- ● Epsom salt: 1 tbsp (boosts magnesium and sulfur for lush foliage).
- ● Molasses or sugar: 1 tbsp (feeds beneficial microbes to speed up fermentation).
- ● Wood ash: ½ cup (adds potassium and raises pH slightly—use sparingly!).
- ● Stirring stick or spoon: For mixing (a clean wooden dowel works great!).
- ● Fine mesh strainer or cheesecloth: For filtering the liquid before use.
- ● Work in a well-ventilated area—fish decomposition can get stinky! 👃
- ● Avoid using fish treated with antibiotics or chemicals (stick to organic sources).
- ● Wear gloves if you’re squeamish—fish bones can be sharp! 🧤
Step-by-Step instructions for making fish fertilizer for plants
Here's how I turn simple scraps into a nutrient powerhouse for your garden—no experience needed.
🐟 Step 1: Collect and Prepare Fish Scraps
Start with clean, fresh fish scraps—heads, bones, and trimmings work best. Rinse them thoroughly to remove salt, oil, or seasonings that can harm plants. I like to use a colander to drain excess water completely before proceeding. The fresher the scraps, the more nutrients they'll release, so don't let them sit for more than a day.
Break larger pieces into smaller chunks—about the size of a quarter—to speed up decomposition. This ensures even distribution of nutrients in your final fertilizer. Place the scraps in a large container or bucket with a tight-fitting lid. If you're using a sealed container, poke a few small holes in the lid to allow gases to escape during fermentation.
💧 Step 2: Add Water and Ferment
Fill the container with enough water to fully submerge the fish scraps, leaving about an inch of space at the top. Stir gently to mix everything, then seal the container tightly. Place it in a cool, dark spot—like a basement or garage—where the temperature stays between 60-70°F. This range prevents foul odors and speeds up fermentation without risking bacterial growth.
Stir the mixture daily for the first 3-5 days to help break down the scraps and distribute nutrients. You'll notice bubbles forming and a slight foamy layer on top—that's normal and indicates fermentation is working. After a week, the mixture should smell earthy and slightly fishy, not rotten. If it smells strongly unpleasant, it's too hot or needs more air circulation.
☀️ Step 3: Strain and Dilute for Plant Use
Once the mixture has fermented for 2-3 weeks and developed a dark, liquid consistency, it's ready to strain. Line a large colander or sieve with cheesecloth or a fine mesh bag, then pour the mixture through it into a clean bucket. The liquid is your fertilizer, while the solids can be composted or buried directly in the soil for extra nutrients.
Dilute the liquid fertilizer with water—1 part fertilizer to 10 parts water—before applying to plants. Undiluted fertilizer can burn roots, so always test a small area first. Store the diluted mixture in a sealed container in the fridge for up to 2 weeks or use it immediately. I apply it every 4-6 weeks during the growing season, and my plants thrive with deep green leaves and strong stems.
Tips & tricks for perfect fish fertilizer
Real talk: Turning fish scraps into garden gold is easier than you think—once you know these game-changing tricks.
Scrap Size Matters: In Step 1, when breaking fish scraps into quarter-sized pieces, consistency is key. Smaller chunks decompose faster and release nutrients more evenly. I use a sharp knife to chop through bones—this prevents clumping and speeds up the fermentation process in Step 2. If you're working with particularly tough bones, a small food processor can save time, but avoid pulverizing everything into a paste.
Fermentation Temperature Control: The 60-70°F range in Step 2 is your sweet spot for safe fermentation. Too hot and you risk bacterial growth; too cold and the process slows dramatically. If your space runs warmer, move the container to a cooler spot or even the fridge for part of the day. A simple kitchen thermometer helps monitor conditions—this prevents foul odors and ensures you're working with beneficial microbes rather than harmful ones.
Straining Strategy: For Step 3, don't rush the straining process. The solids contain valuable nutrients too! I like to press the strained solids through the cheesecloth with a spoon to extract every last drop of liquid. These solids can be buried directly in garden beds or added to compost piles. The more thorough you are with straining, the more nutrient-rich your final fertilizer will be.
Storage Wisdom: When storing your diluted fertilizer (1 part to 10 parts water), always use a sealed container with minimal air space. I add a layer of olive oil on top before sealing—the oil creates a barrier that prevents oxidation and keeps the fertilizer fresh longer. This simple trick extends the shelf life from 2 weeks to nearly 3 weeks in the fridge, giving you more time to use it before it loses potency.
Pro Tips for Make Fish Fertilizer For Plants
- Real talk: Turning fish scraps into garden gold is easier than you think—once you know these game-changing tricks.
- Scrap Size Matters: In Step 1, when breaking fish scraps into quarter-sized pieces, consistency is key. Smaller chunk...
- Fermentation Temperature Control: The 60-70°F range in Step 2 is your sweet spot for safe fermentation. Too hot and y...
Frequently asked questions
Got questions about turning fish scraps into plant power? You’re not alone!
Here are answers to the most common queries about making fish fertilizer—so you can grow like a pro.
How long does homemade fish fertilizer last before it goes bad?
Fresh fish fertilizer should be used within 3–5 days when stored in a sealed container in the fridge. For longer storage (up to 2 weeks), freeze it in ice cube trays or small containers. Never use if it smells rotten or has mold—discard and start fresh!
When is the best time to apply fish fertilizer to plants?
Apply diluted fish fertilizer early in the morning or late afternoon to avoid burning leaves in direct sunlight. For vegetables and flowers, use it every 2–4 weeks during growing season. Avoid applying before heavy rain—it’ll wash away nutrients!
Can I use fish fertilizer on all types of plants, or are there exceptions?
Fish fertilizer is great for most plants, but avoid using it on acid-loving plants (like blueberries or azaleas) if your soil is already acidic. Citrus trees and cacti may also react poorly—always dilute heavily (1:20 ratio) for sensitive plants.
What’s the best alternative if I don’t have fish scraps?
No fish? Try these DIY fertilizer swaps:
- Banana peels (potassium-rich)
- Eggshells (calcium boost)
- Coffee grounds (nitrogen for acid-lovers)
- Compost tea (balanced nutrients)
Why does my fish fertilizer smell terrible even after diluting?
A strong odor usually means fermentation is incomplete or the mixture is too concentrated. Fix it by:
- Adding more water (1:10 ratio) to dilute.
- Stirring in a tablespoon of baking soda to neutralize smells.
- Using it immediately—don’t store it if it’s overpowering.
Wrapping up and next steps
Making your own fish fertilizer is a game-changer for gardeners—it’s eco-friendly, cost-effective, and packed with nutrients to supercharge your plants! 🌱 With just a few simple steps, you’ve unlocked a natural way to boost growth without harsh chemicals.
Whether you’re a seasoned gardener or just starting out, this DIY solution proves that sustainability and success go hand in hand.
Now that you’re ready to brew your liquid gold, take the next step: experiment with different fish sources (like sardines or anchovies) or even mix it with compost tea for extra potency. Your plants—and the planet—will thank you! 🌟