
How To
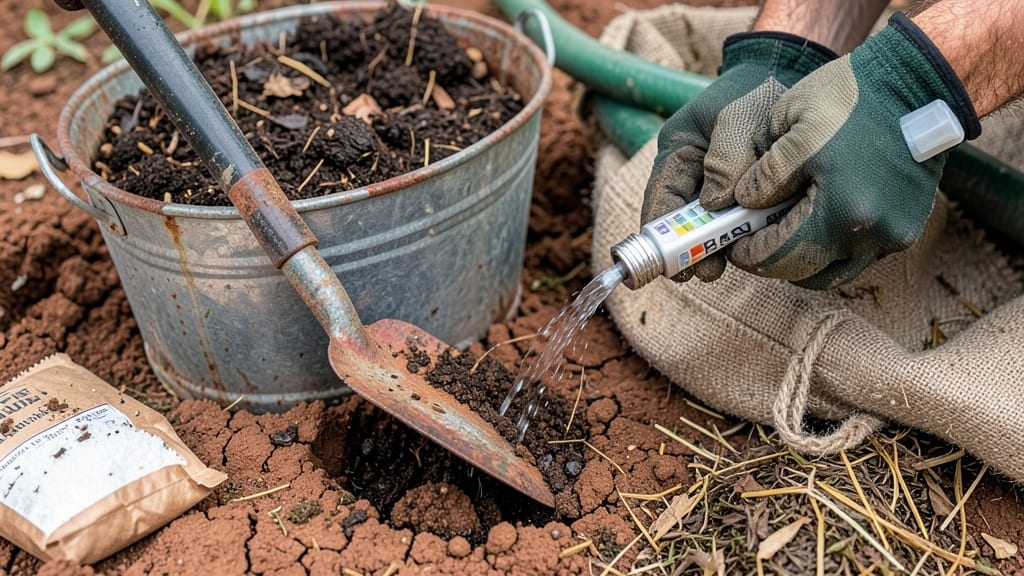
How to amend clay soil for vegetable gardening—it’s the game-changer you’ve been missing. 🌱 After years of struggling with plants that barely broke through the dense ground, I finally cracked the code: a mix of organic matter and strategic amendments that transforms stubborn clay into a garden powerhouse. The secret isn’t just throwing compost on top—it’s working the amendments deep into the soil where roots need them most. Start with 2-3 inches of compost mixed into the top 6-8 inches of soil, then add coarse sand or perlite for drainage if your clay feels like concrete when dry. Gypsum helps break up the compacted layers over time, while worm castings add microbial life that keeps nutrients available. By the end of one growing season, you’ll see roots spreading freely, water draining instead of pooling, and vegetables thriving like they’re in a premium raised bed. The texture changes from heavy to crumbly, and weeds struggle to take hold—because healthy soil crowds them out. This method works for any vegetable garden, from backyard plots to container growing. The key is patience: soil improvement is a long game, but the payoff in harvests makes every shovelful worth it.
📚 In This Guide
- What you need
- Instructions
- Tips and common mistakes
- Wrapping up and next steps
What you need
- ● Organic Matter: Compost (2–4 inches per square foot of garden bed) – homemade or store-bought
- ● Well-rotted manure (horse, cow, or chicken, 1–2 inches per square foot) – avoid fresh manure
- ○ Leaf mold or peat moss (1–2 inches) – optional but improves drainage
- ● Soil Amendments: Garden lime (if soil pH is test first! Use ~1 lb per 100 sq ft
- ● Gypsum (calcium sulfate) – 10–20 lbs per 100 sq ft to break up clay
- ● Perlite or vermiculite (1–2 cups per 5-gallon bucket of amended soil) – boosts aeration
- ● Tools: Garden fork or broadfork (for deep tilling, 12–18 inches)
- ● Shovel or spade (for mixing amendments)
- ● Rake (to level and smooth soil)
- ● Gloves (heavy-duty for protection)
- ○ Soil pH test kit (optional but highly recommended)
- ● Test first! Use a soil test kit to check pH and nutrient levels before amending.
- ● Work in layers: Spread amendments in thin layers (1–2 inches) and mix deeply.
- ● Timing matters: Amend soil 3–4 weeks before planting for best results.
- ● Mulch it! Add 2–3 inches of mulch (straw or wood chips) after amending to retain moisture.
Step-by-Step instructions for amending clay soil
Here’s how to transform dense, waterlogged clay into fertile, root-friendly soil for your vegetable garden.
🌱 Step 1: Test and Assess Your Clay Soil
Start by squeezing a handful of moist soil—if it forms a hard, tight ball that cracks when dry, you’ve got classic clay. Dig a 6-inch deep hole and observe how water drains: if it pools instead of seeping, your soil needs serious loosening. Walk your garden bed and note where compaction feels worst—usually along footpaths or where equipment has passed.
Use a soil test kit (available at garden centers) to check pH—clay often runs acidic, which stunts root growth. Aim for a neutral 6.0-7.0 range. If your test shows poor fertility, you’ll need extra organic matter to feed both soil microbes and plants. This step ensures you target the right amendments for your specific clay type.
🪴 Step 2: Break Up Compaction with Heavy-Duty Tools
Rent a rototiller or use a broadfork to shatter the dense clay layers. Work the soil to a depth of 12 inches, breaking up clods into 2-3 inch chunks—no need for powder-fine texture. I like to pass the broadfork through in a grid pattern, lifting and dropping it to fracture the soil naturally without pulverizing it.
For small areas, a sturdy garden fork works just as well. Avoid walking on freshly tilled clay—it re-compacts instantly. If you notice the soil feels sticky and gummy, it’s still too wet to work. Wait until it’s damp but crumbly when squeezed (like a damp sponge). This prevents creating a muddy mess that bakes into a new hardpan when dry.
💧 Step 3: Blend in Organic Amendments Deeply
Spread a 2-3 inch layer of compost or well-rotted manure over the tilled area, then mix it in with your hands or a fork. For heavy clay, I add 1 part coarse sand (like builder’s sand) to 3 parts soil to improve drainage without suffocating roots. Work the amendments down to your tilled depth—don’t just top-dress, or you’ll create a fertile crust while the subsoil stays compacted.
For long-term structure, incorporate 1/2 cup of gypsum per square foot if your soil tests high in sodium. Gypsum won’t change pH but helps clay particles fluff apart. Water the amended soil until it’s evenly moist, then let it settle for 24 hours before planting. This gives the organic matter time to start breaking down and improving soil structure.
☀️ Step 4: Establish Cover Crops or Mulch Heavily
Plant a cover crop like winter rye or clover to protect the amended soil from re-compacting during rain. The roots will further loosen the clay as they grow. If you’re planting vegetables immediately, lay down a 3-4 inch layer of straw mulch, leaving a 2-inch gap around plant stems to prevent rot.
Water deeply once a week to encourage microbial activity in the fresh amendments. You’ll notice the soil starts to feel lighter and more crumbly after 4-6 weeks—this is your signal that the amendments are working. Avoid tilling again until next season, as repeated disturbance can undo your progress. This step prevents your hard work from washing away or baking back into impermeable layers.
⏰ Step 5: Monitor and Maintain Year-Round
After planting, check soil moisture weekly by sticking your finger 2 inches deep. Clay holds moisture longer than sandy soil, so water only when the top layer feels dry. Add a 1-inch layer of compost annually to replenish organic matter lost during the growing season. I like to top-dress with compost in early spring and again after harvest.
If you notice water pooling or plants wilting despite regular watering, your soil may still need more sand or organic matter. Adjust by adding 1/2 inch of compost and 1/4 inch of sand to the surface, then lightly scratch it in. Over time, your clay will transform from a brick-like barrier into a crumbly, nutrient-rich growing medium—exactly what vegetable roots crave for maximum yield.
Tips & tricks for perfect soil amendments
Transforming heavy clay into garden gold takes patience and the right approach—here's how to avoid common pitfalls and maximize your efforts.
Timing is Everything: In Step 2, when breaking up compaction, work the soil only when it's damp like a sponge—not sticky or dry. I test by squeezing a handful: if it holds shape but crumbles easily, you're good to go. Working clay when too wet creates mud, and when too dry makes it nearly impossible to break up. This is the single most important factor for successful tilling.
Layering Matters: When adding amendments in Step 3, don't just sprinkle compost on top—mix it down to your 12-inch tilled depth. I like to create horizontal layers: spread compost first, then sand, then compost again, working each layer down. This creates a gradual transition that prevents water pooling while improving drainage throughout the entire root zone.
Sand Selection Tip: Not all sand works equally! Use coarse builder's sand (the kind used for concrete) rather than fine beach sand. The larger particles improve drainage without filling the pore spaces that roots need. I've found that 1 part sand to 3 parts soil creates the perfect balance—too much sand can actually make clay more compacted by reducing organic matter.
Mulch Depth Strategy: That 3-4 inch layer of straw mulch in Step 4 isn't just for looks—it's a living blanket. The 2-inch gap around stems prevents rot while allowing water to penetrate. I've noticed that maintaining this mulch layer through the growing season keeps soil temperatures stable, which is especially important for heat-sensitive vegetables like lettuce and peas.
Pro Tips for Amend Clay Soil For Vegetable Gardening
- Transforming heavy clay into garden gold takes patience and the right approach—here's how to avoid common pitfalls an...
- Timing is Everything: In Step 2, when breaking up compaction, work the soil only when it's damp like a sponge—not sti...
- Layering Matters: When adding amendments in Step 3, don't just sprinkle compost on top—mix it down to your 12-inch ti...
Frequently asked questions
about amending clay soil for your vegetable garden—here’s what you need to know!How often should I amend clay soil for vegetables?
Amend clay soil once a year (fall or early spring) for long-term improvement. For new gardens, work in amendments every 2–3 years or after heavy rainfall compacts the soil. Test soil pH annually—clay holds nutrients well but may need lime or sulfur adjustments.
Can I grow vegetables in clay soil without amending it?
Yes, but with challenges! Clay soil drains poorly, leading to root rot or stunted growth. Heavy feeders like tomatoes or peppers may struggle. Quick fix: Raise beds with compost or use containers. For in-ground plots, focus on deep soil loosening and organic matter to improve drainage over time.
What’s the cheapest way to amend clay soil for a vegetable garden?
Skip expensive soil mixes—use free/low-cost alternatives:
- Compost: Kitchen scraps, yard waste, or free municipal compost.
- Leaf mold: Shred leaves in a bin for 6–12 months.
- Sawdust/shavings: Aged hardwood (avoid cedar or treated wood).
- Manure: Cow, horse, or chicken (aged 6+ months to avoid burning plants).
Mix these into the top 6–12 inches of soil for best results.
Why does my clay soil still feel compacted after amending?
Clay stays sticky when too wet or not worked deeply enough. Try this:
- Amend only when soil is crumbly (squeeze a handful—it should hold shape but not be slick).
- Use a broadfork to loosen subsoil 12+ inches deep.
- Add coarse sand or perlite (10–20%) to improve drainage.
- Walk on beds only when dry—foot traffic compacts clay fast!
Patience is key—clay improves gradually!
Are there vegetables that tolerate clay soil without heavy amending?
Yes! These thrive in moderately amended clay:
- Leafy greens (kale, spinach, Swiss chard)
- Root crops (carrots—short varieties, beets, turnips)
- Brassicas (cabbage, broccoli, Brussels sprouts)
- Peas and beans (fix nitrogen, improving soil over time)
Avoid delicate roots (radishes, celery) or waterlogged-lovers (lettuce) unless drainage is fixed.
Wrapping up and next steps
Amending clay soil for your vegetable garden is all about patience, preparation, and persistence—but the results are oh-so-worth it! 🌱 By adding organic matter, improving drainage, and avoiding heavy compaction, you’ll create the perfect foundation for robust veggie growth.
Remember, every garden evolves over time, so celebrate small wins and keep experimenting.
Ready to roll up your sleeves? Start small—pick one bed or section to transform first, then expand as you gain confidence. Happy gardening, and may your tomatoes and carrots thrive like never before! 🥕🍅