
Landscaping
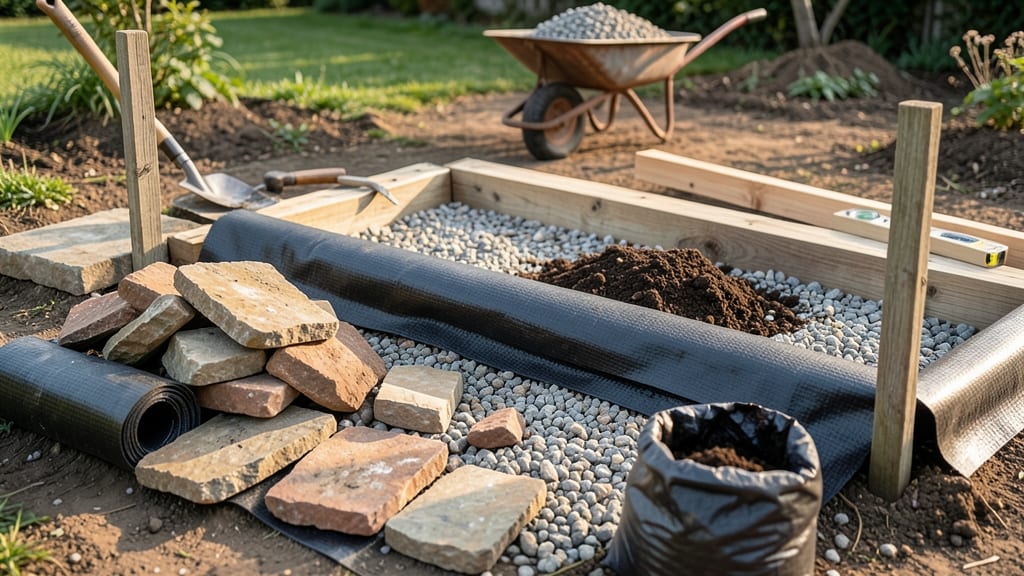
How to build a stone raised bed outlasts wood and plastic by decades. 🌱 I’ve built mine from fieldstone and pavers, and they’ve held up through rain, freeze-thaw cycles, and years of gardening—no rot, no warping, just solid structure. The key? Choosing the right stones, layering them properly, and keeping drainage in mind from day one.
You’ll need basic tools—a shovel, level, rubber mallet, and some landscape fabric—but the real secret is in the stones. Flagstone or pavers work best; they’re flat enough to stack neatly and sturdy enough to resist shifting.
Start with a base layer of larger stones for stability, then build upward with smaller ones for a clean edge. The height? 12-18 inches is ideal for most plants, keeping roots cozy while improving drainage.
What you end up with is a garden bed that stays put, warms up faster in spring, and gives you better control over soil quality. No more compacted earth or weeds creeping in from the edges—just a neat, functional space where your plants can thrive.
Plus, the aesthetic? Timeless. Stone beds age like fine wine, developing character over time.
Works for veggie patches, flower borders, or even a cozy herb garden by the door. The best part? Once built, these beds last for generations—unlike flimsy alternatives that crumble after a few seasons. Let’s get started on yours!
📚 In This Guide
- What you need
- Instructions
- Tips and common mistakes
- Wrapping up and next steps
What you need
- ● Flat, durable stones: 20–50 stones (depending on bed size), preferably flagstone, bluestone, or fieldstone (12–18" long, 2–4" thick). Aim for 3–4 stones per linear foot for stability.
- ● Landscape fabric: 1 roll (10–15 ft wide) to prevent weed growth and stabilize soil.
- ● Gravel or crushed stone: 1–2 bags (50 lb each) for drainage and base layer.
- ● Soil mix: 1–2 cubic yards of high-quality topsoil or compost blend (check local suppliers for "raised bed mix").
- ● Tools: Wheelbarrow (for hauling materials)
- ● Shovel & spade (for digging and leveling)
- ● Rubber mallet (to tap stones into place)
- ● Level (2–4 ft, to ensure even height)
- ● String & stakes (for marking bed layout)
- ● Work gloves & safety glasses (protection is key!)
- ● Edging materials: Metal edging strips or plastic landscape edging to contain stones and soil.
- ● Adhesive or mortar: For securing uneven stones (use sparingly—stones should fit snugly without glue).
- ● Water-permeable membrane: Underlayment for extra weed barrier (e.g., landscape fabric with slit edges).
- ● Decorative capstones: Smooth stones for a polished finish on top edges.
Step-by-step instructions for building stone raised beds
Here's how I build stone raised beds that stay sturdy for years—no rot, no shifting, just solid garden edges.
🪴 Step 1: Choose Your Location and Clear the Ground
Pick a spot with 6+ hours of sunlight and easy access to water. I always mark the bed outline with landscape fabric stakes—this prevents weeds from creeping up later. Clear all grass, rocks, and debris within the marked area using a shovel or sod cutter. The flatter the ground, the easier the stones will sit level.
Dig out the top 4-6 inches of soil inside your marked outline and set it aside. You'll use this later to fill your bed. If the area slopes, create a slight trench along the outer edge to help contain the stones. I like to keep my beds 4 feet wide max—any wider makes reaching the center difficult.
🪴 Step 2: Lay the Base Layer for Stability
Start with a 2-3 inch layer of compacted gravel> in the trench you dug. This prevents soil from spilling out and gives your stones something solid to rest on. Use a hand tamper or plate compactor to press it down firmly. For extra stability, I add a layer of landscape fabric over the gravel—this blocks weeds while letting water drain.
Now arrange your largest, flattest stones> along the outer edge of your bed. These become the foundation layer. I like to stagger them like brickwork, with each stone overlapping the one below by at least 3-4 inches. This creates a natural interlock that won't shift over time. Leave gaps of 1-2 inches> between stones for smaller fillers later.
🪴 Step 3: Build the Bed Walls in Layers
Begin stacking stones in 3-4 layers, using progressively smaller stones as you go up. The first layer should be the widest—about 12-18 inches> at the base. Each subsequent layer can taper inward by 2-3 inches> to create a gentle slope. I always check for level every 2 layers> using a 4-foot level or by eye—uneven walls make water pool in spots.
For extra strength, I weave in landscape pins> (U-shaped metal stakes) every 2 feet> through the stone layers. These keep the walls from spreading outward over time. Fill any large gaps with smaller stones or broken pieces—every inch of space should be packed to prevent soil from leaking out.
☀️ Step 4: Fill and Prepare the Bed
Once your walls are complete, add a 4-6 inch layer of cardboard> inside the bed to smother weeds. Then fill with a mix of your saved topsoil and 2-3 inches of compost. I like to add a handful of slow-release fertilizer here for a nutrient boost. Water everything lightly to settle the soil before adding more layers.
Top with another 6-8 inches of soil>, mixing in a bit of sand if your native soil is heavy clay. The final layer should be loose enough to plant into but firm enough to support roots. I always leave a 1-2 inch gap> between the soil and the top of the stones to prevent erosion during watering.
💧 Step 5: Finish and Protect the Edges
Top the bed with edging stones> if desired—these can be flat slabs or even larger rocks placed on their sides. I like to leave a ½ inch gap> between the top stones and the soil to allow for seasonal settling. For extra durability, I apply a thin layer of concrete sealant> to the outer stone surfaces (optional but worth it in high-traffic areas).
Water the bed thoroughly after filling to help the soil settle. Then, let it sit for 1-2 weeks> before planting. This gives any shifting stones time to settle, and the cardboard underneath will fully decompose. You'll know it's ready when the soil feels crumbly and the stones no longer wobble when pressed.
Tips & tricks for building stone raised beds
Here's what I've learned after building these beds for over a decade—tricks that'll save you time, money, and frustration.
Stone Selection: Don't overlook irregularly shaped stones—they interlock better than perfect slabs. Look for flat rocks with at least one side measuring 8-12 inches wide for your foundation. I've found that river rocks and field stones work best because their rough texture creates natural friction between layers. Avoid smooth, round stones—they won't stack securely.
Leveling Secret: Use a 4-foot level or even a long piece of lumber to check your stone layers every 2 layers. I've ruined perfectly good beds by skipping this step—uneven walls cause water to pool in spots, leading to soggy soil and root rot. For extra precision, place your level on the stones themselves rather than the ground, which might be uneven.
Cardboard Hack: The 4-6 inch cardboard layer isn't just for weed suppression—it also helps prevent soil from leaking out between stones. I like to use corrugated cardboard because it's sturdy and breaks down quickly. Avoid glossy paper or plastic—these won't decompose properly and can block water drainage. Tear it into strips that fit snugly between your stones before adding soil.
Soil Mix Strategy: For that final 6-8 inch soil layer, I mix my saved topsoil with about 20% sand if my native soil is heavy clay. This improves drainage while still retaining moisture. You can also add a handful of perlite or vermiculite (about 1 cup per square foot) to lighten the mix further. The key is creating a soil that's loose enough for roots but firm enough to support plants.
Pro Tips for Build A Stone Raised Bed
- Here's what I've learned after building these beds for over a decade—tricks that'll save you time, money, and frustra...
- Stone Selection: Don't overlook irregularly shaped stones—they interlock better than perfect slabs. Look for flat roc...
- Leveling Secret: Use a 4-foot level or even a long piece of lumber to check your stone layers every 2 layers. I've ru...
Frequently asked questions
What’s the best time of year to build a stone raised bed?
The ideal time is early spring or fall—when soil is workable but not frozen. Building in summer avoids extreme heat, while winter risks frost heaving. If you’re in a mild climate, year-round construction is possible, but avoid rainy seasons to prevent waterlogged soil.
Can I use just any stones for my raised bed?
Not all stones work! Use uncoated, natural stones like flagstone, granite, or river rocks (2–4 inches thick). Avoid limestone or sandstone (they break down) and painted or treated stones (toxic to plants). Field stones or pavers are great budget-friendly options—just ensure they’re flat and stable.
How much does a stone raised bed cost compared to wood or metal?
Costs vary, but stone beds are long-term investments:
- Materials: $50–$200+ (depending on stone type and size).
- Labor: $100–$500+ if hiring pros (DIY saves money!).
- Lifespan: 20+ years (vs. 5–10 for wood, 10–15 for metal).
What’s the easiest way to level uneven ground for a stone bed?
Start by marking the bed’s outline with stakes. Dig out 4–6 inches of soil within the marked area, then:
- Use a shovel or mattock to break up roots/clods.
- Add a 2-inch layer of sand or gravel for drainage.
- Compact the base with a plate compactor or tamper.
Will stone raised beds drain too fast and dry out plants?
Yes, but it’s fixable! Stone beds drain faster than soil**, so:
Water deeply 1–2x/week in dry climates.
Wrapping up and next steps
Building a stone raised bed is a rewarding project that adds beauty, durability, and functionality to your garden—and it’s easier than you think! With the right materials, a little planning, and patience, you’ll create a long-lasting feature that enhances your outdoor space for years to come. 🌱✨
Now that you’re ready to roll up your sleeves, why not start small? Pick a section of your yard, gather your tools, and begin with a single bed. Once you’ve mastered the basics, you can expand your stone garden oasis—one stunning bed at a time! Ready to dive in?