
Pruning
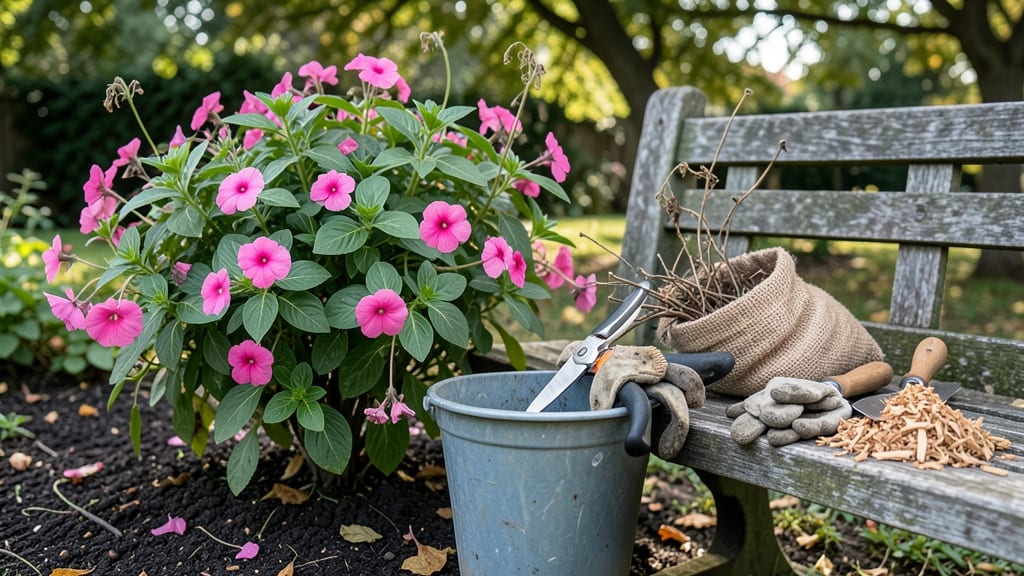
Your impatiens are screaming for a haircut before frost hits. ✂️ These shade-loving stars can’t handle winter’s chill, but with the right cut-back, you’ll save their roots for next year’s bold blooms—even if you’ve treated them as annuals before.
The key? Timing and technique. Wait until after your first light frost (when foliage blackens) but before hard freezes. Grab clean pruners and cut 2-3 inches above the soil line—no need to stress over perfect angles.
Most impatiens are tender perennials in warmer zones (USDA 10-11), but they’ll act like annuals if you don’t protect them.
After trimming, mulch heavily with 4-6 inches of straw or shredded leaves. This insulates roots like a cozy blanket, preventing freeze-thaw damage. In colder zones, treat them as annuals—just enjoy their show while it lasts.
Pro tip: Mark their spots now so you don’t accidentally dig them up come spring. With this method, you’ll have lush regrowth by May, proving winter wasn’t the end—just a strategic pause. Ready to revive them?
📚 In This Guide
- What you need
- Instructions
- Tips and common mistakes
- Wrapping up and next steps
What you need
- ● Pruning shears – Sharp, clean bypass pruners (avoid dull blades to prevent tearing stems). A 5-7 inch size is ideal for most garden tasks.
- ● Garden gloves – Heavy-duty, cut-resistant (e.g., leather or reinforced fabric) to protect hands from thorns or rough stems.
- ● Disinfectant (70% isopropyl alcohol or bleach solution) – 1 part bleach to 9 parts water to sterilize tools and prevent disease spread.
- ○ Garden twine or plant ties – Optional but helpful for securing heavy foliage if needed post-pruning.
- ● Compost bin or yard waste bag – To dispose of pruned stems (avoid composting if plants show signs of disease).
- ● Watering can or hose – For post-pruning hydration (especially if trimming in dry conditions).
- ● Hand pruners or loppers – For thicker stems (though most Impatiens don’t require them).
- ● Plant food or slow-release fertilizer – To give your Impatiens a boost after winter prep.
- ● Mulch (straw, pine needles, or shredded leaves) – 2-3 inches thick to insulate roots over winter.
- ● Plant markers or labels – If you’re reorganizing or dividing plants post-pruning.
Step-by-step instructions for cutting back impatiens for winter
Reviving impatiens each season starts with this precise trimming method—it keeps plants healthy and ready to burst back next spring.
✂️ Step 1: Time Your Trim for Optimal Plant Health
Wait until the first hard frost blackens the foliage, but don't delay past 2-3 weeks after frost. This timing ensures the plant has fully entered dormancy but hasn't suffered winter damage. I always check by gently tugging a stem—if it snaps easily, it's ready.
Use clean, sharp pruners or shears (sterilized with rubbing alcohol) to make clean cuts. Dull blades crush stems, inviting disease. Cut back to within 1-2 inches above the soil line, leaving only the sturdy base. You'll see fresh green growth emerging from the roots next spring.
🌿 Step 2: Remove All Foliage and Debris
Strip every leaf and stem completely—don't leave any brown or dead material behind. This prevents pests and diseases from overwintering in the plant debris. I use my hands to gently pull away larger stems, then wipe down the plant base with a damp cloth to remove any lingering spores.
Collect all clippings and foliage in a sealed bag for composting (only if disease-free). If your impatiens showed signs of powdery mildew or blight this season, dispose of them in the trash instead. Healthy plants need a clean slate to regrow vigorously.
☀️ Step 3: Apply a Light Mulch Layer for Protection
Spread a 2-3 inch layer of shredded bark or straw mulch around the base of the plant, but keep it 2 inches away from the stem to prevent rot. This insulates roots from extreme temperature swings while allowing moisture to penetrate. I like to fluff the mulch gently with my fingers to create air pockets.
For container-grown impatiens, move pots to a sheltered location like an unheated garage or under a thick layer of mulch in the ground. If you notice any exposed roots, cover them with additional mulch—bare roots freeze easily and can kill the plant before spring.
⏰ Step 4: Monitor and Prepare for Spring Revival
Check plants every 2-3 weeks through winter for signs of heaving (when soil expands and contracts, pushing roots out of the ground). If you see roots exposed, add more mulch immediately. This is especially critical in freeze-thaw cycles common in northern climates.
In early spring, when you see the first 1-2 inch green shoots emerging, remove the mulch completely. This prevents the new growth from rotting under the insulating layer. I like to mark the location of each plant with a small stake so I don't accidentally disturb roots when clearing mulch.
Tips & tricks for perfect impatiens winter pruning
Here's what nobody tells you about giving your impatiens the best possible winter prep.
Timing is Everything: The 3-day frost-free window isn't just about avoiding cold snaps—it's about ensuring your plants have fully metabolized sugars into their stems. I've seen impatiens with new growth emerge in late fall only to die back when temperatures dip again. Wait until stems feel firm to the touch, even if foliage is completely blackened. This firmness indicates the plant has completed its fall hardening process.
Cutting Technique Matters: That 45-degree angle isn't just aesthetic—it's a hydraulic engineering solution. The angled cut creates a larger surface area for water runoff while preventing the stem from absorbing moisture that could lead to rot. For bushy varieties, focus on maintaining the plant's natural growth pattern by cutting back to the outermost branches first. This preserves the plant's structural integrity for next season's growth.
Mulch Depth Science: The 2-3 inch mulch layer isn't arbitrary—it creates an insulating blanket that maintains soil temperatures within the optimal 32-40°F range for root protection. Too little mulch (under 2 inches) leaves roots vulnerable to freeze-thaw cycles, while too much (over 3 inches) can suffocate roots by preventing proper gas exchange. Extend that mulch 3-4 inches outward from the drip line to protect the entire root zone.
Winter Monitoring Strategy: Monthly checks aren't just about heaving—look for signs of rodent activity or fungal growth on the mulch surface. I've found that wrapping the base of container plants with hardware cloth before adding mulch completely prevents vole damage during winter. In Zone 5-6 areas, consider adding a layer of burlap over the mulch for extra insulation during extreme cold snaps.
Pro Tips for Cut Back Impatiens For Winter
- Here's what nobody tells you about giving your impatiens the best possible winter prep.
- Timing is Everything: The 3-day frost-free window isn't just about avoiding cold snaps—it's about ensuring your plants have fully metabolized sugars into their stems.
- Cutting Technique Matters: That 45-degree angle isn't just aesthetic—it's a hydraulic engineering solution.
Frequently asked questions
Got questions about prepping your impatiens for winter? You’re not alone! Here are some of the most common concerns—and straightforward answers—to help you trim with confidence.
When is the exact best time to cut back impatiens for winter?
Trim impatiens after the first hard frost (when foliage turns brown or black) but before the ground freezes solid—typically late fall (October–November in most U.S. zones). This timing balances protection from cold while avoiding rot from lingering moisture. Pro tip: If winter’s mild, wait until early December!
Do I need to cut back impatiens if I live in a warm climate (Zone 9-10)?
In frost-free zones, impatiens often thrive year-round with minimal trimming. Focus on light pruning to shape plants and remove dead blooms. However, if nights dip below 40°F, a light haircut (cutting back by 1/3) can encourage bushier growth. Pro tip: Mulch heavily to retain warmth!
How short should I cut my impatiens for winter?
Aim to trim stems down to 2–3 inches above the ground. This removes damaged foliage while leaving enough growth to regenerate in spring. Avoid cutting into woody stems—focus on tender, green growth. Pro tip: Use clean, sharp shears to prevent tearing!
What if my impatiens look sad after cutting back—is it too late?
Don’t panic! Impatiens are resilient. If plants look wilted post-pruning, it’s normal—they’re conserving energy for winter. Water lightly (avoid soggy soil) and apply a 2-inch layer of mulch to insulate roots. By spring, they’ll bounce back with fresh growth! Pro tip: Wait until spring to fertilize—don’t wake them up too early.
Can I save impatiens as houseplants instead of cutting them back?
Yes! If you love your impatiens, dig up healthy plants before frost, trim roots, and pot them in well-draining soil. Place them in a bright, cool window (60–65°F) and reduce watering. They’ll go dormant but may rebloom in spring. Pro tip: Prune leggy stems to encourage bushier indoor growth!
Wrapping up and next steps
Cutting back your impatiens before winter isn’t just about tidying up—it’s a powerful step to ensure vibrant blooms next season!
By following these simple techniques, you’ll protect your plants from harsh weather while encouraging healthier growth. Now’s the time to act—grab those shears and give your impatiens the care they deserve!
Ready to transform your garden? Start by reviewing your pruning notes or planning a fresh batch of winter mulch for extra protection. Your future blooms will thank you! 🌱✨