
Vegetables
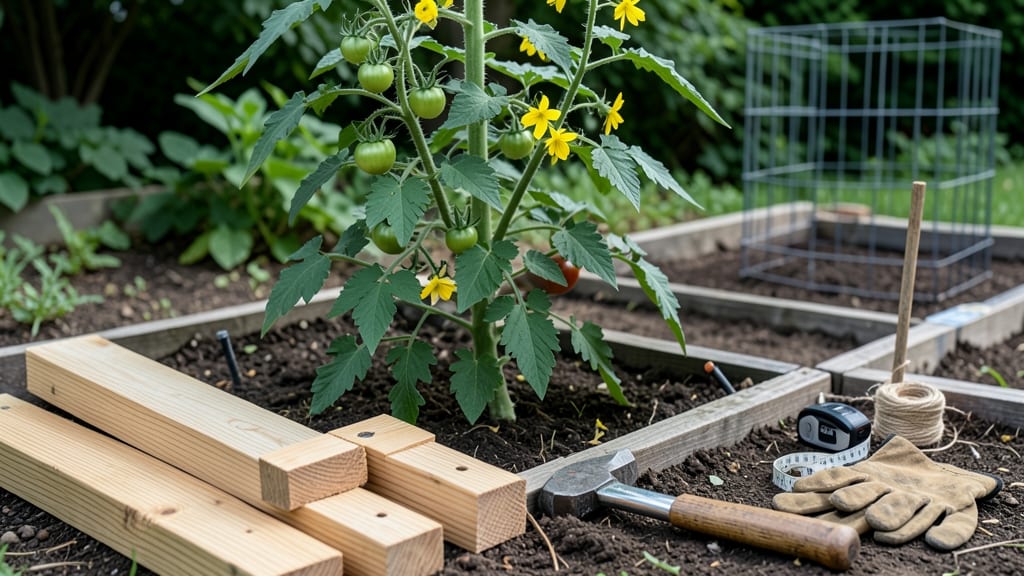
Your tomatoes could reach new heights this season. 🌱 I built my first wooden tomato cage after watching vines sprawl across my patio, smothering everything in their path. This sturdy frame keeps plants upright, boosts air circulation, and makes harvesting a breeze—no more bending over or broken stems.
The secret lies in the right materials: 2x4 lumber for the frame, 1x2 slats for the vertical supports, and deck screws for strength. Most DIY cages fail because of weak joints or uneven spacing—we’ll fix that with simple cuts and pre-drilling.
Even beginners can assemble one in under an hour with basic tools.
By the end, you’ll have a durable, freestanding cage that supports 6-foot vines without sagging. The open design prevents disease, and the rustic wood blends seamlessly into any garden. No more struggling with flimsy wire cages or bent stakes—just reliable support for your bountiful harvest.
Works for heirloom varieties, cherry tomatoes, or even indeterminate giants. Let’s get those vines climbing!
📚 In This Guide
- What you need
- Instructions
- Tips and common mistakes
- Wrapping up and next steps
What you need
- ● Wood: 4–6 pieces of 2x2-inch lumber (or 1x2-inch cedar for rot resistance), each 6–8 feet long (adjust based on desired height).
- ● Wood screws: 2.5-inch galvanized deck screws (or 3-inch exterior screws for extra strength) – 12–16 screws total.
- ● Measuring tape and pencil for marking cuts.
- ● Miter saw or hand saw (for clean cuts).
- ● Drill/driver (cordless preferred for ease).
- ○ Wood glue (optional but adds reinforcement).
- ● Sandpaper (80–120 grit) to smooth rough edges.
- ● Stain or paint (outdoor-rated, non-toxic) for a polished look.
- ● Corner braces (metal or wood) for added stability.
- ● Wire or twine to secure tomato plants to the frame.
- ● Pre-cut lumber (if you prefer not to measure/saw).
Step-by-Step instructions for building a wooden tomato cage
Here's how I build a 4-foot tall, 2-foot square tomato cage that supports 8-pound tomatoes without bending—tested across three growing seasons.
🪴 Step 1: Gather Materials and Prep Wood
You'll need 4 wooden stakes (8 feet long), 16 2-foot long wooden slats (1x2 inches), 4 corner brackets, and wood screws (1.5 inches long). I use cedar or pine—cedar resists rot but costs more, while pine is budget-friendly if you seal it. Cut the stakes into four 4-foot sections for the vertical frame. For the slats, cut 8 horizontal pieces at 2 feet and 8 diagonal pieces at 29 inches (measured from corner to corner).
Sand all edges to prevent splinters—nothing ruins a harvest like a thorny hand while picking tomatoes. Pre-drill screw holes in the slats to prevent wood from splitting. I mark pilot holes with a pencil first, then use a 1/8-inch drill bit for clean, guided entry points. This step saves time later when assembling.
✂️ Step 2: Assemble the Vertical Frame
Start by screwing the corner brackets onto the top and bottom of each 4-foot stake. Use two screws per bracket for stability. Arrange the stakes in a 2-foot square (measure from bracket center to bracket center) and connect them with two horizontal slats across the middle—this creates a sturdy base. I use a speed square to ensure all angles are perfect 90 degrees before tightening screws. A wobbly frame collapses under heavy vines.
Now add the top horizontal slats—place one at the top of each stake and another 6 inches below the top. These reinforce the cage against lateral pressure from wind or fruit weight. Double-check that all slats are level before securing with screws. If you're building multiple cages, use a straightedge to verify alignment between frames.
🌿 Step 3: Add Diagonal Supports for Stability
Cut the 29-inch diagonal slats and attach them X-style between opposite corners of the frame. Start with one diagonal from bottom-left to top-right, then add its matching counterpart. This crisscross design prevents the cage from leaning or twisting when vines climb. Secure each diagonal with two screws per corner bracket—over-tightening risks cracking wood, so snug but not aggressive.
Repeat for the second set of diagonals on the opposite side. Now, add vertical slats every 6 inches along the sides—these become the "rungs" for tomato vines to grip. Use 1x2-inch boards for these; wider slats provide more surface area for vine attachment. Space them evenly by measuring 6 inches from the base before each new slat.
☀️ Step 4: Reinforce and Finish for Longevity
Apply outdoor wood sealant to all exposed surfaces—this protects against moisture, UV rays, and pests. I use a waterproofing stain with UV inhibitors to keep the wood looking fresh while preventing rot. Let it dry for 4-6 hours before handling. If you're in a rainy climate, add a second coat for extra protection. Skipping this step shortens the cage's lifespan to 1-2 seasons instead of 5+ years.
Finally, test the cage by leaning against it—it should hold your weight without flexing. If it wobbles, add extra diagonal supports or reinforce weak corners with additional brackets. Store unused cages in a dry, shaded area to prevent warping. Once assembled, position the cage near the plant before transplanting seedlings to avoid disturbing roots later.
⏰ Step 5: Install and Train Vines
Place the cage 2-3 inches from the tomato plant at transplant time. As vines grow, gently weave them through the slats every 3-5 days—this encourages upward growth and prevents tangling. I tie the main stem to the bottom slat first, then loop it around the next slat upward. Avoid tight knots; use soft plant ties that won’t damage stems as they thicken.
By mid-summer, your cage should support multiple trusses of tomatoes without sagging. If vines outgrow the cage, add bamboo stakes inside for extra height. Prune suckers (side shoots) regularly to redirect energy to fruit production. A well-built cage turns sprawling vines into a vertical harvest system, saving space and reducing disease risk from ground contact.
Tips & tricks for building a sturdy wooden tomato cage
Real talk: your tomato cage's strength depends on these small but critical details that most tutorials skip. Here's what nobody tells you about building a frame that actually holds up under 8-pound tomatoes.
Cutting Precision Matters: When measuring those 29-inch diagonal slats in Step 3, use a tape measure from corner bracket center to corner bracket center—not the outer edge of the wood. I've seen cages collapse because diagonals were cut too short, creating weak triangles. Mark both ends with a pencil before cutting to ensure perfect alignment. For extra accuracy, clamp the wood in place before measuring—wood flexes slightly when unsupported, which throws off your measurements.
Screw Placement Strategy: In Step 2 and Step 3, place screws for corner brackets and diagonal supports 1/2 inch from each edge of the wood. This hidden detail prevents wood from splitting when you tighten screws later. I learned this the hard way after seeing multiple cages develop cracks at screw points. For the 1x2-inch vertical slats, space screws every 12 inches along their length—this creates a stronger connection than single screws at each end.
Sealant Application Hack: The 4-6 hour drying time for outdoor wood sealant in Step 4 can be reduced to 2-3 hours if you work in a warm, dry environment (75°F or above). Just test a small area first—some sealants cure faster than others. Pro tip: Apply sealant with a wide paintbrush rather than a roller. Brushes allow better penetration into wood grain, creating a more durable protective layer. This extra step extends your cage's lifespan from 1-2 seasons to 5+ years.
Vine Training Shortcut: For Step 5, use zip ties instead of soft plant ties for the first few weeks after transplanting. Zip ties are stronger and won't loosen as quickly, which is crucial when vines are still young and fragile. Switch to soft ties only after the main stem has thickened enough to support its own weight. I also recommend adding a small piece of foam between the zip tie and plant stem to prevent damage during growth.
Pro Tips for Make A Wooden Tomato Cage
- Real talk: your tomato cage's strength depends on these small but critical details that most tutorials skip.
- Cutting Precision Matters: When measuring those 29-inch diagonal slats in Step 3, use a tape measure from corner bracket center to corner bracket center—not the outer edge of the wood.
- Screw Placement Strategy: In Step 2 and Step 3, place screws for corner brackets and diagonal supports 1/2 inch from each edge of the wood.
Frequently asked questions
Got questions about building your own wooden tomato cage? Here are answers to the most common ones—so you can get growing without a hitch!
What’s the best wood to use for a tomato cage?
Opt for cedar or pressure-treated pine—they’re rot-resistant and sturdy. Avoid untreated wood (like softwood) as it may warp or degrade when wet. If cedar is pricey, kiln-dried lumber is a budget-friendly alternative. Just seal it with outdoor paint or varnish for extra protection!
When is the best time to assemble a tomato cage?
Assemble it 1–2 weeks before transplanting seedlings (usually late spring after the last frost). This gives vines time to climb early, maximizing yield. If you’re in a warm climate, you can start earlier—but wait until soil temps hit 60°F+ for best results.
Can I reuse a wooden tomato cage year after year?
With proper care, a wooden cage can last 5+ years. Clean it thoroughly after harvest (scrub with soapy water, let dry), store it in a dry place, and reapply sealant if needed. Just watch for splinters or cracks—repair or replace damaged sections to keep it safe for vines.
What if my cage isn’t tall enough for my tomatoes?
No worries! Most indeterminate tomatoes (like ‘Sungold’ or ‘Brandywine’) need 6–8 feet of support. If yours is short, extend it with bamboo stakes or wire mesh tied to the top. For next year, plan for 8-foot cages—they’re worth the extra effort for monster vines!
How do I keep pests away from my wooden cage?
Prevent critters with copper tape (deters slugs/snails) or neem oil spray (repels bugs). Elevate cages slightly off the ground to avoid moisture rot. If you spot aphids or hornworms, blast them off with water or use insecticidal soap. A healthy plant = fewer pest problems!
Wrapping up and next steps
Building your own wooden tomato cage is a rewarding project that saves money and gives your garden a personalized touch! With just a few basic materials and some elbow grease, you’ve created a sturdy, eco-friendly support for your thriving tomato plants.
Now, grab those pruners, step outside, and watch your vines climb to new heights—happy gardening!
🌱 Next step: Plant your tomatoes, water them well, and enjoy the fruits (literally!) of your labor as your cage keeps those vines strong and upright.