
Propagation
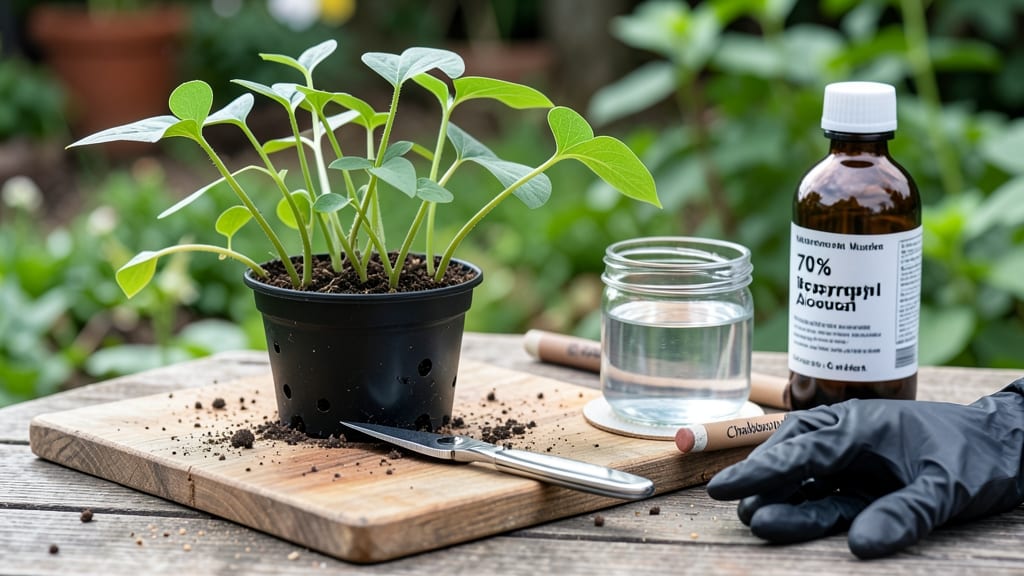
Cutting sweet potato slips is where the magic of propagation begins. ✂️ I’ve turned store-bought sweet potatoes into a jungle of green slips—here’s how to do it without the stress or botched stems that waste your time.
The secret lies in sharp pruners, a clean workspace, and knowing exactly where to slice. You’ll need slips with 3-4 inches of stem (roots attached are optional but helpful), and the right cutting angle makes all the difference—no jagged edges that slow healing.
Most beginners overlook this step, but it’s what keeps slips thriving until planting.
After cutting, let the stems callus over for 1-2 hours—this prevents rot when you’re ready to plant. The slips will grow roots quickly in water or soil, and within 6-8 weeks, you’ll have strong, ready-to-transplant plants.
No more buying expensive tubers; you’ll have your own stress-free, homegrown slips for years.
Works for any sweet potato variety, and the process scales from a single jar to a full propagation system. Here’s how to avoid the most common mistakes—like overwatering or cutting too close to the roots—and set yourself up for a bountiful harvest.
📚 In This Guide
- What you need
- Instructions
- Tips and common mistakes
- Wrapping up and next steps
What you need
- ● Sweet potatoes: 3–5 medium-sized, organic sweet potatoes (avoid store-bought varieties treated to prevent sprouting). Look for ones with visible "eyes" (sprout nodes).
- ● Water: Room-temperature water (about 1–2 gallons) for the jar method, or a shallow tray for the tray method.
- ● Clear glass jar or container: A 16–32 oz mason jar (or any transparent vessel with a narrow neck) for the jar method.
- ● Sharp knife or pruning shears: A clean, sterilized knife or shears (rubbing alcohol works great for disinfecting).
- ○ Newspaper or paper towels: For drying cuttings (optional but helpful to prevent rot).
- ○ Rooting hormone (optional): A small bottle of rooting powder or gel (like Clonex or Dyna-Gro) to speed up root growth.
- ● Small pots or seed trays: 3–4 inch pots or a seed tray with drainage holes (for transplanting slips later).
- ● Potting mix: A well-draining, sterile seed-starting mix (avoid garden soil—it’s too dense!).
- ○ Spray bottle: For misting cuttings to keep them hydrated (optional but useful in dry climates).
- ● Grow lights or a sunny windowsill (if starting indoors before the last frost).
- ● Plastic wrap or a humidity dome (to create a mini greenhouse for cuttings).
- ● Labels and markers (to track sweet potato varieties if experimenting with multiple types).
- ● Hydrogen peroxide (3%) for sterilizing tools and preventing bacterial infections.
Step-by-Step instructions for cutting sweet potato slips
Here’s how I turn store-bought sweet potatoes into healthy slips—no green thumb required.
🌱 Step 1: Select and Prepare the Sweet Potatoes
Choose firm, disease-free sweet potatoes with at least one eye (the tiny dimple). Avoid soft or sprouted ones—they won’t root well. Rinse the tubers under cool water to remove dirt, then let them dry completely. I like to work with 4-6 sweet potatoes to get a good batch of slips.
Place them in a shallow tray (like a plastic storage container) with 1-2 inches of water covering the bottom. The water should just touch the base of the tubers, not submerge them. Set the tray in a bright spot with indirect light—a kitchen windowsill works perfectly. Keep the water level consistent; I top it off every 2-3 days to prevent rot.
🌿 Step 2: Wait for Slips to Emerge
Within 2-3 weeks, you’ll see tiny green shoots (slips) sprouting from the eyes. These slips are your future plants! Once they reach 3-4 inches tall, it’s time to cut them. Don’t rush—waiting ensures stronger stems. I check daily after 14 days to catch the perfect moment.
Here’s the trick: cut the slips at a 45-degree angle, about ½ inch below the base of the stem. This gives the slip a larger surface area to absorb moisture and encourages faster rooting. Use a sharp knife or clean scissors to avoid crushing the stem. Set the slips aside in a cool, shaded spot for 24 hours to let the cut heal slightly.
✂️ Step 3: Root the Slips in Water
Fill a small jar or glass with room-temperature water, leaving 1-2 inches of stem submerged. I use a clear container so I can watch the roots grow—it’s oddly satisfying! Place the slips in the water, ensuring only the lower half of the stem touches the liquid. Keep them in bright, indirect light (no direct sun yet) and change the water every 3-4 days to prevent bacterial growth.
After 7-10 days, you’ll see tiny white roots forming at the base. Once the roots reach 1-2 inches long, your slips are ready to transplant. I like to wait until the roots fill the jar slightly—this means they’re strong enough to handle soil. Avoid overcrowding; each slip needs its own space to thrive.
🪴 Step 4: Transplant Slips to Soil
Fill small pots (3-4 inches deep) with well-draining potting mix. Gently remove the slips from the water, being careful not to damage the roots. Plant each slip 1 inch deep, firming the soil around the base to secure it. Water lightly to settle the mix, but don’t drown the roots—soggy soil causes rot.
Place the pots in a warm, sunny spot (like a greenhouse or sunny windowsill) and keep the soil moist but not soggy. After 2 weeks, the slips will show new growth, signaling they’ve taken root. This is when you can gradually introduce them to outdoor conditions if you’re hardening them off for a garden bed.
☀️ Step 5: Maintain and Harvest
Once your slips are established, they’ll grow into full sweet potato plants. Keep them in full sun (6+ hours daily) and water 1-2 times weekly, depending on your climate. I fertilize lightly with a balanced organic fertilizer every 4-6 weeks to encourage healthy vines and tubers.
When the vines turn yellow and die back (usually 3-4 months after transplanting), it’s time to harvest. Dig carefully—sweet potatoes are sensitive to rough handling. Cure them in a warm (80°F), humid space for 10 days to develop their sweetness. Store in a cool, dark place for long-term enjoyment.
Tips & tricks for perfect sweet potato slips
Here's what nobody tells you about growing slips from sweet potatoes—these tricks will make all the difference between wimpy stems and thriving plants.
Selection Tip: Pay close attention to the eyes on your sweet potatoes—they're the key to success. Look for plump, firm tubers with multiple eyes spaced evenly around the surface. I've found that sweet potatoes with 3-5 well-formed eyes produce the most slips. Avoid potatoes with deep scars or cracks, as these can lead to rot during the sprouting process. Pro tip: Store your selected sweet potatoes in a cool, dark place for 1-2 weeks before starting to encourage more active eyes.
Light Management: That bright, indirect light in Step 1 is non-negotiable for healthy slips. While a kitchen windowsill works perfectly, I've discovered that placing your tray near a north-facing window provides the most consistent light without risking scorching. If you're using artificial grow lights, position them about 6-12 inches above the tray and keep them on for 12-14 hours daily. The goal is to encourage strong, sturdy stems—not leggy, weak shoots that'll break when you try to cut them.
Cutting Technique: The 45-degree angle cut in Step 2 might seem like a small detail, but it makes a world of difference. Using a sharp knife (I prefer a ceramic knife for this task) and making clean cuts prevents crushing the stem tissues. Here's my secret: After cutting, immediately place the slips in a glass of room-temperature water for 5 minutes. This helps prevent air bubbles from forming in the stem, which can block water uptake during rooting. Don't skip this step—it dramatically improves survival rates!
Rooting Environment: When it comes time to root your slips in water, resist the urge to use tap water straight from the faucet. The chlorine can inhibit root growth. Instead, fill your jar with room-temperature water and let it sit uncovered for 24 hours before using it. I've also found that adding a tiny pinch of cinnamon (just a sprinkle) to the water helps prevent bacterial growth without harming the slips. Change that water every 3-4 days as instructed, but watch for any signs of cloudiness—this is your cue to refresh it immediately.
Pro Tips for Cut Sweet Potato Slips
- Here's what nobody tells you about growing slips from sweet potatoes—these tricks will make all the difference betwee...
- Selection Tip: Pay close attention to the eyes on your sweet potatoes—they're the key to success. Look for plump, fir...
- Light Management: That bright, indirect light in Step 1 is non-negotiable for healthy slips. While a kitchen windowsi...
Frequently asked questions
Got questions about cutting sweet potato slips? You’re not alone! Here are some of the most common concerns—plus quick, no-fuss answers to keep your propagation game strong.
Can I use regular sweet potatoes from the grocery store?
Not ideal! Store-bought sweet potatoes are often treated to prevent sprouting. Instead, opt for organic or farm-fresh sweet potatoes with visible "eyes" (buds). Look for firm, unblemished tubers—these are your best bet for healthy slips!
How long does it take for slips to grow?
Patience pays off! With proper warmth (70–80°F) and humidity, you’ll see tiny green sprouts in 2–4 weeks. Once they’re 4–6 inches tall (about 6–8 weeks), they’re ready to cut and root. Speed it up with a heat mat or grow light!
What’s the best way to cut slips without hurting the mother tuber?
Use a sharp, sterilized knife (or pruners) to make clean cuts at a 45-degree angle, about 1/4-inch above the node. Dip the cut end in rooting hormone (optional but helpful) and avoid damaging the main tuber’s skin. Pro tip: Work quickly to minimize stress!
Can I propagate sweet potatoes without slips?
Try these slip-free methods:
- Water propagation: Place whole sweet potatoes in water (leave 1–2 inches submerged) until roots and sprouts emerge.
- Direct planting: Cut tubers into 2-inch chunks with 2+ eyes, let them callus for 1–2 days, then plant in soil.
- Tissue culture: For advanced gardeners, lab-grown slips ensure disease-free starts.
Why are my slips turning yellow or mushy?
This usually signals rot or overwatering. Check for:
- Too much moisture (keep soil damp, not soggy).
- Poor airflow (space slips 2–3 inches apart).
- Fungal issues (sterilize tools and use perlite in soil).
Do sweet potato slips need sunlight right away?
Not yet! Keep slips in indirect light (like a bright windowsill) for the first week to avoid stress. Once rooted, gradually introduce 6+ hours of sunlight daily. Too much light too soon can scorch tender leaves—go slow!
Wrapping up and next steps
Cutting sweet potato slips is a rewarding way to grow your own lush, vibrant plants with minimal effort!
By following these simple steps—from selecting healthy tubers to nurturing your slips—you’ll soon enjoy a thriving garden full of delicious harvests. Remember, patience and care are key! Now that you’re ready, why not share your newfound skills with friends or expand your garden by propagating more slips? Happy growing! 🌱✨