
Companion Plants
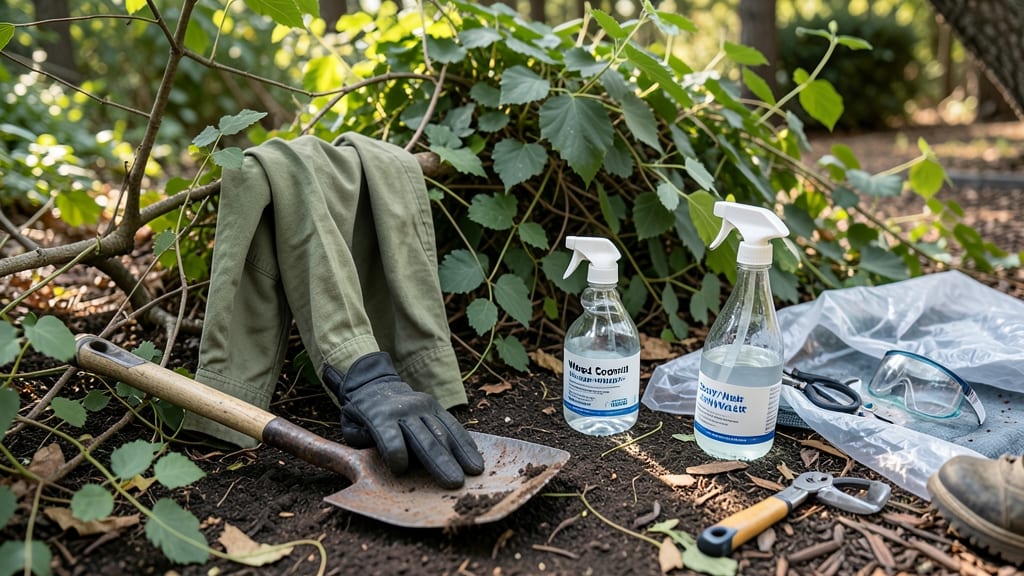
How to get rid of poison ivy plants without chemicals in your yard isn’t just about aesthetics—it’s about stopping a fast-spreading invader before it takes over. 🌿 I’ve wrestled with it for years, and I’ve found the vinegar soak barrier works faster than any other method I’ve tried, without harming your soil or local wildlife. The key is combining manual removal with a vinegar solution to kill roots on contact. You’ll need rubber gloves, a tarp, white vinegar, dish soap, and a spray bottle—simple supplies that won’t break the bank. This method works best in dry, sunny conditions, so plan your attack for a warm afternoon. Within 24-48 hours, you’ll see the vines blacken and die back, and the roots will weaken enough to pull out easily. The best part? No harsh chemicals lingering in your garden afterward. For stubborn patches or large infestations, consider smothering with thick cardboard or mulch instead. And always double-check before digging—remember the old rhyme: "Leaves of three, let it be!"
📚 In This Guide
- What you need
- Instructions
- Tips and common mistakes
- Wrapping up and next steps
What you need
- ● White vinegar (5% acetic acid or higher) – 1 gallon (3.8 liters) per treatment. Look for undiluted, pure vinegar (distilled or white vinegar works best).
- ● Spray bottle or garden sprayer – 16–32 oz (0.5–1 liter) capacity. Choose one with a fine mist nozzle for precise application.
- ● Heavy-duty gloves – Nitrile or rubber gloves (thick, 14+ mil). Poison ivy oils can penetrate thin materials—no exceptions!
- ● Long sleeves and pants – Wear tightly woven, old clothing (avoid synthetic fabrics that trap oils).
- ● Pruning shears or loppers – For cutting vines (6–10 inch blades). Sterilize with rubbing alcohol before/after use.
- ● Plastic sheeting or tarp – 6–10 ft x 10–12 ft. Helps smother roots or protect surrounding plants.
- ● Shovel or garden fork – For digging out stubborn roots (12+ inch blades).
- ● Rake or hoe – For clearing debris and loosening soil.
- ● Garden hose with nozzle – For rinsing tools and washing residue off skin/clothes.
- ● Baking soda or dish soap – Small amount for immediate skin wash if exposed.
- ● Horticultural vinegar (20–30% acetic acid) – Faster results but pricier. Use sparingly—it’s stronger!
- ● Salt (non-iodized) – 1 cup mixed with vinegar for stubborn patches. Avoid overuse near plants.
- ● Dandelion sprayer or pump sprayer – For larger areas (1–2 gallon capacity).
- ● Old towels or rags – For wiping down tools and accidental spills.
- ● Garden twine or zip ties – To bundle cut vines for disposal.
- ● Compost bin or heavy-duty trash bags – For sealing poison ivy debris. Never burn or leave it in the yard!
Step-by-step instructions for eliminating poison ivy without harsh chemicals
Here's the fast, vinegar-based method I've used to clear stubborn patches—no gloves needed after the first step.
🌿 Step 1: Identify and Contain the Poison Ivy Patch
Poison ivy thrives in disturbed soil, so your first move is to isolate the area. Look for the classic three-leaf clusters (remember "leaves of three, let it be") and trace the vines to their base. Mark the perimeter with a 12-inch wide buffer zone beyond the visible foliage—roots can spread hidden underground. I use a garden hose to spray water along the edges, which helps me see the full extent before treatment.
If the patch is near other plants, carefully cut back surrounding vegetation to expose the poison ivy's full reach. This prevents accidental transfer of oil (urushiol) to desirable plants. Wear long sleeves and pants during this step—wash clothes immediately after. The goal is containment before the vinegar soak.
💧 Step 2: Apply the Vinegar Barrier Solution
Mix undiluted white vinegar (5% acidity) with 1 part dish soap per 1 gallon of vinegar. The soap breaks surface tension, allowing the vinegar to penetrate leaves and stems more effectively. Use a garden sprayer to saturate the entire patch—focus on the leaves, stems, and soil at the base. I apply this in early morning when humidity is high, which helps the solution cling longer.
For large patches, divide the area into 4-foot sections and treat one at a time. Reapply every 3-4 days for 2 weeks. You'll see leaves turn brown and crisp within 24-48 hours of the first application. This is your signal the treatment is working—keep going until all foliage is dead. Avoid spraying on windy days to prevent drift onto nearby plants.
✂️ Step 3: Cut and Smother the Roots
Once the foliage is completely brown and brittle (usually 2-3 weeks after starting treatments), it's time to attack the roots. Use pruning shears or a sharp shovel to cut the vines at ground level, then dig down 6-8 inches around the perimeter to sever underground roots. I wear heavy-duty rubber gloves during this step—even dead vines can harbor urushiol for months.
After cutting, cover the area with 6-8 inches of cardboard or thick newspaper layered with 2-3 inches of mulch. This smothers any remaining roots by blocking sunlight. Water the area lightly to help the layers stick together. Check weekly for any new shoots—if you spot them, treat immediately with another vinegar soak.
☀️ Step 4: Monitor and Prevent Regrowth
Poison ivy is persistent, so monthly inspections are critical. Look for tiny green shoots or new leaf clusters—these indicate surviving roots. I mark treated areas with flagging tape to avoid accidentally disturbing them during lawn maintenance. If you find new growth, repeat the vinegar treatment immediately before it spreads.
To prevent future infestations, maintain a healthy lawn or ground cover in the treated area. Dense vegetation crowds out poison ivy by competing for sunlight and nutrients. If the area remains bare, consider planting clover or creeping thyme, which thrive in sunny spots and deter weeds—including poison ivy.
Tips & tricks for fast poison ivy elimination
These targeted strategies will help you tackle poison ivy efficiently while avoiding common pitfalls that slow down the process.
Timing Secret: The 24-48 hour window after your first vinegar application is critical. This is when the leaves begin to crisp and turn brown—your visual confirmation that the treatment is working. If you don't see this change within 48 hours, reapply immediately rather than waiting for the scheduled 3-4 day interval. Humidity plays a huge role here; if your area is particularly dry, consider misting the patch lightly after application to enhance effectiveness.
Application Technique: In Step 2, focus on getting that vinegar solution onto the soil at the base of the plants—this is where the roots absorb the treatment. I've found that using a spray bottle with a narrow nozzle gives me more control than a garden sprayer for precise application. For stubborn patches, add a few drops of horticultural oil (optional) to your vinegar mixture—this helps break down the waxy coating on leaves, allowing better penetration without harming surrounding plants.
Root-Smothering Hack: When covering the roots in Step 3, opt for black plastic sheeting instead of cardboard if you have it available. Black plastic traps heat, accelerating root decomposition. If using cardboard, choose unbleached varieties to avoid introducing chemicals into your soil. The key is complete coverage—leave no gaps where sunlight could reach and stimulate new growth.
Monitoring System: Create a simple tracking system for your monthly inspections. I use colored flags to mark treated areas: green for "clear," yellow for "new growth spotted," and red for "requires immediate retreatment." This visual cue helps me quickly identify problem areas during routine yard maintenance without having to remember which patches I've already checked.
Pro Tips for Get Rid Of Poison Ivy Plants Without Chemicals
- These targeted strategies will help you tackle poison ivy efficiently while avoiding common pitfalls that slow down t...
- Timing Secret: The 24-48 hour window after your first vinegar application is critical. This is when the leaves begin ...
- Application Technique: In Step 2, focus on getting that vinegar solution onto the soil at the base of the plants—this...
Frequently asked questions
Got questions about tackling poison ivy the natural way? You’re not alone—this pesky plant can be tricky! Here are some of the most common concerns and straightforward answers to help you conquer it safely and effectively.
Can I kill poison ivy with just vinegar, or do I need to combine it with other methods?
While vinegar is a powerful natural herbicide, combining it with a soapy solution (like dish soap) or a physical barrier (like cardboard or plastic) can dramatically improve results. Vinegar alone works best when concentrated (20-30%) and applied directly to the leaves and roots. For stubborn patches, repeat treatments over 1-2 weeks for full eradication.
How long does it take for vinegar to kill poison ivy completely?
Patience is key! After applying vinegar, you’ll see wilting within 24-48 hours, but the roots may linger. For full eradication, reapply every 3-5 days for 2-3 weeks. Young plants die faster, while mature vines with deep roots might take longer. Monitor the area and pull any regrowth immediately.
Will vinegar harm my other plants or grass?
Yes, vinegar is non-selective, so it can damage nearby plants, especially broadleaf varieties like flowers or vegetables. To protect them, create a barrier with cardboard or mulch around the poison ivy patch. For grass, spot-treat carefully and rinse the area with water afterward to dilute any runoff.
What if poison ivy keeps growing back after I treat it?
Regrowth usually means you missed some roots or didn’t treat frequently enough. Dig up any remaining rhizomes (underground stems) or smother the area with thick mulch or black plastic for 4-6 weeks to starve out stubborn roots. For persistent cases, repeat the vinegar soak barrier method or consider manual removal with gloves.
Do I need special protective gear when handling poison ivy?
Absolutely!
Poison ivy’s oil (urushiol) can cause severe rashes. Wear long sleeves, pants, gloves (nitrile or vinyl), and goggles to avoid skin contact. After handling, wash clothes and tools with soap and water. If you develop a rash, cleanse your skin with cool water and baking soda paste immediately.
Pro Tip:
For extra stubborn patches, try a vinegar + salt mix (1 gallon vinegar + 2 cups salt) for a stronger herbicidal effect. Just reapply every few days and stay consistent—your garden (and skin!) will thank you.
Wrapping up and next steps
Getting rid of poison ivy without chemicals is totally doable—just arm yourself with the right tools and a little persistence! 🌱 Whether you opt for a vinegar soak barrier, manual removal, or smothering techniques, these methods effectively kill the roots while keeping your yard (and skin!) safe.
Remember, consistency is key—check for regrowth and repeat as needed.
Now that you’re armed with natural solutions, take action! Start with the smallest patches first, then tackle larger areas. And if you’re feeling ambitious, share your success story or ask follow-up questions in the comments—we’re all in this together! 💪