
Size
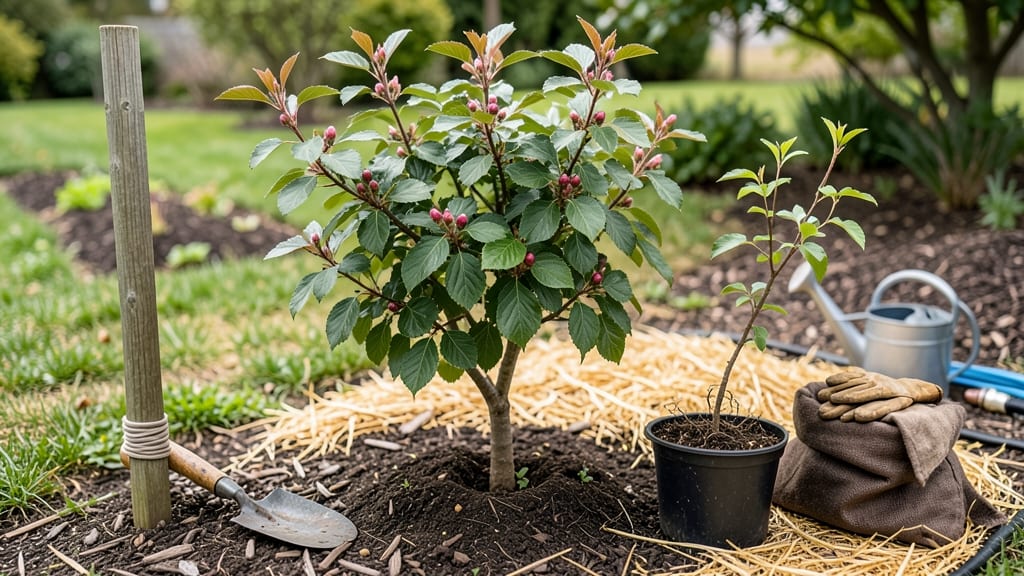
How to grow cherries at home—sweet cherries in your backyard—yes, really. 🌱 I planted my first cherry tree in a container last spring, and now I’m harvesting plump, juicy fruit that tastes nothing like the store-bought kind. The key? Picking the right variety and giving it the care it craves. Most people assume cherry trees need a full yard, but dwarf varieties thrive in 15-gallon containers with proper drainage. You’ll need well-draining soil, full sun (6+ hours daily), and patience—cherry trees take 3-5 years to bear fruit, but the wait is worth it. Prune in late winter to shape the tree and encourage strong growth. By summer, you’ll see clusters of tiny blossoms (and maybe a few hungry birds eyeing them). Hand-pollinate if needed, and protect fruit from cracking with consistent watering. The first harvest? A handful of tart-sweet cherries that disappear faster than you can pick them. Works for patios, balconies, or small yards in zones 5-9. Here’s how to set yours up for success!
📚 In This Guide
- What you need
- Instructions
- Tips and common mistakes
- Wrapping up and next steps
What you need
- ● Cherry Tree Variety: Dwarf or semi-dwarf cherry tree (e.g., Stella®, Lapins®, or Montmorency for sour cherries). Choose self-pollinating varieties if space is limited.
- ● Quantity: 1–2 trees (for cross-pollination if needed).
- ● Container or Planting Spot: For containers: 15–20 gallon pot (minimum) with drainage holes. Use fabric grow bags for flexibility.
- ● For ground planting: Well-draining soil in a sunny, sheltered location (cherries hate wind!).
- ● Soil: Well-draining, slightly acidic soil (pH 6.0–6.5). Mix 50% potting soil with 50% compost or use a balanced fruit-tree mix.
- ● Fertilizer: Slow-release granular fertilizer (e.g., 10-10-10 or 8-3-9) for planting.
- ● Organic options: Composted manure, worm castings, or fish emulsion (apply in early spring).
- ● Mulch: 2–3 inches of organic mulch (wood chips, straw, or pine needles) to retain moisture and regulate soil temp.
- ● Watering Supplies: Drip irrigation system or soaker hose (to avoid wetting leaves).
- ● Watering can with a rose attachment (for containers).
- ● Pruning Tools: Bypass pruners (for clean cuts).
- ● Loppers (for thicker branches).
- ● Sterilizing solution (rubbing alcohol or bleach water) to prevent disease.
- ● Pest Control: Neem oil or insecticidal soap (for aphids, mites).
- ● Bird netting (to protect ripe fruit from birds!).
- ● Tree Support: Stakes or cages for young trees in containers or windy areas.
- ● Soil Moisture Meter: To monitor watering needs (cherries hate soggy roots!).
- ● Pollination Aid: A small paintbrush to hand-pollinate flowers if bees are scarce.
- ● Fruit Thinning Shears: For removing excess cherries to improve size/quality.
- ● Winter Protection: Burlap wraps or tree guards for young trees in cold climates.
Step-by-Step instructions for growing cherries in containers
Here's how I've successfully grown sweet cherry trees in pots—perfect for small spaces and urban gardens.
🌱 Step 1: Choose the Right Cherry Variety and Container
Start with a self-pollinating dwarf cherry tree like 'Stella' or 'Sweetheart'—these produce fruit without needing a second tree. A 5-gallon container is ideal for the first few years, with at least 18 inches of depth to accommodate root growth. I use fabric grow bags because they allow roots to breathe and prevent soil compaction.
Make sure your container has drainage holes—cherry roots rot quickly in soggy soil. Place a 2-inch layer of gravel or broken pottery at the bottom before adding soil. This ensures excess water drains away while keeping the root zone stable. If you're using a decorative pot without holes, add extra gravel and monitor watering closely.
🌿 Step 2: Plant Your Cherry Tree Properly
Fill the container with a well-draining potting mix—I blend equal parts potting soil, perlite, and compost for the best results. Remove the young cherry tree from its nursery pot and loosen the roots gently if they're circling. This encourages outward growth instead of a tangled root ball.
Dig a hole in the center of the container twice as wide as the root ball but no deeper. Place the tree so the graft union (the bump near the base) sits 1-2 inches above the soil line. This prevents water from pooling at the graft and rotting it. Backfill with soil, pressing lightly to remove air pockets, and water deeply until it drains from the bottom.
☀️ Step 3: Provide the Right Light and Care
Cherry trees need full sun—at least 6-8 hours daily. A south-facing spot or a grow light for 12-14 hours per day works best. Without enough light, your tree will grow weak and produce little to no fruit. If you're in a shady area, choose a partial-shade tolerant variety like 'Black Tartarian' (though yields will be smaller).
Water deeply once a week, allowing the top 2 inches of soil to dry out between waterings. Overwatering is the #1 killer of container-grown fruit trees. In summer, I add 1 inch of mulch around the base to retain moisture and keep roots cool. Fertilize every 4-6 weeks with a balanced fruit-tree fertilizer during the growing season, but avoid heavy feeding in fall or winter.
✂️ Step 4: Prune for Shape and Fruit Production
Prune your cherry tree in late winter or early spring before new growth begins. Remove any dead, crossing, or inward-growing branches first—this opens the center of the tree for better airflow and sunlight. I also cut back last year’s growth by 1/3 to encourage bushier growth and more fruiting spurs.
Shape the tree into an open vase form by selecting 3-5 main branches spaced evenly around the trunk. This prevents overcrowding and makes harvesting easier. Avoid heavy pruning in summer—it stresses the tree and can reduce fruit set. After pruning, apply a wound dressing to larger cuts to prevent disease entry.
🍒 Step 5: Protect and Harvest Your Cherries
Container-grown cherries are vulnerable to birds and pests. I cover young trees with bird netting as soon as flowers appear—cherries ripen quickly, and birds will strip the tree in minutes. For pests, I spray with neem oil every 2 weeks during bloom and fruit set to deter aphids, mites, and fruit flies.
Harvest cherries when they easily pull from the stem and have full color (though some varieties stay green). Pick in the early morning when sugars are highest. Container-grown cherries ripen 1-2 weeks earlier than in-ground trees, so keep an eye on them. Store in the fridge for up to 2 weeks or freeze for longer storage.
Tips & tricks for growing cherries in containers
Container cherry growing is totally doable—here's how to avoid the most common pitfalls and maximize your harvest.
Container Size Matters: That 5-gallon container recommendation in Step 1 isn't just a suggestion—it's non-negotiable for the first few years. Cherry roots grow aggressively, and anything smaller will lead to root-bound trees that produce little to no fruit. If you're tempted to go bigger, remember: a 10-gallon container is the absolute maximum for dwarf varieties. The key is depth—those 18 inches give roots room to spread downward where they can access moisture and nutrients.
Light is Non-Negotiable: The 6-8 hours of full sun in Step 3 isn't just ideal—it's critical. If your space only gets 4-5 hours of direct sun, supplement with a grow light for the full 12-14 hours per day. I've seen trees wither when light was compromised, even with perfect watering. Place your container where it gets morning sun (gentler) and afternoon shade if temperatures exceed 90°F—this prevents leaf scorch while maintaining photosynthesis.
Root Care Prevents Rot: That 2-inch gravel layer in Step 1 isn't just for drainage—it's insurance against root rot. Fabric grow bags are my secret weapon because they allow roots to breathe while preventing soil compaction. If you must use a decorative pot without drainage, add an extra 3-4 inches of gravel and monitor watering like a hawk. The goal is to mimic natural soil conditions where excess water drains away quickly. Overwatering is the silent killer of container cherries.
Pruning Pays Off: When you cut back last year's growth by 1/3 in Step 4, you're not just shaping the tree—you're signaling it to produce more fruiting spurs. The open vase form isn't about aesthetics; it's about airflow and sunlight penetration. I mark my pruning cuts with a permanent marker before making them to visualize the final shape. And that wound dressing? It's not optional for cuts larger than a pencil—it prevents disease entry points that could ruin your tree.
Pro Tips for Grow Cherries At Home
- Container cherry growing is totally doable—here's how to avoid the most common pitfalls and maximize your harvest.
- Container Size Matters: That 5-gallon container recommendation in Step 1 isn't just a suggestion—it's non-negotiable ...
- Light is Non-Negotiable: The 6-8 hours of full sun in Step 3 isn't just ideal—it's critical. If your space only gets ...
Frequently asked questions
Got questions about growing cherries at home? You’re not alone—this sweet (but sometimes tricky) fruit has a few quirks! Here are answers to the most common queries to help you avoid pitfalls and savor success.
Can I grow cherry trees in containers if I live in a small space?
Dwarf or semi-dwarf varieties like Stella® or Black Tartarian thrive in 15–25 gallon pots. Just ensure the container has drainage holes and use a well-draining soil mix. Place them in a sunny spot (6+ hours of light daily) and rotate the pot occasionally for even growth. Pro tip: Fertilize lightly in spring to avoid overfeeding roots in confined spaces!
How long does it take for a cherry tree to bear fruit?
Patience is key! Dwarf varieties may produce cherries in 2–3 years, while standard trees can take 4–6 years. Young trees focus on root and branch growth first—keep them healthy with proper watering, sunlight, and occasional pruning. Sweetheart® cherries are one of the fastest, fruiting in as little as 2 years!
What pests or diseases should I watch for when growing cherries?
Cherries are prone to aphids, Japanese beetles, and brown rot fungus. To prevent issues:
- Inspect leaves regularly for holes or sticky residue (signs of pests).
- Prune branches to improve airflow and reduce humidity.
- Use neem oil or insecticidal soap for pests, and copper fungicide for brown rot.
Pro tip: Plant self-pollinating varieties (like Montmorency) to avoid cross-pollination stress, which can weaken trees.
Do I need two cherry trees to get fruit?
It depends! Some varieties are self-pollinating (e.g., Stella® or Black Gold®), meaning they produce fruit alone. Others, like Bing or Rainier, need a second tree (or nearby pollinator) for fruit set. Check the label or ask your nursery—cross-pollination can double your harvest!
Can cherry trees survive winter in containers?
Yes, but they need protection! Move potted trees to a garage, shed, or insulated porch when temps drop below 20°F (-7°C). Wrap the pot in bubble wrap or burlap and water lightly before storing to prevent root freeze. In spring, acclimate them gradually to outdoor conditions to avoid shock.
What’s the best alternative if my climate is too hot or cold for cherries?
If your zone is too warm (10+) or too cold (below 5), try these cherry-like alternatives:
- Sour cherries (Montmorency)—hardier and more cold-tolerant.
- Chokecherries (Prunus virginiana)—drought-resistant and edible!
- Dwarf peach trees—similar care, faster fruiting.
Pro tip: Check your USDA zone map to pick the best fit for your area.
Wrapping up and next steps
Growing cherries at home is a rewarding journey that brings sweet, juicy rewards straight to your doorstep—whether in a cozy container or a sunny backyard! 🌱 With the right cherry tree variety, patience, and care, you can enjoy homegrown fruit in just a few years.
Start small, stay consistent, and don’t forget to prune and pollinate for the best harvest.
Ready to take the next step? Pick your favorite cherry type, gather your supplies, and get planting! Share your progress with fellow gardeners—your sweet success story might inspire others to start their own cherry-growing adventure. 🍒✨