
Size
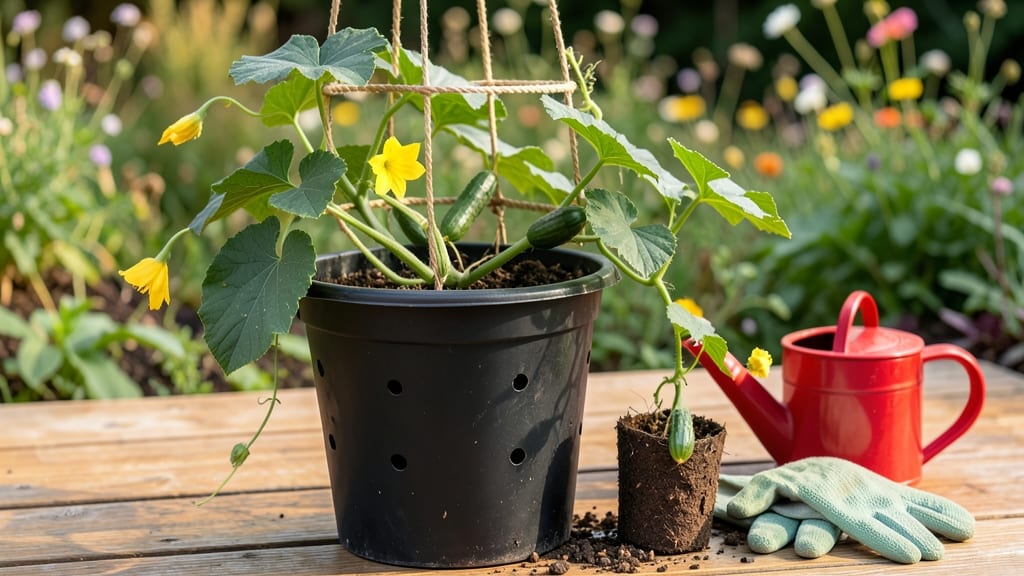
Growing cucumbers in a 5-gallon bucket feels like cheating—no yard needed to grow crisp, vine-ripened cucumbers. 🌱 I’ve grown them this way for three summers straight, and my balcony harvest rivals my neighbor’s in-ground garden. The secret? Matching the plant’s needs to the container’s limits without sacrificing yield.
You’ll need a sturdy 5-gallon bucket with drainage holes, well-draining potting mix, and a trellis or cage to guide those rampant vines upward. Sunlight is non-negotiable—6+ hours daily—and watering gets tricky in small spaces.
Overwatering is the fastest way to kill your plants, but underwatering stunts growth. I’ve perfected a drip irrigation setup that keeps roots happy without drowning them.
By mid-summer, you’ll be harvesting 10-15 cucumbers per plant—enough for salads, pickling, or snacking straight off the vine. The plants stay compact, the bucket fits on patios or balconies, and you avoid the soil-borne diseases that plague in-ground gardens.
Plus, no more bending over to pick cucumbers—just reach up and snip.
This method works in zones 3-10, though you’ll need to bring buckets indoors or to a garage during hard frosts. The biggest mistake? Skipping the trellis—vines sprawling on the ground attract pests and rot. Let’s get those cucumbers growing without the garden plot.
📚 In This Guide
- What you need
- Instructions
- Tips and common mistakes
- Wrapping up and next steps
What you need
- ● 5-gallon bucket: Clean, food-safe bucket with drainage holes (or drill your own). Look for one with a handle for easy moving!
- ● Potting mix: A high-quality, well-draining container mix (avoid garden soil—it compacts too much!). Aim for 2-3 cubic feet per bucket (about 4-6 bags of 2-3 cubic feet mix).
- ● Cucumber seeds or seedlings: Choose bush-type or compact varieties like ‘Bush Champion,’ ‘Spacemaster,’ or ‘Straight Eight.’ Start with 1-2 seeds per bucket.
- ● Drainage material: Small rocks, pebbles, or broken pottery shards (fill the bottom 1-2 inches to prevent root rot).
- ● Fertilizer: A balanced, slow-release fertilizer (like 10-10-10) or organic options such as compost or worm castings. Use 1-2 tbsp per bucket at planting.
- ● Watering can or hose with a gentle spray nozzle: Cucumbers love consistent moisture—aim for 1-2 inches per week.
- ● Trellis or stakes: A small bamboo stake, wire trellis, or tomato cage (3-4 feet tall) to support vines and improve airflow.
- ● Twine or soft plant ties: For securing cucumber vines to the trellis as they grow.
- ● Mulch: Straw or shredded leaves to retain moisture and suppress weeds.
- ● Epsom salt: A spoonful at planting can boost magnesium for healthier leaves.
- ● Compost tea or liquid fertilizer: For a mid-season nutrient boost (follow package instructions!).
- ● Bucket with a lid: To protect seedlings from pests or harsh weather.
- ● Grow lights (if indoors): 12-16 hours of light daily for seedlings before transplanting.
Step-by-Step instructions for growing cucumbers in a 5-Gallon bucket
Here's how to grow vigorous, productive cucumber vines in limited space—no compromise on flavor or yield.
🪴 Step 1: Prepare Your Container and Drainage System
Start with a 5-gallon bucket that has at least four drainage holes spaced evenly around the base. If your bucket lacks holes, drill them yourself using a ½-inch bit—this prevents root rot by allowing excess water to escape. Line the bottom with 1 inch of gravel or broken pottery shards to create an air gap and improve drainage further.
Real talk: I've seen buckets with just one hole at the bottom, and those plants always struggled. The key is even drainage—water should exit freely from multiple points. Place a piece of window screen or hardware cloth over the holes before adding soil to keep roots from escaping while still allowing water through.
🌱 Step 2: Layer Soil and Fertilizer for Optimal Growth
Fill the bucket ¾ full with a lightweight potting mix (never garden soil—it compacts and suffocates roots). I blend ½ cup of compost and ¼ cup of balanced, slow-release fertilizer (10-10-10) directly into the top 4 inches of soil. This ensures nutrients are concentrated where the roots will actively grow.
Press the mix down gently with your fingers until it's firm but not packed. You want it to hold shape when you squeeze a handful, but still feel airy. Leave 2 inches of space at the top of the bucket—this prevents soil from spilling when you water and gives the plant room to grow without overflowing.
💧 Step 3: Plant Your Cucumber and Set Up Support
Dig a 2-inch deep hole in the center of the bucket and place one cucumber seedling (or 2-3 seeds, spaced 1 inch apart) at the bottom. Cover lightly with soil and water deeply until it drains from the holes. For trellising, insert a 5-foot bamboo stake or wire cage into the bucket 1 inch from the plant—this gives vines immediate support to climb.
Here's the thing—I used to wait to add trellises until vines got long, but that leads to weak stems and broken plants. Start support day one so the cucumber can grow upward naturally. If using seeds, thin to the strongest seedling once they sprout and show first true leaves.
☀️ Step 4: Water and Fertilize for Maximum Productivity
Water deeply every 2-3 days, ensuring the top 2 inches of soil feel dry before adding more. Cucumbers are thirsty plants, but soggy soil invites disease. I use a watering can with a narrow spout to direct moisture at the base, avoiding wet leaves. In hot weather, you may need to water daily—check by sticking your finger 1 inch into the soil.
Feed with a liquid fertilizer (like fish emulsion) every 2 weeks once flowers appear. This boosts fruit production without burning roots. I also sprinkle ½ cup of compost on the soil surface monthly to replenish nutrients. Watch for yellowing leaves—this usually means it's time to fertilize again.
✂️ Step 5: Prune and Harvest for Continuous Production
Once vines reach the top of the trellis, prune side shoots that grow below the first 3 leaves to direct energy upward. This encourages more fruit production and prevents overcrowding. Use clean, sharp scissors to make cuts just above a leaf node—never tear stems, as this invites disease.
Harvest cucumbers when they're 6-8 inches long and still firm to the touch. I pick every 2-3 days to encourage more flowers and fruit. Overripe cucumbers turn bitter and attract pests, so stay on top of harvesting. If a vine looks exhausted after a few harvests, trim it back by half—it often produces a second flush of growth in 2-3 weeks.
Tips & tricks for growing cucumbers in a 5-Gallon bucket
A few simple strategies can transform your container garden into a thriving cucumber factory—here's how to maximize every inch of space.
Drainage is Non-Negotiable: The four drainage holes in Step 1 aren't just recommended—they're essential. I learned this the hard way when my first bucket's single hole led to root rot after just two weeks. For even better airflow, add a second layer of window screen over the gravel before filling with soil. This prevents soil from clogging the holes while maintaining that critical air gap at the base.
Soil Texture Matters More Than You Think: When mixing your lightweight potting mix in Step 2, resist the urge to pack it down tightly. The ideal soil should crumble easily when squeezed in your hand—think of it like wet sand at the beach. Too much compaction suffocates roots and prevents proper water absorption. If your mix feels dense, add perlite or vermiculite to improve aeration without compromising moisture retention.
Trellis Placement is a Game-Changer: Don't wait until vines are sprawling to add support in Step 3. Insert your bamboo stake or wire cage immediately after planting—this gives cucumbers something to grab onto from day one. Position it just 1 inch from the plant so vines can wrap around it naturally. Pro tip: If using a wire cage, bend the top wires outward slightly to create a funnel shape that guides vines upward more efficiently.
Watering Wisdom for Consistent Harvests: The 2-3 day watering schedule in Step 4 works perfectly when temperatures are moderate, but summer heat demands adjustments. In 80°F+ weather, I switch to morning watering only—this prevents fungal diseases that thrive in damp evening conditions. Always water at the base using your narrow-spout can; wetting leaves creates perfect conditions for powdery mildew, which can devastate your crop in weeks.
Pro Tips for Grow Cucumbers In A 5 Gallon Bucket
- A few simple strategies can transform your container garden into a thriving cucumber factory—here's how to maximize e...
- Drainage is Non-Negotiable: The four drainage holes in Step 1 aren't just recommended—they're essential. I learned th...
- Soil Texture Matters More Than You Think: When mixing your lightweight potting mix in Step 2, resist the urge to pack...
Frequently asked questions
Got questions?
Growing cucumbers in a 5-gallon bucket is simple, but every gardener has a few concerns. Here are answers to the most common queries to help you grow like a pro!
Can I reuse a bucket that previously held food or chemicals?
It’s best to avoid reusing buckets that held any chemicals (like pesticides or cleaning agents) or acidic foods (like tomatoes). These can leave residues that harm plants. If you’re repurposing a food-grade bucket (like a milk jug), clean it thoroughly with hot, soapy water and rinse well. For peace of mind, opt for a new bucket dedicated to gardening!
How long does it take for cucumbers to grow in a 5-gallon bucket?
With the right care, you can expect to see first cucumbers in 50–60 days after planting. Bush varieties (like ‘Bush Champion’) mature faster (around 50 days), while vining types (like ‘Straight Eight’) may take 60–70 days. Patience pays off—consistent watering, sunlight, and support (like trellises) speed up the process!
Why are my cucumber leaves turning yellow?
Yellow leaves usually signal overwatering, underwatering, or nutrient deficiencies. Check the soil: it should stay moist but not soggy. If the bucket drains poorly, add perlite or vermiculite to improve aeration. Yellowing on older leaves often means nitrogen deficiency—try a balanced fertilizer. Wilting + yellow? You might be underwatering!
Can I grow more than one cucumber plant in a 5-gallon bucket?
It’s not recommended—cucumbers are heavy feeders and need space to sprawl. One plant per bucket ensures proper root growth and airflow. If you’re tempted to squeeze two in, opt for compact bush varieties and monitor closely for competition. Better yet, use a 7–10 gallon bucket if you’re growing two!
How do I keep pests away from my bucket-grown cucumbers?
Prevention is key! Start with healthy soil (sterilized potting mix) and avoid overwatering (pests love dampness). For bugs like aphids or cucumber beetles, spray with neem oil or introduce beneficial insects like ladybugs. Row covers (lightweight fabric) work wonders early in the season. Check leaves regularly for early signs!
Wrapping up and next steps
Growing cucumbers in a 5-gallon bucket is a game-changer for small spaces—proving you don’t need a sprawling garden for a bountiful harvest! 🌱 With the right soil, sunlight, and care, you’ll enjoy fresh, crisp cucumbers right outside your door.
Start small, experiment with varieties, and soon you’ll be sharing your green thumb success with neighbors.
Ready to take the next step? Try planting a few more buckets with different veggies like tomatoes or peppers—your balcony or patio will thank you!