
Size
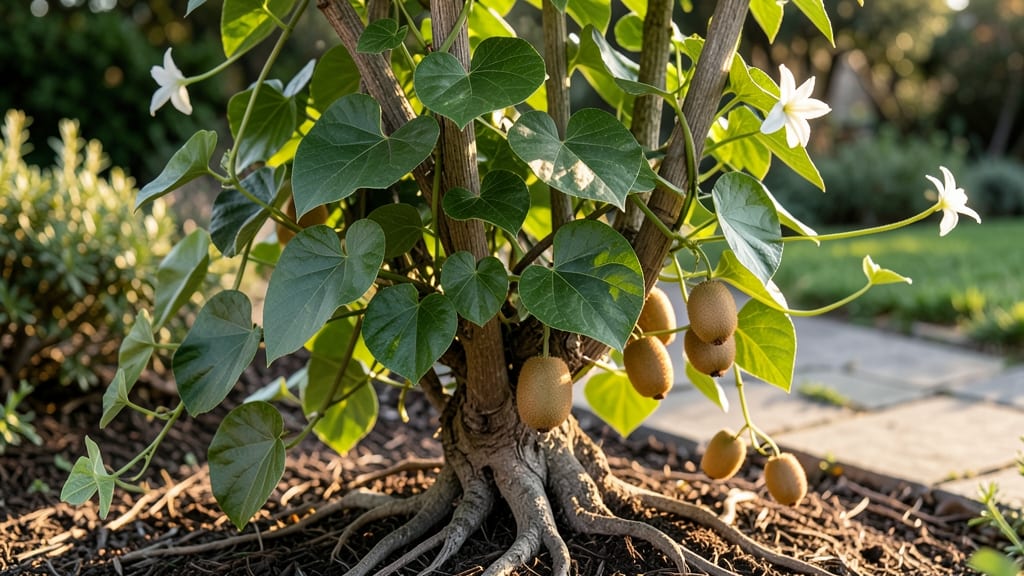
How to grow kiwi at home tastes like summer in a tiny vine. 🌿 I planted my first hardy kiwi vine last spring, and now it climbs my backyard fence, producing sweet, fuzzy-free fruit that rivals store-bought—but with none of the $6-per-pound price tag.
The secret isn't just patience—it's choosing the right variety for your climate. Hardy kiwi (Actinidia arguta) thrives in cooler zones (4-8), while fuzzy kiwi (Actinidia deliciosa) needs warmth (7-9).
Both grow on trellises or fences, so even small spaces work. You'll need male and female vines for pollination, but once established, they're low-maintenance powerhouses.
By year two, you'll harvest 10-20 pounds of fruit per vine, and the vines themselves become living art—glossy leaves, delicate flowers, and that intoxicating kiwi scent in late summer. The best part? These vines live 20+ years, so your harvest keeps growing long after you've mastered the basics.
Container growing works too—just use 15-gallon pots for dwarf varieties and keep them in full sun. The key challenges? Frost damage (protect young vines!) and pollination (hand-pollinate if bees are scarce). But once you get past those hurdles, you're in for a lifetime of homegrown kiwi.
📚 In This Guide
- What you need
- Instructions
- Tips and common mistakes
- Wrapping up and next steps
What you need
- ● Kiwi plants: Choose hardy kiwi varieties like Actinidia arguta (hardy kiwi) or Actinidia deliciosa (classic kiwi). Buy 2-4 plants (kiwi vines are dioecious, meaning you need at least one male and one female plant for fruit production). Opt for 1-2 year-old plants for faster results.
- ● Potting mix or garden soil: Use a well-draining, nutrient-rich mix (e.g., 50% potting soil + 50% compost) if growing in containers. For in-ground planting, amend soil with organic matter (compost or aged manure) for better fertility.
- ● Containers (if applicable): If growing in pots, choose large containers (15+ gallons) with drainage holes. Fabric grow bags (5-gallon minimum) also work well.
- ● Support structure: Kiwi vines need strong support to climb. Use a trellis, arbor, or sturdy fence (at least 6-8 feet tall). For containers, a small trellis or bamboo stakes will suffice.
- ● Fertilizer: A balanced, organic fertilizer (e.g., 10-10-10 or compost tea) to kickstart growth. Slow-release granules are ideal for container gardening.
- ● Mulch: Organic mulch (straw, wood chips, or shredded leaves) to retain moisture and regulate soil temperature.
- ● Watering can or hose: With a gentle spray nozzle to avoid damaging vines.
- ● Pruning shears: Sharp, clean shears for trimming and shaping vines.
- ● Drip irrigation system: Automates watering and ensures consistent moisture—perfect for busy gardeners!
- ● Soil pH test kit: Kiwi vines thrive in slightly acidic soil (pH 5.5-6.5). Adjust with lime (to raise pH) or sulfur (to lower pH) if needed.
- ● Frost cloth or row covers: Protect young vines from late spring frosts (kiwi flowers are frost-sensitive!).
- ● Handheld fan: Helps with pollination if you’re growing in a greenhouse or small space.
- ● Epsom salt: A magnesium boost (1 tbsp per gallon of water) can improve fruit quality.
Step-by-Step instructions for growing kiwi vines at home
Here's how to cultivate sweet, homegrown kiwis in limited space using proven techniques.
🌱 Step 1: Select the Right Variety and Planting Site
Choose a compact, self-pollinating variety like 'Issai' or 'Matua'—these produce fruit without needing a second vine. Kiwi vines thrive in zones 5-9 with full sun to partial shade (6+ hours daily). A sturdy trellis or fence is essential for support, as vines can grow 20+ feet if unchecked.
I always plant in well-draining soil with a pH of 5.5-6.5. Amend heavy clay with compost before planting, and avoid low spots where water pools. The vine's roots need oxygen to prevent rot—this is why I dig in 2-3 inches of coarse sand when planting in containers or heavy soil.
🪴 Step 2: Plant Bare-Root Vines or Container Grown Plants
For bare-root vines, soak roots in lukewarm water for 1 hour before planting to revive them. Dig a hole twice as wide as the root ball but only as deep as the container's base. This prevents burying the graft union (visible as a bulge near the base) too deeply, which can cause disease.
Place the vine in the hole, spread roots outward, and backfill with soil while gently pressing down to eliminate air pockets. Water deeply until the soil is saturated 12 inches down—you'll know it's right when water runs out the drainage holes if planted in a container. Mulch with 2-3 inches of organic mulch (like wood chips) to retain moisture and suppress weeds.
☀️ Step 3: Train and Prune for Maximum Fruit Production
Kiwi vines need structured training to produce fruit efficiently. Start by selecting 3-4 strong canes in early spring to form the main framework. Tie these to the trellis at 45-degree angles to encourage upward growth. Remove any competing shoots that emerge from the base or along the main stems—these saplings drain energy from fruit production.
Prune in late winter (before buds swell) to remove dead, crossing, or inward-growing branches. I always cut back one-third of the oldest wood annually to maintain vigor. For container-grown vines, prune more aggressively to keep the plant within its pot's limits—this prevents root-bound stress that reduces fruiting.
💧 Step 4: Water and Fertilize for Consistent Fruit Set
Kiwi vines need deep, infrequent watering—1-2 inches per week during growing season. Water at the base of the vine in the morning to reduce fungal risks. Let the soil dry slightly between waterings; soggy conditions lead to root rot, which kills vines quickly. You'll know moisture is right when the top 2 inches of soil feel dry to the touch.
Fertilize twice yearly: once in early spring with balanced 10-10-10 and again after harvest with low-nitrogen 5-10-10 to encourage fruiting. I avoid high-nitrogen fertilizers after mid-summer—they promote leafy growth at the expense of fruit. A slow-release organic fertilizer like fish emulsion works well for container plants.
⏰ Step 5: Harvest and Overwinter for Year-Round Success
Kiwi fruit ripens in late summer to fall, typically 120-160 days after flowering. Harvest when the skin softens slightly and the fruit detaches easily from the vine. Store at 35-40°F until fully ripe—unripe kiwis won’t soften at room temperature. I always leave a few on the vine to ripen naturally for the best flavor.
In zones 5-7, protect young vines from winter kill by mulching heavily (6+ inches) and wrapping the trellis in burlap. Mature vines handle cold better but still need snow cover in harsh winters. Prune lightly in late winter to remove dead wood before new growth begins—this prevents disease buildup in old, damaged tissue.
Tips & tricks for perfect kiwi vine cultivation
These essential insights will help you transform your backyard into a productive kiwi orchard with minimal fuss.
Soil Preparation Secret: Before planting, test your soil's pH using a simple kit—kiwi vines are particularly sensitive to acidity levels. If your soil measures below 5.5, amend it with elemental sulfur (sprinkle 1 pound per 100 square feet and water thoroughly). For container growing, mix 20% perlite into your potting soil to improve drainage and oxygen flow to roots. This prevents the common issue of root rot that plagues many beginner growers.
Planting Depth Matters: When planting bare-root vines, the graft union (that visible bulge near the base) should sit just above soil level—never buried. I've seen gardeners accidentally bury this junction 2-3 inches too deep, which often leads to disease. For container plants, use a pot with drainage holes at least 18 inches deep to accommodate the vine's extensive root system as it matures.
Pruning Timing: The late winter pruning in Step 3 is your chance to shape the vine's future. I always carry a small notebook to record which canes I've selected as main framework—this helps me identify them during subsequent pruning sessions. For container vines, prune more aggressively in late winter to prevent the plant from becoming root-bound, which can reduce fruiting by up to 40%. Always use clean, sharp pruners to make cuts at 45-degree angles just above outward-facing buds.
Winter Protection Strategy: In zones 5-7, the 6-inch mulch layer mentioned in Step 5 should be applied after the first hard frost. I've found that wrapping the trellis in burlap works best when combined with a layer of straw on top of the mulch—this creates an insulating blanket that maintains consistent soil temperatures. For container-grown vines, move pots to a sheltered location against a south-facing wall before winter to protect them from freezing winds.
Pro Tips for Grow Kiwi At Home
- These essential insights will help you transform your backyard into a productive kiwi orchard with minimal fuss.
- Soil Preparation Secret: Before planting, test your soil's pH using a simple kit—kiwi vines are particularly sensitiv...
- Planting Depth Matters: When planting bare-root vines, the graft union (that visible bulge near the base) should sit ...
Frequently asked questions
Got questions about growing kiwi at home?
Here are answers to the most common ones—so you can troubleshoot, plan, and enjoy your own backyard harvest with confidence!
Can I grow kiwi indoors or in a small space?
Kiwi vines thrive in containers (like 5-gallon pots) and can be grown indoors near a sunny window or under grow lights. Just ensure your vine gets at least 6 hours of sunlight daily and prune aggressively to control size. Dwarf varieties (e.g., 'Issai' or 'Matua') are perfect for small spaces—they produce fruit without needing a male pollinator!
How long does it take for a kiwi vine to bear fruit?
Patience is key! Most kiwi vines take 2–3 years to produce fruit after planting. Female vines need a male nearby for pollination (unless you choose a self-pollinating variety like 'Issai'). For faster results, buy a 1–2-year-old vine from a nursery—it’ll fruit sooner than starting from seed.
What’s the best climate for growing kiwi at home?
Kiwi vines love mild to warm climates (USDA zones 7–9) but can adapt to cooler areas with winter protection (e.g., frost cloth or a greenhouse). They hate extreme cold (below 10°F) or heat (above 90°F). If you live in a hot zone, provide afternoon shade and keep soil moist. In colder areas, grow them in pots and move them indoors during winter.
Why aren’t my kiwi flowers turning into fruit?
Common culprits include:
- Lack of pollination: Hand-pollinate with a soft brush if bees aren’t visiting.
- Imbalanced male/female vines: Ensure a 1:6–1:8 male-to-female ratio (or use a self-pollinating variety).
- Stress or poor nutrition: Fertilize with high-potassium food (like banana peels or compost) and check for pests (aphids, mites).
- Young vines: Wait until the vine is 3+ years old for reliable fruiting.
Can I grow kiwi from seed, or should I buy a plant?
While you can grow kiwi from seed, it’s a gamble—seeds may not produce true-to-type fruit, and the vine could take 5–7 years to bear. For faster, reliable results, buy a grafted or rooted cutting from a reputable nursery. Look for disease-resistant varieties like 'Hayward' (classic) or 'Saichu' (hardy).
Wrapping up and next steps
Growing your own kiwi vines at home is a rewarding adventure that brings sweet, tangy fruit straight to your kitchen—no matter how small your space! 🌱 With the right support structure, soil, and care, you can enjoy homegrown kiwis in just a few years.
Whether you’re a beginner or a seasoned gardener, this compact yet productive plant is perfect for balconies, patios, or even containers.
Now that you’re armed with tips and tricks, take the next step—plant your kiwi vine today! Start with a healthy young plant, give it love, and watch it thrive. Before you know it, you’ll be harvesting juicy kiwis and bragging about your green thumb. Happy growing! 🍈✨