
Propagation
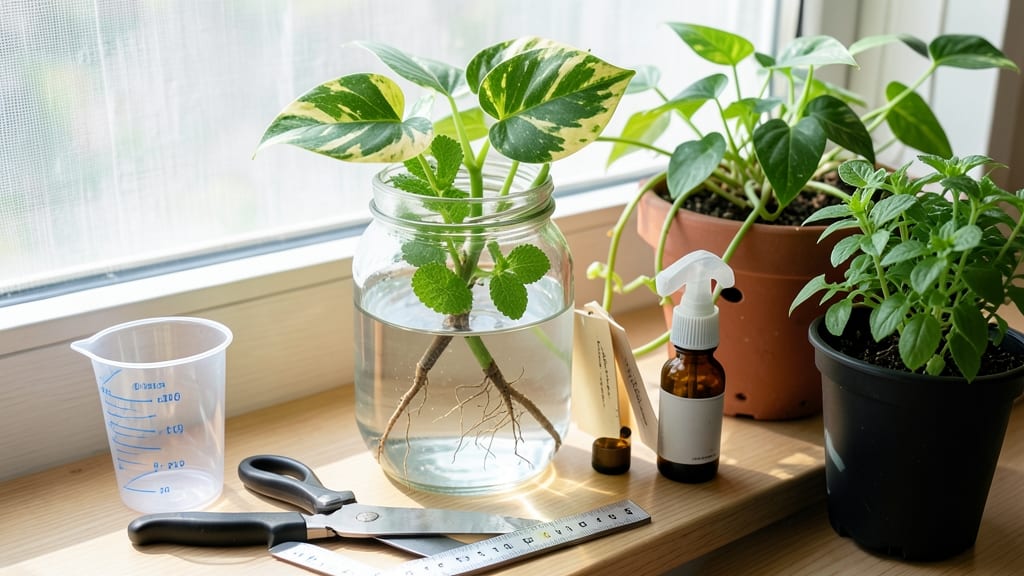
This simple method for how to grow plants from cuttings in water saved my struggling pothos last winter. 🌱 No fancy tools, no rooting hormones—just a glass and a cutting.
The best part? You can watch roots grow right before your eyes, turning stems into new plants in just a few weeks.
Start with healthy stems—look for ones with at least two leaves and a node where roots will sprout. Snip just below a node at a 45-degree angle for maximum surface area, then pop the cutting into a clean glass of room-temperature water.
Change the water every 3-5 days to keep it fresh and prevent bacteria.
Within 2-4 weeks, you'll see tiny white roots forming. Once they're 2-3 inches long, it's time to plant your cutting in soil. The transition might take a week or two, but soon you'll have a thriving new plant—completely free and ready to grow.
Works for pothos, mint, coleus, and even some herbs. Just avoid woody plants like roses or lavender—they need soil from the start. This method is beginner-friendly, cost-effective, and endlessly satisfying to watch roots develop right in your kitchen.
📚 In This Guide
- What you need
- Instructions
- Tips and common mistakes
- Wrapping up and next steps
What you need
- ● Healthy plant cuttings: 4–6 inches long (or as specified for your plant type)
- ● With at least 2–3 leaf nodes (the bumps where leaves grow)
- ● Cut at a 45-degree angle (use clean, sharp scissors or pruners)
- ● Clean water: Room-temperature (avoid tap water with chlorine—let it sit out for 24 hours if needed)
- ● Filtered or distilled water is ideal (reduces impurities)
- ● Clear glass or jar: Wide-mouth mason jars, glass vases, or even repurposed jars work
- ● Large enough to submerge 1–2 nodes without drowning leaves
- ● Pruning shears or sharp scissors: Sterilized (wipe with rubbing alcohol)
- ● Clean cuts prevent disease and encourage root growth
- ○ Rooting hormone (optional): Speeds up root growth for stubborn plants like succulents.
- ● Small pebbles or marbles: Place at the jar’s bottom to weigh down cuttings and prevent algae.
- ● Grow lights or sunny windowsill: Bright, indirect light (6+ hours/day) boosts success.
- ● Labeling tags: Track plant types and root progress!
- ● Hydrogen peroxide (3%): 1–2 drops in water can prevent bacterial growth.
Step-by-step instructions for growing plants from cuttings in water
Here's how to revive plants from cuttings using just water—no fancy tools or chemicals needed.
🌿 Step 1: Select Healthy Cuttings
Choose stems with at least 3-4 sets of leaves and no signs of disease or damage. The best cuttings come from healthy, non-flowering growth—those side shoots below the main blooms work perfectly. Use clean, sharp scissors or pruners to make a clean cut just below a leaf node (that little bump where leaves attach).
If you're working with woody plants like pothos or snake plant, you can cut a section with a single node. For herbaceous plants like mint or coleus, a 4-6 inch cutting with multiple leaves will root faster. The reason we aim for multiple leaves is simple: more leaves mean more energy for root development.
💧 Step 2: Prepare the Water Container
Use a clear glass or jar so you can monitor root growth without disturbing the cutting. Fill it with room-temperature water—cold water can shock the plant while warm water encourages bacterial growth. I like to use filtered or rainwater if possible, as tap water with chlorine can inhibit root development over time.
Place the cuttings in the water immediately after cutting. Submerge only the bottom 1-2 inches of the stem—any more and the leaves will rot. You'll see the leaves naturally position themselves above the waterline, which is your visual cue everything's set correctly. Change the water every 3-5 days to prevent bacterial buildup that can turn the water cloudy.
⏰ Step 3: Position for Optimal Light
Set your cuttings in a spot with bright, indirect light. A north-facing window or under a sheer curtain works best—direct sun will scorch the leaves while too little light slows root growth. You'll know the light is right when the leaves stay vibrant but don't develop brown spots or wilt.
Rotate the container a quarter turn daily so all sides get even light exposure. This prevents the cutting from growing lopsided toward the light source. Within 2-4 weeks, you'll see tiny white or yellow roots forming at the nodes. That's your signal the cutting is establishing its own root system—no more water dependency!
🌱 Step 4: Transition to Soil
Once roots reach about 1-2 inches long, it's time to plant. Gently remove the cutting from water and let the roots dry for 10-15 minutes to prevent transplant shock. Prepare a small pot with fresh well-draining potting mix and make a hole slightly larger than the root ball.
Plant the cutting at the same depth it was in water—burying too deep can cause rot while planting too shallow leaves roots exposed. Water lightly immediately after planting, then keep the soil consistently moist (not soggy) for the first 2 weeks. You'll see new growth within 3-4 weeks as the plant adjusts to its new home.
✂️ Step 5: Maintain New Growth
After transplanting, keep your new plant in the same bright, indirect light conditions for 1-2 weeks to help it establish. Gradually introduce more direct sunlight over the next week. You'll know it's thriving when you see fresh leaves emerging from the top—this means the roots are actively growing and supporting the plant.
Water when the top inch of soil feels dry to the touch. Avoid getting water on the leaves to prevent fungal issues. If you notice yellowing leaves, it's usually a sign of overwatering—let the soil dry out more between waterings. With proper care, your cutting will grow into a full, healthy plant ready for your garden or home.
Tips & tricks for perfect plant revival in water
Here's what nobody tells you about maximizing success with your water-propagated cuttings.
Leaf Node Location: The angle of your cut matters more than you think. Make your cut just below a leaf node at a 45-degree angle—this increases surface area for better water absorption and root formation. I learned this the hard way after struggling with slow rooting on straight cuts. For woody plants like pothos, a clean diagonal cut right below the node gives you the fastest results.
Water Quality Matters: While tap water works, you'll get better results with filtered or rainwater. If you must use tap water, let it sit out uncovered for 24 hours first to allow chlorine to evaporate. I've noticed cuttings in chlorinated water take about 5-7 days longer to root compared to filtered water. The difference in root development is dramatic—especially for sensitive plants like coleus.
Root Growth Timing: Those 2-4 weeks for root formation can feel like forever, but there's a trick to speed things up slightly. Once you see tiny white bumps at the nodes (usually around day 10), switch to a smaller container with just 1 inch of water. This creates a more oxygen-rich environment that encourages faster root elongation. Just keep the nodes submerged—roots need that initial water contact to start growing.
Transplanting Technique: When it's time to move to soil, don't rush the 10-15 minute drying period. This might seem like a long wait, but it prevents shocking the delicate roots. I've seen cuttings wilt dramatically when transplanted too soon because the roots weren't ready for the drier soil environment. After drying, gently tap the root ball to encourage the roots to spread out before planting.
Pro Tips for Grow Plants From Cuttings In Water
- Here's what nobody tells you about maximizing success with your water-propagated cuttings.
- Leaf Node Location: The angle of your cut matters more than you think. Make your cut just below a leaf node at a 45-d...
- Water Quality Matters: While tap water works, you'll get better results with filtered or rainwater. If you must use t...
Frequently asked questions
How long does it take for cuttings to root in water?
Most cuttings develop roots in 2–4 weeks, depending on the plant type. Fast-rooters like mint or pothos may sprout roots in 10–14 days, while woody plants (e.g., olive or jasmine) can take 4–6 weeks. Patience is key—keep the water fresh and avoid disturbing the cutting.
Can I reuse the water from rooted cuttings?
No, never reuse water from rooted cuttings. The water becomes saturated with bacteria and nutrients from decaying plant matter, which can harm new cuttings. Always use fresh, filtered water to prevent infections and encourage healthy root growth.
What if my cuttings rot instead of rooting?
Rotting usually happens from too much water, poor lighting, or bacterial growth. To fix it:
- Trim the mushy parts with clean scissors.
- Rinse the cutting in hydrogen peroxide (3%) for 10 minutes to kill bacteria.
- Switch to fresh water and place the cutting in bright, indirect light.
- Skip the water method for succulents or cacti—they root better in soil.
Do I need to add anything to the water for faster roots?
While plain water works, you can boost rooting with:
- A pinch of cinnamon (natural antifungal).
- Crushed aspirin (1/4 tablet per liter) to reduce bacteria.
- Hydrogen peroxide (1 tsp per cup) for oxygenation.
When should I transplant my water-grown cutting to soil?
Transplant when roots reach 2–3 inches long (or when you see a dense network). Gently rinse off any algae, then:
- Use well-draining soil mixed with perlite.
- Avoid overwatering for 1–2 weeks to prevent shock.
- Place in bright, indirect light until established.
Wrapping up and next steps
Growing plants from cuttings in water is a rewarding and budget-friendly way to propagate your favorite greens—no fancy tools or hormones required! 🌱 With just a few simple steps, you can revive cuttings and watch roots sprout in as little as a few weeks.
Whether you're a beginner or a seasoned plant parent, this method is a fantastic way to expand your garden without stress.
Now that you’re armed with the know-how, give it a try with a cutting from your favorite plant! Experiment with different species, track your progress, and soon you’ll be sharing your newfound skills (and thriving plants) with friends. Happy propagating!