
Size
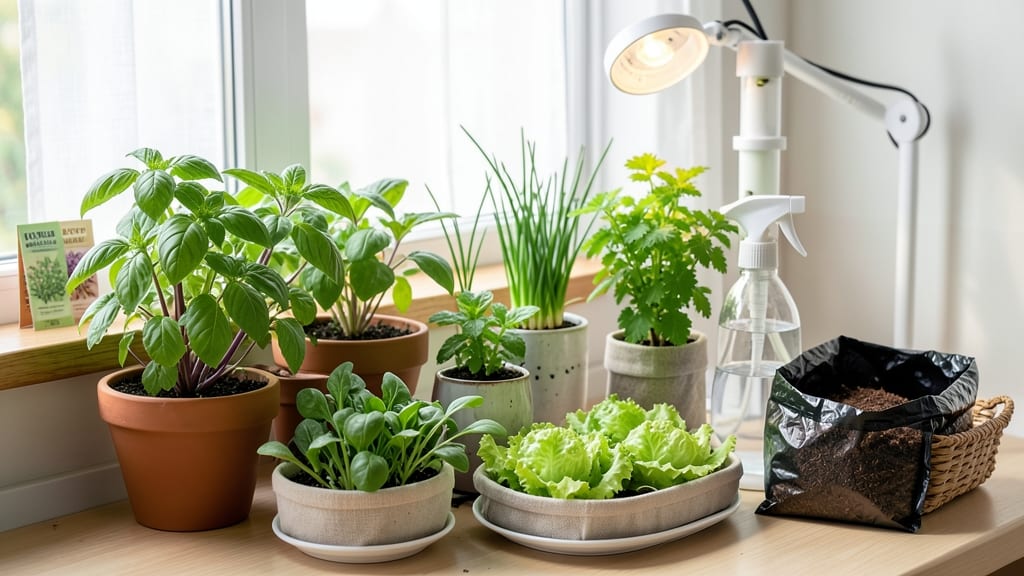
How to grow veggies in an apartment isn’t just possible—it’s transformative. 🌱 I’ve turned my tiny kitchen windowsill into a mini farm producing fresh basil, spinach, and cherry tomatoes, all without a yard. The secret? Stacked planters that maximize space while keeping maintenance simple. You’ll need just three essentials: lightweight containers (stackable pots or vertical towers), a south-facing window or grow light, and a balanced potting mix. Herbs like parsley and cilantro thrive in 6-inch pots, while leafy greens need 8-10 inches of depth. Cherry tomatoes? They’ll climb a 5-foot trellis in a corner, saving floor space. By week 6, you’ll harvest enough greens for salads and herbs for cooking—no grocery store markup. The best part? No weeding, no soil-borne pests, and zero excuses for skipping fresh ingredients. Even my black thumb can’t kill these setups. Works for any apartment size, from studio balconies to sunroom corners. Let’s get your kitchen growing!
📚 In This Guide
- What you need
- Instructions
- Tips and common mistakes
- Wrapping up and next steps
What you need
- ● Stacked planters or vertical garden kit: 2–4 units (choose 6–12" deep for herbs/greens like lettuce, spinach, or basil). Look for modular systems with drainage holes.
- ● High-quality potting mix: 1–2 bags (sterile, well-draining blend labeled for container gardening). Avoid garden soil—it’s too dense!
- ● Organic fertilizer: Slow-release granules (e.g., 10-10-10) or liquid fertilizer (like fish emulsion). Follow package rates for small spaces.
- ● Seeds or seedlings: Herbs: Basil, parsley, cilantro, mint (fast-growing, compact).
- ● Leafy greens: Lettuce, spinach, kale, or arugula (choose bush varieties for space efficiency).
- ● Watering can or spray bottle: 1–2 with a gentle shower nozzle (avoid over-saturating roots).
- ○ Grow lights (optional but helpful): LED full-spectrum bulb (6000K–6500K) or a small clip-on light for <12 hours/day if natural light is <6 hours.
- ● Self-watering reservoir: Add a small tray or wicking system to reduce watering frequency.
- ● Moisture meter: $10–$15 tool to check soil hydration without guesswork.
- ● Eco-friendly pest control: Neem oil spray or sticky traps for aphids/fungus gnats.
- ● Decorative labels: Chalkboard tags or popsicle sticks to track plant names (and impress guests!).
Step-by-Step instructions for growing veggies in small spaces
Here’s how to transform limited apartment space into a thriving vertical garden.
🪴 Step 1: Choose and Assemble Stacked Planters
Start with stackable planters that fit your space—look for 12-18 inch deep tiers to accommodate root growth. I prefer fabric grow bags for their breathability, but plastic or ceramic works too. Arrange them in a corner or against a wall where they’ll catch 4-6 hours of sunlight daily. If your apartment lacks natural light, place the stack under a full-spectrum LED grow light for 12-14 hours daily. The key here is maximizing vertical space while ensuring each tier has access to light—don’t let the bottom layer get shaded by the top.
Fill the bottom tier first with 2-3 inches of drainage material (like pebbles or broken pottery) to prevent waterlogging. This is critical—root rot will kill your plants faster than lack of light. Use the 4 gallons of potting mix specified, dividing it evenly between tiers. Press it down gently to eliminate air pockets, but don’t compact it so tightly that water can’t penetrate. A loose, fluffy mix ensures roots can spread freely.
🌱 Step 2: Select and Plant Fast-Growing Veggies
For stacked planters, focus on compact, shallow-rooted varieties like leafy greens (lettuce, spinach, kale) and herbs (basil, parsley, cilantro). These thrive in 6-12 inch deep soil and produce quickly—perfect for small spaces. Plant 3-4 seeds per tier (or 1-2 transplants) spaced 4-6 inches apart to avoid overcrowding. I like to stagger plantings every 2 weeks so you always have fresh harvests; this is called succession planting, and it’s a game-changer for small gardens.
Press seeds ½ inch deep into the soil—deeper than the seed packet suggests for stacked planters, since drainage is less predictable. Water gently with a spray bottle until the soil is evenly moist but not soggy. Overwatering in stacked setups leads to fungal issues because air can’t circulate between tiers. Place a drip tray underneath to catch excess water and prevent messes. Once seedlings emerge, thin them to the strongest 2-3 plants per tier to give roots room to grow.
☀️ Step 3: Optimize Light and Water for Consistent Growth
Rotate the stack a quarter turn every 3 days so all sides get even light exposure. You’ll notice plants leaning toward the light—this is called etiolation, and it weakens stems. If using natural light, place the stack within 12 inches of a south-facing window for best results. For artificial light, keep the grow bulb 6-12 inches above the top tier and adjust as plants grow. Too close, and you’ll scorch leaves; too far, and growth slows dramatically.
Water from the top tier down, allowing excess to drip through to the next level. This ensures even moisture distribution without over-saturating the bottom. Check soil moisture daily—stick your finger 1 inch deep into the mix. If it feels dry, water lightly; if it’s damp, wait another day. Overwatering in stacked planters is the #1 killer of apartment gardens, so less is more until you see how your setup drains. Fertilize every 2-3 weeks with a balanced liquid fertilizer to keep nutrients flowing in this confined space.
✂️ Step 4: Harvest and Maintain for Continuous Yields
Start harvesting leafy greens when they reach 3-4 inches tall—pinch the outer leaves first to encourage bushier growth. For herbs like basil, snip just above a leaf node to promote branching. This might seem counterintuitive, but it actually boosts production by signaling the plant to grow more stems. I harvest my stacked greens 2-3 times per week, and the plants keep producing for 6-8 weeks before needing a break. If you see yellowing leaves, it’s often a sign of over-maturity or nutrient burn—trim those immediately and reduce fertilizer strength.
Every 4-6 weeks, refresh the soil in the bottom tier by removing the top 2 inches of spent mix and replacing it with fresh potting mix. This prevents nutrient depletion and soil compaction, which stunts root growth. If pests like aphids appear, spray with neem oil or insecticidal soap—these are safe for indoor use and effective against common garden pests. With this routine, your stacked planters will stay productive year-round, even in the smallest apartment.
Tips & tricks for perfect stacked planter gardens
Transforming your apartment into a productive garden starts with these essential strategies that maximize space and yield.
Light Optimization: The 4-6 hours of sunlight requirement in Step 1 is non-negotiable for leafy greens, but here's the secret: position your stack near a window with the tallest plants at the bottom tier. This prevents shading while ensuring all plants get equal light exposure. If using artificial light, I've found that suspending a full-spectrum LED bulb 8-10 inches above the top tier during the 12-14 hour growing period mimics natural sunlight perfectly—just remember to adjust the height as plants grow to avoid scorching leaves.
Soil Science: When dividing the 4 gallons of potting mix evenly between tiers, I recommend mixing in 10% perlite or vermiculite to improve aeration in this confined space. The ½ inch seed depth specified in Step 2 is crucial—any deeper and seedlings may struggle to emerge, while shallower planting risks exposing seeds to drying. For herbs like basil, I often press the seeds just slightly deeper (⅜ inch) since they're more drought-tolerant once established.
Watering Wisdom: The daily moisture check in Step 3 is your best friend, but here's what nobody tells you: water in the morning so excess has time to drain completely before nightfall. I've seen fungal issues develop overnight when water pools between tiers. For the top tier, use a spray bottle with fine mist setting to avoid disturbing seedlings, while bottom tiers can handle a slightly firmer water stream to ensure penetration. The 2-3 week fertilization schedule works well, but I reduce to every 4 weeks in winter when growth naturally slows.
Harvesting Hack: That 3-4 inch height for harvesting leafy greens is perfect, but here's the pro move: use clean, sharp scissors to cut rather than pulling leaves. This prevents damaging the plant's growth points. For continuous harvests, I've found that cutting the outer leaves leaves the inner growth intact, and plants actually produce more vigorously. When refreshing soil every 4-6 weeks, save the top 2 inches of old mix—it's packed with beneficial microbes that can be mixed back in with fresh soil for a nutrient boost.
Pro Tips for Grow Veggies In An Apartment
- Transforming your apartment into a productive garden starts with these essential strategies that maximize space and y...
- Light Optimization: The 4-6 hours of sunlight requirement in Step 1 is non-negotiable for leafy greens, but here's th...
- Soil Science: When dividing the 4 gallons of potting mix evenly between tiers, I recommend mixing in 10% perlite or v...
Frequently asked questions
Got questions about growing veggies in your apartment? You’re not alone! Here are some of the most common concerns—and their easy solutions.
Can I grow veggies in an apartment without a balcony?
You don’t need outdoor space—just a sunny windowsill or a grow light. Leafy greens (like spinach or kale), herbs (basil, mint), and microgreens thrive in indoor stacked planters. Even dwarf varieties of tomatoes or peppers can work with proper lighting and care.
How long does it take to see results?
Timing depends on the plant! Herbs like basil or cilantro may sprout leaves in 2–4 weeks, while leafy greens take 3–6 weeks for a full harvest. Root veggies (like radishes) can be ready in 3–4 weeks if grown in deep planters. Patience pays off—consistent light and water are key!
What’s the biggest mistake beginners make with indoor veggies?
Overwatering or underwatering! Most indoor plants prefer consistently moist (not soggy) soil. Stick your finger in the soil—if the top inch is dry, it’s time to water. Also, avoid placing planters in drafty spots or near AC vents, which can stress plants.
Can I reuse soil from last year’s apartment garden?
Not ideal! Old soil loses nutrients and may harbor pests or diseases. Instead, use fresh potting mix (lightweight and sterile) or repurpose soil by mixing it with 20% compost. Sterilize reused soil by baking it at 200°F (93°C) for 30 minutes to kill pathogens.
What’s the easiest veggie to grow in a small apartment?
Start with microgreens (like broccoli or sunflower sprouts)—they grow in 1–2 weeks with minimal space! Other beginner-friendly picks:
- Herbs: Basil, mint, parsley (fast-growing, forgiving)
- Leafy greens: Lettuce, spinach, kale (cut-and-come-again harvests)
- Compact veggies: Cherry tomatoes (dwarf varieties), peppers, or radishes
Wrapping up and next steps
Growing veggies in your apartment isn’t just possible—it’s empowering! 🌱 With the right stacked planters, herbs, greens, and a little creativity, you can turn even the smallest space into a thriving garden. Start small, stay consistent, and soon you’ll be harvesting fresh flavors right from your windowsill.
Ready to take the next step? Pick one plant to grow this week—whether it’s basil, lettuce, or microgreens—and enjoy the satisfaction of homegrown goodness. Happy planting! 🌿