
Landscaping
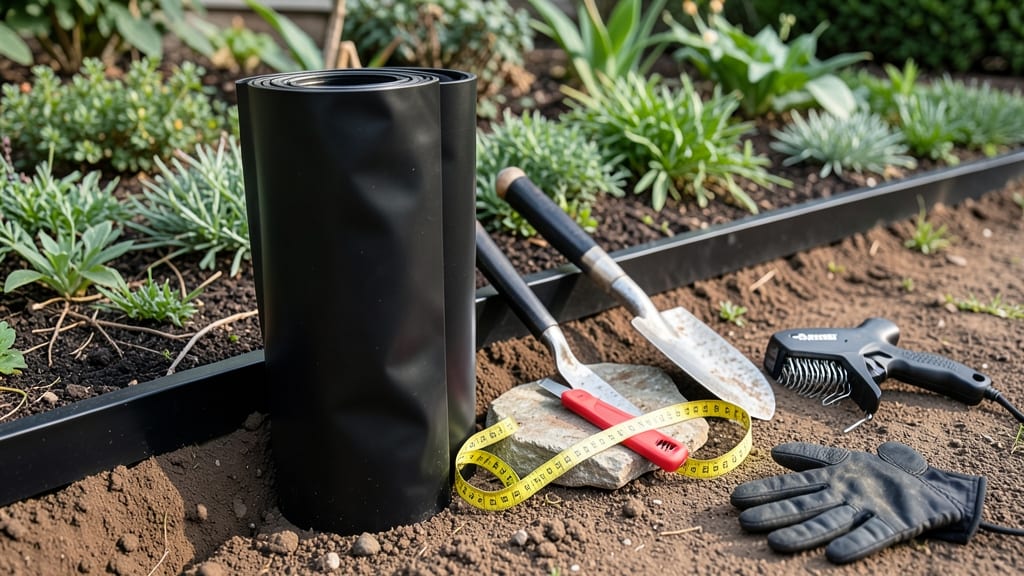
No-dig plastic edging transforms messy garden borders into crisp, weed-free lines with minimal effort. 🌱 I learned the hard way that skipping this step leads to soil erosion and invasive weeds creeping into my flower beds—until I installed edging last spring.
The results were instant: cleaner lines, easier maintenance, and a defined space that actually looks intentional.
You’ll need just three things: durable plastic edging (at least 12 inches tall for weed suppression), a sturdy mallet or hammer, and a few U-shaped stakes to anchor it. The key is choosing edging with interlocking corners—no glue or complicated tools required.
Most kits cost under $50 and last for years, making it a smart investment for any garden.
Once installed, you’ll notice fewer weeds poking through and soil staying contained where it belongs. The edging also makes tilling or planting easier, since you won’t have to fight against encroaching grass or weeds.
Plus, it adds a polished look to vegetable gardens, flower beds, or even pathways without the hassle of digging.
For long-term success, check the edging monthly for gaps where weeds might sneak in, and reinforce stakes if heavy rain shifts them. The payoff? A garden that looks effortlessly maintained, even when you’re not spending hours on it. Ready to give it a try?
📚 In This Guide
- What you need
- Instructions
- Tips and common mistakes
- Wrapping up and next steps
What you need
- ● No-dig plastic edging: Length based on your garden’s perimeter (e.g., 50 ft, 100 ft, etc.). Measure twice to avoid gaps!
- ● Tip: Opt for UV-stabilized plastic to resist fading over time.
- ● Spade or garden trowel: For digging shallow trenches (4–6 inches deep).
- ● Measuring tape & stakes: To mark your garden’s outline before digging.
- ● String line or garden hose: Helps create a straight, level guide for cutting edging.
- ● Hacksaw or heavy-duty scissors: For cleanly cutting edging to size.
- ● Garden gloves: Protect your hands from dirt and sharp edges.
- ○ Gravel or sand (optional but recommended): 1–2 inches of sharp gravel (for drainage and stability).
- ● Or fine sand (for a smoother finish).
- ● Edging hammer or mallet: For gently tapping edging into place.
- ● Level: Ensures your edging stays perfectly straight and even.
- ● Landscape fabric: Prevents weeds from creeping through gaps.
- ● Decorative caps or stakes: Adds a polished finish to the ends of your edging.
- ● Knee pads: Because crawling in dirt is not glamorous! 😅
Step-by-step instructions for installing no dig plastic edging
Here's how to create clean, defined borders without digging—perfect for any garden style.
🪴 Step 1: Measure and Mark Your Garden Border
Use a tape measure to determine the exact length of your garden border. I like to mark the path with a garden hose first—it gives me a clear visual of where the edging will sit. For a 4-foot-wide garden bed, I typically place the edging 6-8 inches from the outer edge to allow for easy maintenance and prevent soil erosion.
Drive small wooden stakes into the ground at 2-foot intervals along your marked line. Tie the hose to each stake to create a straight, unbroken path. This ensures your edging will follow a clean, professional line without any wobbles. Double-check your measurements before moving forward—once the edging is in place, it's hard to adjust without damaging it.
🌱 Step 2: Prepare the Ground for Installation
No dig means no digging, but you'll still want to clear the area of any large rocks, debris, or weeds that could puncture the plastic. I use a garden fork to gently loosen the soil along the marked line—just enough to create a slight trench where the edging will sit. This helps the plastic settle naturally without forcing it into the ground.
For a 4-foot border, I press the plastic edging into the soil at a slight angle, about 1-2 inches deep along the top edge. This keeps it stable while allowing water to drain properly. If your garden has sloped areas, start at the lowest point and work your way up to prevent water pooling behind the edging. A helper makes this step much easier—one person holds the edging while the other presses it into place.
💧 Step 3: Secure the Edging in Place
Use the U-shaped landscape staples to secure the edging every 12-18 inches along the marked line. Drive the staples into the ground at a 45-degree angle so they grip both the plastic and the soil firmly. I find it easiest to press the staple into the ground first, then adjust the edging to sit flush against it before fully securing it.
For corners or curves, use corner connectors or flexible edging pieces—they prevent sharp bends that can tear the plastic over time. After securing the staples, step back and check for gaps or uneven sections. If you spot any, adjust the edging before the staples set completely. This is the moment that matters: a smooth, even line now saves hours of frustration later.
✂️ Step 4: Cut and Connect Sections as Needed
If your garden border has turns or requires multiple straight sections, use a utility knife or heavy-duty scissors to cut the plastic edging to length. Measure twice before cutting—once the edging is buried, you won’t be able to extend it. For straight cuts, clamp the edging between two boards to create a clean, right-angle edge.
To connect sections, overlap the ends by 2-3 inches and secure them with additional staples on both sides of the overlap. This reinforces the joint and prevents it from popping up over time. If you're installing edging around a circular bed, start at the widest point and work your way around, adjusting the tension as you go. A little overlap at the seam ensures a seamless finish.
☀️ Step 5: Backfill and Finalize the Border
Once the edging is fully secured, use a shovel to gently backfill the area behind it with the displaced soil. Press the soil firmly against the edging to eliminate air pockets—this keeps the border stable and prevents shifting over time. For extra stability, especially in high-traffic areas, I add a 1-inch layer of gravel behind the edging before backfilling. This creates a drainage path and reduces soil pressure on the plastic.
Finally, water the soil lightly to settle everything in place. Step on the edging a few times to ensure it stays put—if it moves, add more staples or adjust the backfill. Once everything is set, you’ll have a clean, defined border that keeps weeds at bay and makes garden maintenance a breeze. Real talk: the first time I skipped securing the staples properly, the edging shifted within a week. Don’t make that mistake!
Tips & tricks for perfect no dig plastic edging installation
These simple tricks will help you create clean, durable garden borders that last for years without digging or hassle.
Marking Made Easy: I learned this the hard way after ruining three garden borders—always use a garden hose to trace your path before marking with stakes. The hose creates a clear visual guide that helps you adjust the line before driving in stakes. Pro tip: Use bright orange or yellow hose for high-visibility marking, especially in shaded areas where you might miss subtle lines.
Corner Connections: For corners or curves, invest in flexible corner connectors instead of trying to bend the plastic yourself. I tried bending it once and ended up with a jagged edge that looked terrible. These connectors create smooth transitions and prevent stress points where the plastic could crack over time. They’re worth the small extra cost for a professional finish.
Staple Placement: When securing the edging with U-shaped landscape staples, place them at the base of the edging—not the top—where it meets the soil. This hidden placement keeps your garden looking clean while providing maximum stability. I also recommend pre-driving the staples into the ground before adjusting the edging to ensure perfect alignment.
Backfill Strategy: After installing, press the backfill soil firmly against the edging to eliminate air pockets. This single step prevents shifting over time. For extra stability in high-traffic areas, add a 1-inch layer of gravel behind the edging before backfilling. This creates a drainage path and reduces soil pressure on the plastic, making your border last longer.
Pro Tips for Install No Dig Plastic Edging
- These simple tricks will help you create clean, durable garden borders that last for years without digging or hassle.
- Marking Made Easy: I learned this the hard way after ruining three garden borders—always use a garden hose to trace y...
- Corner Connections: For corners or curves, invest in flexible corner connectors instead of trying to bend the plastic...
Frequently asked questions
Got questions about no-dig plastic edging?
You’re not alone! Here are answers to the most common concerns—from timing to troubleshooting—so you can tackle your garden borders with confidence.
When is the best time to install plastic edging?
Install no-dig plastic edging in spring or early fall when the ground is workable but not frozen or waterlogged. Avoid winter (freezing can damage the plastic) or peak summer (dry soil makes digging harder). If you’re prepping for fall planting, install it 4–6 weeks beforehand to let the soil settle.
Can I install plastic edging without digging?
Yes! The whole point of no-dig plastic edging is to skip the trenches. Instead, use a sharp spade or edging tool to score the soil along your desired border line, then press the edging into the groove. For stubborn spots, a rubber mallet can help seat it firmly without digging. Just ensure the soil is slightly moist for easier insertion.
Will plastic edging damage grass or plants?
No-dig plastic edging is designed to be gentle on existing plants and grass. If you’re edging near established vegetation, score the soil carefully and avoid pressing directly into roots. For grass, use a string trimmer to cut it back before installing. Most plastic edging has a flexible design that contours to the ground without harming plants.
What if my edging shifts or pops up over time?
Shifting edging usually means the soil wasn’t compacted enough or the edging wasn’t seated deeply. To fix it, press the edging further into the groove or add a layer of small rocks or sand around the base for stability. For long-term security, consider driving short metal stakes into the ground every 2–3 feet to anchor it—just be sure to avoid plant roots.
Are there cheaper alternatives to plastic edging?
If budget is tight, try galvanized metal edging (durable but heavier) or wooden stakes (less permanent). For a no-dig option, landscaping fabric strips can create a temporary border, though they won’t last as long. Plastic edging strikes the best balance of affordability, ease, and longevity for most DIYers.
Wrapping up and next steps
Installing no-dig plastic edging is a game-changer for creating clean, low-maintenance garden borders—and you’ve just mastered it! 🎉 With the right tools, a little patience, and our step-by-step guide, your garden will look polished without the backbreaking work.
Now that your edging is in place, it’s time to enjoy the results—whether that means admiring your new borders or diving into the next landscaping project.
Ready to take it further? Consider adding mulch, plants, or even decorative stones to elevate your garden’s look. Happy gardening! 🌿