
Propagation
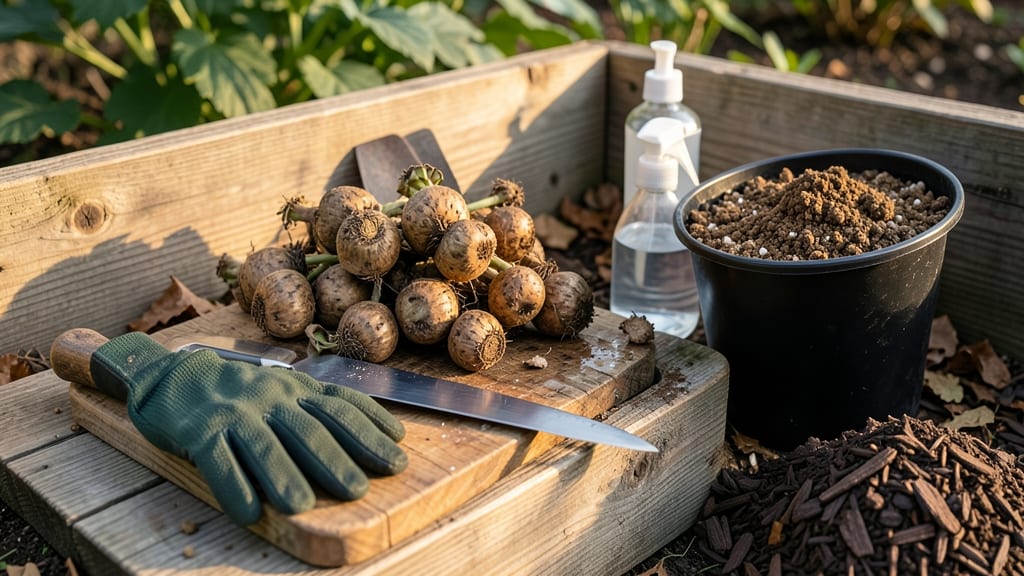
Spring’s the moment to wake up those dormant dahlia tubers—and dividing them now means bigger, bushier plants by summer. 🌱 I’ve divided mine for years, and the secret isn’t just cutting tubers—it’s knowing when and how to do it without shocking the roots.
The best time is 2-3 weeks before your last frost, when shoots are 1-2 inches tall but still tender. You’ll need sharp pruners, a clean knife, and a mix of compost and perlite for replanting. Dig up tubers carefully—they’re fragile, and rough handling can set regrowth back.
After dividing, plant cuttings 2-3 inches deep with at least 6 inches between tubers. Water lightly at first, then mulch to keep soil moist but not soggy. Within 4-6 weeks, you’ll see fresh growth—proof you’ve set up next year’s blooms for success.
Here’s where most gardeners go wrong: dividing too early (before sprouts appear) or using dull tools that crush tubers. Store extras in cool, dry peat moss until planting day. Now, let’s get those tubers multiplying!
📚 In This Guide
- What you need
- Instructions
- Tips and common mistakes
- Wrapping up and next steps
What you need
- ● Dahlia tubers: Healthy, dormant tubers from last season (1-5 tubers, depending on size and variety). Pro tip: Choose tubers that are firm, plump, and free of soft spots or mold! 💡
- ● Sharp, clean pruners or a knife: A sterilized pair of pruners (or a disinfected knife) to make precise cuts. Avoid dull tools—they crush tubers!
- ○ Gloves (optional but recommended): Garden gloves to protect your hands from sharp tools and any potential sap.
- ● Potting mix or well-draining soil: A high-quality, sterile potting mix (or garden soil amended with compost) for repotting. Tip: Avoid heavy clay soil—dahlias hate soggy roots! 🌱
- ● Containers or trays: Small pots (4-6 inches deep) or seedling trays for each divided tuber. Ensure they have drainage holes!
- ● Cinnamon or fungicide: A sprinkle of cinnamon powder (natural fungicide) or a mild fungicide to prevent rot on cut surfaces.
- ● Watering can or spray bottle: For gentle hydration—avoid soaking the tubers!
- ○ Rooting hormone: Speeds up growth for cut tubers (optional but handy for faster blooms!).
- ● Plastic wrap or humidity dome: Creates a mini greenhouse effect to retain moisture while roots establish.
- ● Labeling tags: To keep track of dahlia varieties (especially useful if you have multiple types!).
- ● Disinfectant (rubbing alcohol or bleach solution): To sterilize tools between cuts and prevent disease spread.
Step-by-Step instructions for dividing dahlia tubers in spring
Here's how to multiply your dahlias while ensuring each new tuber has the energy to produce stunning blooms all season.
🪴 Step 1: Choose the Right Time and Prepare Your Workspace
Wait until after the last frost when soil temperatures reach at least 55°F—this ensures tubers won't experience cold shock. I like to work on a clean table or tarp covered with 2-3 inches of moistened peat moss or coconut coir to keep tubers from drying out during handling. Have your sharp, sterilized knife (or pruning shears) and a spray bottle of water ready.
This is the moment that matters: timing affects tuber viability. If you divide too early, tubers won't have stored enough energy; too late, and you risk stunted growth. I mark my calendar for late April to early May in most climates—adjust based on your last frost date. Sterilize your tools with rubbing alcohol to prevent fungal infections that can wipe out tubers overnight.
✂️ Step 2: Dig Up and Inspect the Tubers
Use a garden fork to carefully lift the tubers, being gentle to avoid damaging the delicate crowns. Shake off excess soil and lay them out on your prepared workspace. Look for eyes—those small, bump-like growth points where new stems will emerge. Each division needs at least 3-5 eyes to thrive and produce blooms.
Real talk: some tubers will look shriveled or have blackened areas. Discard any with rot or mold—these won't recover. Healthy tubers have firm, plump sections with multiple eyes clustered near the center. I like to soak the tubers in lukewarm water for 10-15 minutes while I prep, which helps rehydrate them and makes cutting easier.
🌱 Step 3: Make Clean Cuts Between Eyes
Hold the tuber steady and cut just below the eyes, using a single, firm motion. The goal is to create divisions with 3-5 eyes each and at least one healthy stem base. I angle my cuts slightly to increase surface area for faster healing. Avoid making cuts too close to the center—this weakens the tuber's energy reserves.
Here's the thing—dahlias are forgiving, but precision matters. Each cut should be smooth, not jagged, and made with a sharp tool (a dull knife crushes cells, inviting rot). If a division ends up with only 1-2 eyes, toss it—it won't produce meaningful growth. Label each division with a soft-tip marker if you're dividing multiple varieties to avoid confusion later.
💧 Step 4: Replant Divisions Immediately
Plant divisions within 24 hours to prevent drying. Dig holes 12-18 inches deep and 12 inches apart—dahlias need room to establish strong root systems. Mix the planting hole with compost to boost nutrients, then place the tuber eyes-up (never upside-down) so the crown sits 2 inches below soil level. This depth protects tubers from extreme heat while allowing stems to emerge easily.
Water deeply right after planting to settle the soil and eliminate air pockets. I like to add a slow-release fertilizer (like 10-10-10) to the hole to give divisions a nutrient boost. Mulch with 2-3 inches of straw to retain moisture and regulate soil temperature—this is especially critical in hot climates where tubers can dry out quickly.
☀️ Step 5: Monitor and Support New Growth
Keep soil evenly moist but not soggy for the first 4-6 weeks—this is when roots establish. You'll see first true leaves emerge in 2-3 weeks if conditions are right. If growth stalls, check for yellowing leaves (a sign of overwatering) or wilted stems (a sign of underwatering). Dahlias love full sun (6+ hours daily), but young divisions may need afternoon shade in hotter climates to prevent stress.
Once stems reach 6 inches tall, add stakes or cages to support the heavy blooms. I like to use bamboo stakes tied with soft twine—this prevents stem damage as the plant grows. Avoid fertilizing until you see new leaf growth, as fresh divisions need to focus on root development before producing flowers. You'll know you've done it right when divisions bloom just as vigorously as the original plant by mid-summer.
Tips & tricks for perfect dahlia division
Here's what I learned after dividing tubers for years—and how to avoid the mistakes that kill new growth.
The Timing Secret: That 55°F soil temperature threshold isn't just arbitrary—it's when tubers wake from dormancy but haven't yet started active growth. I test with a soil thermometer in the morning when temps are coolest. If you're in doubt, wait until nighttime lows consistently stay above 50°F—this gives you a 3-day buffer before proceeding. Cold shock can trigger rot even in healthy tubers.
Cutting Technique That Changed Everything: In Step 3, when making those 3-5 eyes-per-division cuts, I found that using a ceramic knife (like a Japanese vegetable knife) creates cleaner cuts than stainless steel. The ceramic stays sharper longer and doesn't leave microscopic metal particles that can irritate the tuber tissue. For stubborn tubers, I dip the blade in lukewarm water between cuts—this prevents the knife from binding to the fibrous tissue.
Post-Division Rescue Strategy: If you accidentally create divisions with only 1-2 eyes, don't toss them immediately. Place these "rejects" in a shallow tray of moistened vermiculite and keep them in bright, indirect light for 10-14 days. Many will sprout additional eyes during this recovery period. I've successfully salvaged what would have been waste by giving these tubers a chance to regenerate.
Pro Tips for Divide Dahlia Tubers In Spring
- Here's what I learned after dividing tubers for years—and how to avoid the mistakes that kill new growth.
- The Timing Secret: That 55°F soil temperature threshold isn't just arbitrary—it's when tubers wake from dormancy but ...
- Cutting Technique That Changed Everything: In Step 3, when making those 3-5 eyes-per-division cuts, I found that usin...
Frequently asked questions
Got questions about dividing dahlia tubers? You’re not alone! Here are answers to the most common concerns to help you grow thriving dahlias with confidence.
When is the exact best time to divide dahlia tubers in spring?
Divide your tubers after the last frost when soil temperatures reach 50–55°F (10–13°C). In most regions, this is late April to early June. Wait too long, and you risk stunted growth—so check your local frost dates!
How do I know if I’m cutting the tubers the right way?
Each division should have at least 3–5 eyes (buds) and a portion of the stem. Use a sharp, sterilized knife to make clean cuts—no jagged edges! If a piece looks too small, hold off until next year.
What if my dahlia tubers are soft or mushy when I dig them up?
Soft tubers mean rot, likely from overwatering or poor drainage. Discard mushy sections and replant only firm, healthy divisions. To prevent rot next year, ensure tubers are stored in cool, dry conditions (35–40°F / 2–4°C) with good airflow.
Can I divide dahlias without cutting them at all?
Yes! If you’re short on time, you can separate tubers by gently pulling them apart where natural splits occur. Just ensure each piece has eyes. For larger clumps, a sterilized knife still works best for precision.
What if spring rain makes my newly divided tubers soggy?
Soggy soil can lead to rot, so avoid watering for 1–2 weeks after planting. If rain is heavy, add a 1–2 inch mulch layer (straw or shredded leaves) to protect tubers. Water lightly only when the top inch of soil feels dry.
Wrapping up and next steps
Dividing dahlia tubers in spring is your secret weapon for vibrant, healthy blooms next season—just follow the gentle, precise steps we’ve shared! 🌱 With the right tools, timing, and care, you’ll transform a single tuber into a thriving garden showstopper.
Now that you’re armed with know-how, grab those tubers and get growing—your future dahlias will thank you!
💡 Next step: Mark your calendar for early spring (just as shoots peek through the soil) and prep your propagation space. Happy digging! 🌸