
Tools
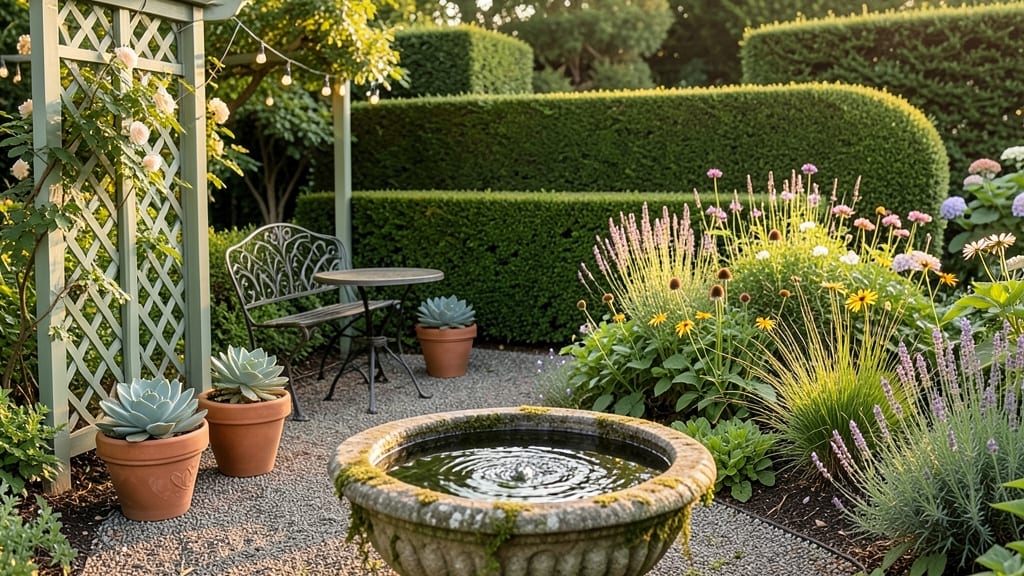
A beautiful garden doesn't happen by accident—it's a carefully layered masterpiece. ✨ I've designed gardens that turn heads in neighborhood parades, and the secret isn't expensive plants or rare varieties, but how you arrange what you already have.
Every season becomes a new canvas when you stack plants by height, color, and bloom time.
The foundation starts with three simple layers: tall backdrops (like ornamental grasses or shrubs), mid-height plants (perennials and small trees), and low-growing fillers (annuals or ground covers). Add pathways that guide visitors through your design, and suddenly a simple yard feels like a curated escape.
My first project used $200 worth of plants and transformed a boring backyard into a showstopper.
You'll end up with a garden that stays vibrant from spring through fall, with something always in bloom. The key is mixing evergreens for structure, seasonal flowers for color bursts, and foliage plants for texture.
Even small spaces can feel lush when you work with what you've got—no fancy tools needed, just good planning.
This approach works for any style—cottage charm, modern minimalism, or tropical vibes. The same principles apply whether you're working with a tiny balcony or a half-acre. Let's get your design started with plants you already love, arranged in ways that make them shine year-round.
📚 In This Guide
- What you need
- Instructions
- Tips and common mistakes
- Wrapping up and next steps
What you need
- ● Perennials (for structure & long-term color): 3–5 Coneflower (Echinacea) (purple/pink/white)
- ● 3–5 Black-eyed Susan (Rudbeckia) (gold/yellow)
- ● 3–5 Russian Sage (Perovskia) (lavender, drought-tolerant)
- ● 3–5 Sedum (Stonecrop) (succulent-like, low-maintenance)
- ● Annuals (for seasonal pops of color): 5–10 Petunias (trailing or bush varieties)
- ● 5–10 Marigolds (bright orange/yellow, pest-repellent)
- ● 3–5 Impatiens (shade-loving, vibrant blooms)
- ● Foliage plants (for texture & height): 1–2 Ornamental Grasses (e.g., Miscanthus or Fountain Grass)
- ● 3–5 Heuchera (Coral Bells) (colorful leaves, shade-tolerant)
- ● Ground cover (for weed suppression): Creeping Thyme (drought-resistant, fragrant)
- ● Ajuga (Bugleweed) (purple foliage, spreads easily)
- ● Digging & Prep: 1 Garden shovel (for moving soil)
- ● 1 Garden fork (for aerating heavy soil)
- ● 1 Hoe (for weeding and soil prep)
- ● Planting & Pruning: 1 Hand trowel (for precision planting)
- ● 1 Pruners (bypass or anvil) (for trimming dead growth)
- ● 1 Garden gloves (to protect your hands)
- ● Watering & Maintenance: 1 Garden hose with adjustable nozzle (or drip irrigation kit)
- ● 1 Watering can (for delicate plants)
- ● 1 Mulch (shredded bark or pine straw) (2–3 inches, to retain moisture)
- ● 1 Soil test kit (to check pH and nutrient levels)
- ● Organic compost or fertilizer (e.g., 10-10-10 or slow-release granules)
- ● Decorative garden stakes or trellises (for climbing plants like Clematis)
- ● Solar-powered garden lights (for evening ambiance)
- ● Knee pads or a foldable stool (for comfort during planting)
Instructions: design a stunning layered garden for year-round beauty
Here's how to create a garden that thrives through all seasons with bold color and texture.
🌿 Step 1: Plan Your Plant Layers for Height and Seasonal Interest
Start by sketching your garden space and dividing it into three distinct layers: back (tallest plants), middle (medium height), and front (low-growing or trailing). I like to use perennials for structure—like black-eyed Susans or coneflowers in the back—because they return year after year, saving you replanting work. For seasonal color, add annuals like petunias or marigolds in the front layer where they’ll bloom all summer.
Think vertically too—trellises with clematis or morning glories add drama while keeping the space organized. Place taller plants toward the center or back of the bed so they don’t block sunlight from shorter varieties. A simple trick: stand in the middle of your garden and look outward—everything should feel balanced, like a well-composed painting.
☀️ Step 2: Choose Plants for Sun Exposure and Soil Conditions
Most gardens have spots with different light levels, so match plants to their needs. For full sun areas (6+ hours of direct light), I recommend daylilies, salvia, or black-eyed Susans—they thrive in heat and bloom prolifically. In partial shade (3-6 hours of sun), try hostas, heuchera, or astilbe for lush foliage and delicate flowers. Shady spots? Ferns, bleeding heart, or impatiens will fill in beautifully.
Test your soil’s drainage by digging a hole, filling it with water, and timing how long it takes to drain. Sandy soil drains fast, while clay holds moisture. Amend heavy clay with compost or sand to improve aeration, and mix in peat moss for sandy soils. The goal is soil that holds moisture but doesn’t stay soggy—most plants hate "wet feet."
🪴 Step 3: Prepare the Soil and Plant for Immediate Impact
Remove weeds, rocks, or debris from your garden bed, then loosen the soil to a depth of 12 inches with a fork or tiller. This helps roots spread easily. Mix in 2-3 inches of compost or aged manure to enrich the soil naturally. For a quick boost, sprinkle a balanced fertilizer (like 10-10-10) over the bed and work it into the top 6 inches of soil.
Plant perennials first, spacing them 12-18 inches apart depending on their mature size. Fill gaps with annuals or ground covers like creeping thyme or ajuga to prevent weeds from taking over. Water deeply right after planting to settle the soil and encourage root growth. Mulch with 2-3 inches of shredded bark or pine needles to retain moisture, suppress weeds, and protect roots from temperature swings.
⏰ Step 4: Maintain Seasonal Color and Health Through the Year
Deadhead spent blooms regularly to encourage more flowers and keep your garden looking tidy. For example, pinch back petunias after they fade to prompt new growth. In early spring, trim back perennials like coneflowers or black-eyed Susans by one-third to shape them and remove winter-damaged stems. This also makes room for fresh, vibrant new growth.
Water deeply 1-2 times per week, depending on rainfall, focusing on the base of plants rather than overhead. Early morning is the best time to water—it reduces evaporation and fungal diseases. In hot climates, add mulch in summer to keep roots cool, and in winter, a thick layer of straw or leaves protects plants from freezing temperatures. Adjust your garden as you go: swap out annuals for fall-blooming varieties like mums or pansies when summer flowers fade.
Tips & tricks for perfect season-long garden design
Here's what nobody tells you about creating a garden that stays stunning all year long.
Seasonal Layering Strategy: When planning your three layers in Step 1, think about seasonal transitions. Plant spring bulbs like daffodils or tulips in the front layer—they'll bloom early and fade just as summer annuals take over. In the middle layer, include ornamental grasses that provide winter interest when other plants go dormant. This creates continuous visual appeal without constant replanting.
Soil Prep Pro Tip: After loosening your soil to 12 inches in Step 3, run a soil test to identify specific nutrient deficiencies. I've seen gardens fail because the soil was rich in nitrogen but lacked phosphorus—critical for root development. If testing shows deficiencies, add a phosphorus-rich fertilizer (like 5-10-10) when planting perennials. This one-time investment pays off for years with stronger plants that handle seasonal changes better.
Plant Spacing Secret: The 12-18 inch spacing in Step 3 might seem generous, but it's crucial for air circulation—especially in humid climates. Poor airflow leads to fungal diseases that can ruin your garden's appearance. For plants like hostas or heuchera, you can actually space them slightly closer (10-12 inches) since they're less prone to disease, but always check the plant tag for mature size recommendations.
Year-Round Maintenance Hack: In Step 4, instead of just deadheading, create a "bloom calendar" for your garden. Note when each plant flowers and set reminders for when to expect new blooms. This helps you time seasonal swaps perfectly—like replacing summer petunias with fall mums when you notice the petunias starting to fade. I keep mine in my phone's notes app with color-coded entries for each plant type.
Pro Tips for Make A Beautiful Garden
- Here's what nobody tells you about creating a garden that stays stunning all year long.
- Seasonal Layering Strategy: When planning your three layers in Step 1, think about seasonal transitions. Plant spring...
- Soil Prep Pro Tip: After loosening your soil to 12 inches in Step 3, run a soil test to identify specific nutrient de...
Frequently asked questions
Got questions about creating your dream garden? You’re not alone—every gardener starts somewhere! Here are answers to the most common queries to help you grow with confidence.
What’s the best time of year to start planting for year-round color?
For layered planting, start in early spring (3–4 weeks before last frost) with cool-season plants (like pansies or hellebores). Add warm-season bloomers (e.g., impatiens or zinnias) after the soil warms (usually May–June). Pro tip: Use annuals for instant pops of color and perennials for long-term structure.
How can I make a beautiful garden on a budget?
Skip expensive nursery plants—start with seeds (cheaper and easier to customize) and propagate cuttings from friends’ gardens. Use mulch (straw or leaves) to retain moisture, and repurpose containers (old buckets, tires, or even boots!) for vertical gardens. Free plants from local "plant swaps" or community gardens are another great option!
What do I do if pests or weeds take over my garden?
Act fast! Prevent pests with neem oil or companion planting (e.g., marigolds deter aphids). For weeds, pull them early (when roots are shallow) or smother them with cardboard + mulch. If bugs strike, handpick (like tomato hornworms) or use soapy water (1 tsp dish soap + 1 quart water) for soft-bodied pests.
Can I create a layered garden in containers or small spaces?
Use deep pots (12"+) for thriller-filler-spiller combos (e.g., thriller: ornamental grass, filler: petunias, spiller: trailing lobelia). For balconies, hang window boxes or stack vertical planters. Choose compact perennials (like ajuga or heuchera) and dwarf annuals (e.g., bacopa) for small spaces.
How do I protect my garden from harsh winters?
Start by choosing cold-hardy plants (e.g., sedum, lavender, or Russian sage). Mulch heavily (4–6 inches of straw or leaves) to insulate roots. For tender perennials, wrap containers in bubble wrap or move potted plants to a sheltered spot. Prune dead foliage in early spring (not fall) to avoid encouraging rot.
Still stumped? Drop your question in the comments—we’re happy to help your garden bloom!
Wrapping up and next steps
A beautiful garden isn’t just about luck—it’s about intentional planning, layering, and seasonal care. By combining perennials, annuals, and strategic spacing, you’ll enjoy vibrant blooms year-round with minimal effort. Start small, experiment with colors, and let your creativity grow!
Ready to transform your space? Pick one plant or section this weekend—your future garden will thank you! 🌸✨