
How To
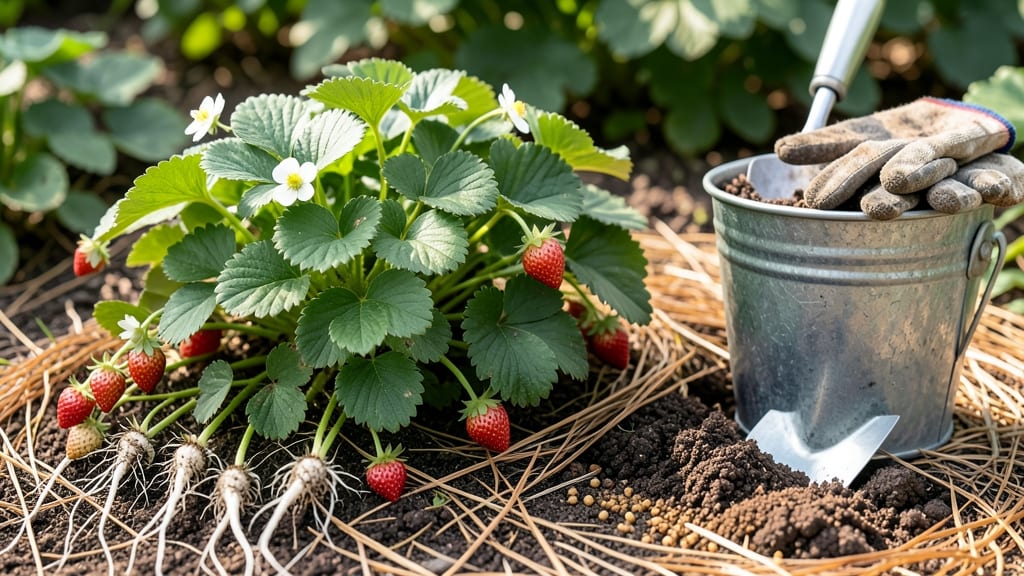
How to make a strawberry planter doesn’t require a sprawling garden—just the right container. 🌱 I’ve turned small balconies into sweet harvests using simple materials, and you can too. The secret lies in choosing containers with proper drainage and sunlight exposure that mimics strawberries’ natural growing conditions. You’ll need just 3 basic supplies: a container (wooden box, hanging basket, or even repurposed buckets), quality potting mix, and a few strawberry plants. Vertical options like trellised towers save space while maximizing yield—perfect for urban gardeners or those with limited ground space. The key is positioning: 6+ hours of sunlight daily and containers that won’t trap excess moisture. By late summer, you’ll be picking juicy, flavorful berries straight from your planter. The plants spread naturally, creating a lush, productive display that keeps giving all season. Even beginners see results—no fancy tools required. This method works for patio gardens, windowsills, or even hanging planters. Let’s get those strawberries growing—your taste buds will thank you!
📚 In This Guide
- What you need
- Instructions
- Tips and common mistakes
- Wrapping up and next steps
What you need
- ● Container: A clean, food-safe container (e.g., plastic bin, wooden crate, or fabric grow bag). Size: At least 6 inches deep and 12 inches wide (bigger is better for more berries!).
- ● Potting Soil: High-quality, well-draining potting mix (avoid garden soil—it compacts). Quantity: Enough to fill your container to 2-3 inches from the top.
- ● Strawberry Plants: Bare-root or potted strawberry plants (June-bearing or everbearing varieties work best). Quantity: 1-2 plants per 12" of container width (space them 6-12 inches apart).
- ● Drainage Layer: Small pebbles, gravel, or broken pottery shards (to prevent root rot). Quantity: 1-2 inches at the bottom of your container.
- ○ Mulch (Optional but Recommended): Straw or shredded leaves to retain moisture and suppress weeds.
- ● Gloves (to protect your hands from soil and thorns).
- ● Trowel or Small Shovel (for planting and soil adjustments).
- ● Watering Can or Hose with Gentle Spray (strawberries hate soggy roots!).
- ○ Fertilizer (Balanced, Slow-Release) (optional but boosts growth—look for 10-10-10 or organic options).
- ○ Plant Stakes or Small Trellis (optional, for everbearing varieties to support heavy fruit).
Step-by-Step instructions for building a strawberry planter
Here's how to create a thriving strawberry planter that maximizes space and yields sweet, abundant fruit.
🪴 Step 1: Select and Prepare the Container
Choose a container with a minimum depth of 12 inches and drainage holes—strawberries hate soggy roots. I prefer a half whiskey barrel or wide, shallow trough because it gives plants room to spread their runners. Clean the container thoroughly with a 10% bleach solution to kill any lingering pathogens, then rinse well and let it dry completely.
Line the bottom with 2 inches of gravel or broken pottery shards to improve drainage. This prevents water from pooling at the roots, which causes rot. If your container has no drainage, drill holes along the bottom edges—strawberries need excellent airflow at their roots.
🌱 Step 2: Layer the Growing Medium
Fill the bottom third of the container with a mix of 50% compost and 50% coarse sand or perlite. This layer ensures rapid drainage while retaining enough moisture for shallow strawberry roots. Pack it down lightly but don't compact it—roots need air pockets to breathe.
Add a 2-inch layer of high-quality potting mix on top of the drainage layer. This middle layer provides nutrients while keeping the roots slightly elevated, which prevents waterlogging. Strawberries are heavy feeders, so mix in a slow-release fertilizer like 10-10-10 at a rate of 1 tablespoon per square foot.
☀️ Step 3: Plant the Strawberries Correctly
Dig planting holes spaced 6-8 inches apart in the top layer of potting mix. Strawberries need room to spread, but overcrowding leads to poor air circulation and disease. Plant crowns (the area where leaves meet roots) just below the soil surface—burying them too deep causes rot, while leaving them exposed invites disease.
Water deeply right after planting to settle the soil and remove air pockets. You'll know it's right when the soil surface looks slightly damp but not glistening. Mulch the surface with 1 inch of straw or pine needles to retain moisture and suppress weeds. This also keeps fruit clean and off the soil.
💧 Step 4: Position for Optimal Growth
Place your planter in a location with 6-8 hours of direct sunlight daily. Strawberries need full sun to produce sweet fruit, but afternoon shade in hot climates prevents leaf scorch. If you're using a container, rotate it quarter-turn weekly so plants grow upright instead of leaning toward the light.
Water consistently to keep the soil evenly moist but not soggy. Strawberries are drought-tolerant once established, but young plants need 1 inch of water per week. Check moisture by sticking your finger 1 inch into the soil—if it feels dry, water deeply until it runs out the drainage holes. Avoid wetting the leaves to prevent fungal diseases.
✂️ Step 5: Maintain and Encourage Productivity
Remove flower buds during the first year to encourage strong root and leaf growth. This might seem counterintuitive, but it ensures your plants establish themselves before fruiting. In the second year, let flowers develop—you'll see fruit in 4-6 weeks after flowering. Harvest berries when they're fully red and slightly soft to the touch.
Prune old leaves and runners in early spring to redirect energy to new growth. I also remove any weeds immediately—they compete for nutrients and can harbor pests. Fertilize lightly every 4-6 weeks with a balanced organic fertilizer to maintain productivity. With proper care, your planter will yield fruit for years.
Tips & tricks for perfect strawberry planters
Common pitfalls—and how to sidestep every one—when creating your compact strawberry haven.
Container Depth Matters: The 12-inch minimum depth in Step 1 is non-negotiable for strawberries. Shallow containers lead to root-bound plants that struggle to produce fruit. If you're working with a shallower container, opt for dwarf varieties like 'Tristar' or 'Mignonette' that thrive in limited space. These compact plants still deliver sweet berries while adapting to your constraints.
Soil Layering Strategy: When building your drainage layer in Step 2, resist the urge to skip the perlite or sand—this is where most beginners go wrong. I've seen strawberry roots rot spectacularly when planted in containers with only compost. The 1:2 compost-to-perlite ratio creates that perfect air-to-moisture balance. Pro tip: Add a handful of coffee grounds to your topsoil layer for extra acidity, which strawberries love.
Crown Placement Precision: Step 3's crown placement is where many gardeners sabotage their plants. The crown should sit just above the soil line—imagine it as a tiny hill with the crown peeking out. Too deep? Rot. Too high? Weak growth. Here's a trick: Use a chopstick to make a small hole, then gently place the crown so it's level with the surrounding soil. Water immediately after planting to help settle the roots into position.
Mulching Beyond Moisture: That 2-inch layer of straw mulch in Step 4 does more than retain moisture—it's a weed barrier and temperature regulator. For extra protection, especially in hot climates, add a thin layer of landscape fabric under the straw. This prevents weeds from growing through while keeping the soil cooler. I've seen strawberry plants in full sun thrive with this double-layer approach, producing fruit even in summer's peak heat.
Pro Tips for Make A Strawberry Planter
- Common pitfalls—and how to sidestep every one—when creating your compact strawberry haven.
- Container Depth Matters: The 12-inch minimum depth in Step 1 is non-negotiable for strawberries. Shallow containers l...
- Soil Layering Strategy: When building your drainage layer in Step 2, resist the urge to skip the perlite or sand—this...
Frequently asked questions
Got questions about crafting your own strawberry planter? You’re not alone! Here are answers to the most common queries to help you grow a thriving strawberry garden with confidence.
Can I use any container for a strawberry planter?
Most containers work, but opt for ones with drainage holes to prevent root rot. Avoid plastic without holes—it traps moisture. Repurposed buckets, wooden boxes, or even hanging baskets (with proper drainage) are great alternatives! Just ensure the container is at least 6-8 inches deep for healthy root growth.
When is the best time to plant strawberries in a DIY planter?
Plant in early spring (after the last frost) or late summer for a fall harvest. Strawberries thrive in cooler weather and need time to establish roots before hot spells. If you’re in a warm climate, fall planting works too—just avoid extreme heat or cold.
How often should I water strawberries in a planter?
Keep soil consistently moist but not soggy. Water deeply 2-3 times per week (daily in extreme heat). Planters dry out faster than ground soil, so check moisture 1-2 inches below the surface. Mulch helps retain moisture—try straw or shredded leaves!
What should I do if my strawberries get pests or diseases?
Prevent pests with neem oil spray or companion planting (e.g., basil or mint). For fungal issues like gray mold, remove affected berries and improve airflow. Ensure your planter has good drainage to avoid soggy roots. If slugs are a problem, use beer traps or diatomaceous earth.
Can I grow strawberries year-round in a planter?
In most climates, no—but you can extend the season! Move planters indoors during winter (if temperatures drop below 20°F) or use a cold frame. Ever-bearing varieties produce fruit in cooler weather, but growth slows in freezing temps. Plan for a shorter harvest cycle if you’re pushing limits!
Wrapping up and next steps
Creating your own strawberry planter is a rewarding way to enjoy fresh, homegrown fruit—even in small spaces! With just a few supplies and a little creativity, you’ve got everything you need to grow juicy strawberries year after year.
Whether you’re using a hanging basket, repurposed container, or vertical planter, the key is consistency: water, sunlight, and love. 🌱
Now that you’re ready to plant, take the next step: watch your garden grow! Start with a few plants, experiment with varieties, and soon you’ll be harvesting strawberries straight from your balcony or backyard. Happy planting—your taste buds will thank you! 🍓✨