
Size
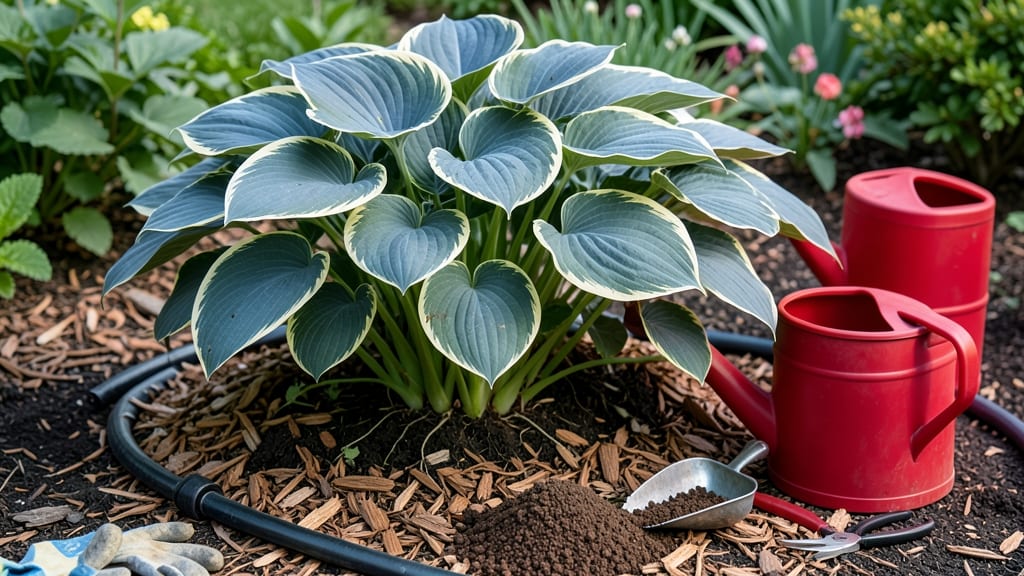
How to make hostas grow bigger—turn those sad little salad leaves into bold, dinner-plate giants with just a few soil tweaks. The secret starts underground—and it’s simpler than you think. I’ve watched my hostas go from tiny clumps to lush, thriving monsters by focusing on drainage, organic matter, and a little patience. No fancy tools needed, just smart layering that mimics their wild, forest-dwelling cousins.
First, ditch the compacted soil. Hostas hate soggy feet but love moist, rich, and well-draining conditions. Mix in 3–4 inches of compost or aged manure into the top 12 inches of soil, then top with a 2-inch layer of mulch (wood chips or shredded leaves work best).
This keeps roots cool, retains moisture, and feeds them slowly all season. My biggest mistake? Skipping the mulch—now I never do.
Watering matters just as much. Give them 1–1.5 inches of water per week, more in blazing summer heat, but never let them sit in puddles. Fertilize lightly in spring with a balanced 10-10-10 or a slow-release organic option—hostas don’t need heavy feeding, just a gentle nudge.
By midsummer, you’ll see new leaves the size of your hand, and by fall, your plants will look like they’ve been growing for years.
Pro tip: Divide clumps every 3–4 years to refresh growth. The smaller the divisions, the faster they establish—and the bigger they’ll grow next season. Avoid overcrowding, and watch your hostas double in size with minimal effort. Now go dig in—your future giant foliage is waiting.
📚 In This Guide
- What you need
- Instructions
- Tips and common mistakes
- Wrapping up and next steps
What you need
- ● Hostas: Mature plants (at least 1–2 years old) or divisions from existing clumps (3–5 inches tall for best results).
- ● Well-draining potting soil: 5–10 gallons, rich in organic matter (look for a blend labeled for perennials or shade plants).
- ● Compost or aged manure: 2–3 cups per plant to boost nutrients (avoid fresh manure—it can burn roots!).
- ○ Slow-release fertilizer: 10-10-10 or 12-12-12 (granular, 1–2 tablespoons per plant). Optional: Organic options like worm castings or fish emulsion.
- ● Mulch: 2–3 inches of shredded bark, pine needles, or straw to retain moisture and regulate soil temperature.
- ● Garden fork or trowel: For amending soil and planting.
- ● Watering can or hose with a gentle spray nozzle: Hostas love consistent moisture but hate soggy roots.
- ● Pruners or sharp shears: For trimming dead leaves or dividing clumps (sterilize with rubbing alcohol!).
- ● Garden gloves: To protect your hands from soil and sharp edges.
- ● Mycorrhizal fungi: A sprinkle in the planting hole to enhance root growth (mixes into soil before planting).
- ● Epsom salt (magnesium sulfate): 1 tablespoon dissolved in water (monthly feed for greener leaves).
- ● Shade cloth (30–50% coverage): If your hostas are in hotter climates, to protect young foliage.
- ● Soil pH test kit: To check if your soil is slightly acidic (ideal pH: 6.0–7.5 for hostas).
- ● Container or raised bed: If planting in pots, use a container at least 12–18 inches deep and wide.
Tips & tricks for perfect hostas growth
These simple strategies will help you transform your hostas into lush, leafy giants with minimal effort.
Soil Preparation Secret: Before adding compost, test your soil's moisture retention by squeezing a handful. If it forms a tight ball, your soil is too dense—this is why hostas struggle in clay. The 3-4 inches of compost we're adding should be mixed into the top 12 inches of soil, but don't stop there. Work in an extra inch of compost around the root ball when planting to give those new roots an immediate nutrient boost. Think of it like giving your hostas a head start with premium soil right where they'll be growing.
Planting Depth Insight: The "top of the roots" guideline in Step 2 is crucial—this means the crown (where leaves meet roots) should sit just slightly above soil level. I've seen gardeners bury the crown too deep, thinking it needs protection, only to watch the plant rot. For extra insurance, create a slight mound of soil around the base after planting to prevent water pooling. This small adjustment prevents the classic hosta problem of yellowing leaves from poor drainage.
Mulch Placement Precision: When applying that 3-4 inches of mulch in Step 3, resist the urge to pile it right against the crown. That 2-3 inch gap is intentional—it prevents moisture from sitting against the plant, which can cause rot. I like to create a shallow well around each plant to direct water toward the roots while keeping the crown dry. This simple adjustment can mean the difference between thriving hostas and plants with brown, crispy edges.
Fertilizer Timing Tip: That early spring application in Step 4 should happen when you see the first 2-3 inches of new growth emerging. This timing ensures the fertilizer supports active growth rather than sitting dormant in cold soil. I've found that applying it too early can actually stress the plant, while waiting too late means missing the initial growth window. Think of it as feeding your hostas at the perfect moment when they're most hungry for nutrients.
Pro Tips for Make Hostas Grow Bigger
- These simple strategies will help you transform your hostas into lush, leafy giants with minimal effort.
- Soil Preparation Secret: Before adding compost, test your soil's moisture retention by squeezing a handful. If it for...
- Planting Depth Insight: The "top of the roots" guideline in Step 2 is crucial—this means the crown (where leaves meet...
Frequently asked questions
Got questions about growing bigger, bolder hostas? You’re not alone! Here are answers to the most common queries—so you can get those lush leaves thriving fast.
How often should I fertilize hostas for bigger growth?
Feed hostas every 4-6 weeks during spring and summer with a balanced, slow-release fertilizer (like 10-10-10 or a compost-based option). In fall, switch to a low-nitrogen, high-phosphorus fertilizer to boost root development. Avoid overdoing it—too much nitrogen can lead to leafy growth at the expense of size!
How long does it take for hostas to grow noticeably bigger?
With ideal care, hostas can show visible growth in 4-6 weeks, especially after dividing or fertilizing. However, dramatic size increases (like doubling foliage) may take 1-2 growing seasons. Patience pays off—consistent watering, rich soil, and proper spacing are key!
Can I make hostas grow bigger in containers?
Use a large pot (at least 12-18 inches wide) with well-draining soil mixed with compost. Container hostas need regular watering (they dry out faster) and monthly feeding. Choose compact varieties (like ‘Blue Angel’ or ‘Halcyon’) for smaller spaces, or opt for sprawling types (like ‘Francee’) if you have room!
Why are my hostas staying small despite good care?
Small hostas often signal root-bound conditions, poor soil, or pests. Check for:
- Crowded roots: Divide overgrown clumps every 3-4 years.
- Compacted soil: Amend with organic matter (compost, peat moss).
- Pests: Slugs, snails, or vole damage can stunt growth. Use organic barriers or diatomaceous earth.
- Inadequate light: Hostas need partial shade (4-6 hours of sun)—too little light = tiny leaves.
What’s the best time to divide hostas for bigger growth?
Divide hostas in early spring or early fall when the soil is cool and moist. Avoid dividing in summer heat (stresses plants) or winter (roots may not regenerate). Choose healthy clumps with 3-5 shoots per division and replant in enriched soil for a growth boost!
Wrapping up and next steps
Growing bigger, lusher hostas is all about layered care—rich soil, consistent watering, smart feeding, and a little patience! 🌱 With the right techniques, you’ll soon enjoy those showstopping leaves you’ve been dreaming of. Ready to see your hostas thrive?
Your next step? Pick one tip from this guide—whether it’s amending soil, dividing clumps, or protecting them from pests—and try it this season. Small changes lead to big results, so grab your gardening gloves and get growing! 🌿