
Transplanting
How to move a peony to another location feels like relocating a stubborn old friend—it takes patience, but the right timing makes all the difference. 🌿 The best time to transplant peonies is in early fall, when the foliage yellows but before the first hard frost. This gives roots time to establish before winter dormancy, and you’ll see those lush, repeat-blooming stems emerge stronger next spring.
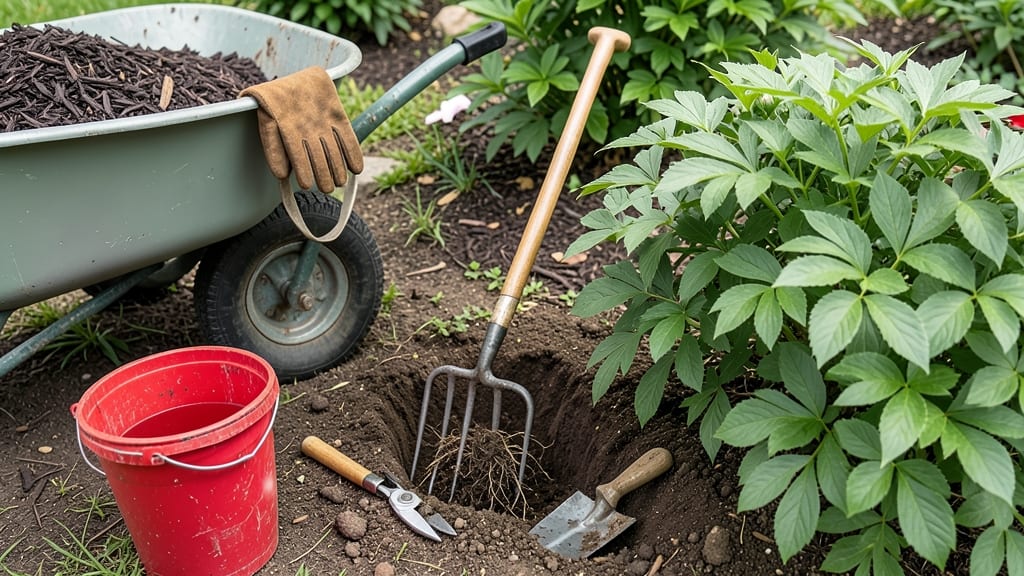
You’ll need basic tools: a sharp spade, garden gloves, and a wheelbarrow for hauling. The real secret? Digging a wide trench around the plant first—12-18 inches out—to loosen roots gently.
Peonies hate root damage, so avoid cutting through thick roots unless necessary. A little mulch around the new spot helps retain moisture while the plant adjusts.
After transplanting, keep the soil consistently moist but not soggy for the first 4-6 weeks. The first year might be quiet—no blooms, just foliage—but by year two, your peony will reward you with bold, vibrant blooms that last all season.
The key is minimal stress: shade the plant for a few days post-move, and avoid fertilizing until new growth appears.
This method works for both herbaceous and tree peonies, whether you’re relocating a single plant or a whole garden bed. Just remember: peonies thrive where they’re happy, and a little extra care during transplanting ensures decades of trouble-free blooms. Let’s get those roots settled!
📚 In This Guide
- What you need
- Instructions
- Tips and common mistakes
- Wrapping up and next steps
What you need
- ● Garden fork or shovel: A sturdy, wide-blade fork or spade (18–24 inches long) to carefully dig up peony roots without damaging them.
- ● Pruning shears: Sharp, clean shears (sterilized with rubbing alcohol) to trim dead or overgrown foliage and roots.
- ● Garden hose or watering can: For thorough watering before and after transplanting (aim for 1–2 gallons per plant).
- ● Compost or well-aged manure: 2–3 gallons per plant to enrich the new soil and provide nutrients.
- ● Organic mulch: 2–3 inches of straw, wood chips, or shredded leaves to retain moisture and protect roots.
- ● Garden gloves: Heavy-duty gloves to protect your hands from thorns and dirt.
- ● Measuring tape or ruler: To ensure proper spacing (2–3 feet between peonies for optimal growth).
- ● Root stimulator: A liquid or powder (like mycorrhizal fungi or seaweed extract) to encourage root growth in the new location.
- ● Soil test kit: To check pH and nutrient levels (ideal pH: 6.0–7.0 for peonies).
- ● Transplanting fabric or burlap: To protect roots if moving peonies during extreme heat or cold.
- ● Stakes or cages: For support if your peonies are tall or leggy in their new spot.
Step-by-Step instructions for moving peony to a new location
Peonies thrive when transplanted correctly—here’s how to relocate them without sacrificing next year’s blooms.
🌱 Step 1: Choose the Right Time and Prepare the New Site
Transplant peonies in early fall, about 6 weeks before the first hard frost, when the foliage begins to yellow but hasn’t fully died back. This timing lets roots establish before winter. Avoid moving in spring—peony roots are most vulnerable then, and the plant may not recover in time for blooming.
Select a location with full sun (at least 6-8 hours daily) and well-draining soil. Peonies hate soggy roots, so amend heavy clay with 2-3 inches of compost or sand to improve drainage. Test the soil pH—peonies prefer 6.5-7.0. If your soil is too acidic, mix in lime before planting.
🌿 Step 2: Dig Up the Peony Carefully to Preserve Roots
Use a shovel or garden fork to dig around the peony, keeping the clump intact. Aim for a 12-inch diameter around the base to capture as many roots as possible. Lift the entire plant gently—never pull by the stems, as this can damage the crown (the swollen base where roots and stems meet).
Inspect the roots immediately after digging. Trim any rotten or mushy roots with sterilized pruners, but leave healthy roots intact. If the clump is overcrowded (more than 5-6 eyes—the small buds on the crown), divide it now by carefully separating sections with a sharp knife. Each division should have 3-5 eyes and a portion of the root system.
🪴 Step 3: Plant the Peony at the Correct Depth
Dig a hole twice as wide as the peony’s root ball but no deeper than 2 inches below the crown. Peonies planted too deep won’t bloom, while those planted too shallow risk frost damage. The crown should sit just below the soil surface—use a ruler to measure if unsure.
Place the peony in the hole, spreading roots outward naturally. Fill the gap with the amended soil, pressing lightly to remove air pockets. Water deeply until the soil settles, then add a 1-inch layer of mulch (like straw or wood chips) around the base, keeping it 6 inches away from the crown to prevent rot.
☀️ Step 4: Water and Monitor for Stress Signs
Water the newly transplanted peony every other day for the first 2 weeks, then taper to once a week unless rainfall provides 1 inch of moisture. Overwatering after transplanting can suffocate roots, while underwatering stresses the plant. You’ll know it’s getting enough water when the soil feels damp 2 inches below the surface.
Watch for wilting leaves or yellowing foliage—these are signs of transplant shock. If you see them, reduce watering slightly and ensure the mulch isn’t smothering the crown. Peonies may skip blooming the first year after moving, but with proper care, they’ll rebound with vibrant flowers in 2-3 years.
⏰ Step 5: Prune and Fertilize for Recovery
Wait until spring to prune the peony. Cut back the previous year’s stems to 1 inch above the ground, removing any dead or damaged growth. Avoid pruning in fall—it stresses the plant before it’s had time to recover. Apply a balanced fertilizer (like 10-10-10) in early spring to encourage root growth and flowering.
Here’s the thing—don’t fertilize immediately after transplanting. Wait until new growth appears in spring. Over-fertilizing now can burn the roots and delay recovery. Instead, focus on keeping the soil moist and the mulch in place to protect the crown through winter.
Tips & tricks for stress-free peony transplanting
Relocating peonies successfully requires attention to detail—here’s how to avoid the most common pitfalls and ensure your plants thrive in their new home.
Timing is Everything: The 6-week window before hard frost in Step 1 is non-negotiable. I’ve seen gardeners rush this and end up with peonies that struggle to establish roots before winter. Check your local frost dates and mark your calendar—this timing gives roots just enough time to knit together before dormancy. If you’re unsure, aim for late September to early October in most climates.
Root Preservation Technique: In Step 2, that 12-inch diameter around the base isn’t arbitrary—it captures the full extent of the peony’s root system. I learned this the hard way after transplanting a clump I thought was big enough, only to watch it struggle for years. Use a garden fork to loosen soil gradually in a circular motion, then lift the entire root ball intact. If you must divide, make clean cuts with a sterilized knife and ensure each section has 3-5 eyes—this guarantees future blooms.
Crown Depth Matters More Than You Think: Step 3’s 2 inches below the crown rule is critical for two reasons: First, planting too deep smothers the crown, preventing blooms. Second, planting too shallow exposes it to frost heave in winter. I’ve seen gardeners eyeball this and end up with peonies that either refuse to flower or get frost-damaged. Use a ruler to measure—this small investment prevents years of frustration.
Watering Wisdom: The every other day for 2 weeks schedule in Step 4 might seem excessive, but it’s essential. Peonies need consistent moisture to establish roots without becoming waterlogged. I’ve found that checking soil dampness 2 inches below the surface is more reliable than sticking to a rigid schedule—adjust based on weather conditions. Mulch helps maintain even moisture, but don’t let it touch the crown.
Pro Tips for Move Peony To Another Location
- Relocating peonies successfully requires attention to detail—here’s how to avoid the most common pitfalls and ensure ...
- Timing is Everything: The 6-week window before hard frost in Step 1 is non-negotiable. I’ve seen gardeners rush this ...
- Root Preservation Technique: In Step 2, that 12-inch diameter around the base isn’t arbitrary—it captures the full ex...
Frequently asked questions
Got questions about relocating your peonies? You’re not alone—transplanting these beauties can feel tricky! Here are some of the most common concerns and straightforward answers to help you move with confidence.
When is the best time to transplant peonies?
The ideal window is early fall (September–October) or early spring (March–April), when the soil is workable but not frozen. Avoid transplanting in extreme heat or during peak blooming season—your peonies will thank you with faster recovery and stronger roots!
How long does it take for peonies to adjust after moving?
Peonies are tough but need patience! Expect 1–2 years for full recovery, though they may bloom sooner if transplanted correctly. Focus on consistent watering and mulching during the first year to reduce stress.
Can I divide and transplant peonies in the same season?
Nope—dividing and transplanting should never happen in the same season. If you divide peonies in spring or fall, wait at least 6 months before moving them again. This gives roots time to heal and establish.
What if my peonies look sad after transplanting?
Wilted leaves or no blooms? Don’t panic! This is normal for the first year. Ensure they get full sun (6+ hours/day), well-draining soil, and regular water. Avoid fertilizing heavily—peonies thrive on low-nitrogen care.
Are there alternatives if my peonies refuse to bloom after moving?
If blooms are scarce, check these fixes:
- Too much nitrogen (use a balanced 10-10-10 fertilizer instead).
- Overcrowded roots—dig up and divide if needed.
- Improper depth—eyes (buds) should sit 1–2 inches below soil.
Wrapping up and next steps
Moving your peony to a new home doesn’t have to be stressful—with the right timing, tools, and care, you’re setting the stage for years of stunning blooms. Remember: patience and preparation are key, whether you’re relocating a mature plant or giving a young peony a fresh start.
Now that you’re armed with the know-how, grab those gloves and get ready to give your peony the perfect new spot!
🌱 Next step: Mark your calendar for early fall or late winter—the ideal windows for transplanting—and watch your garden transform with vibrant peony magic!