
Vegetables
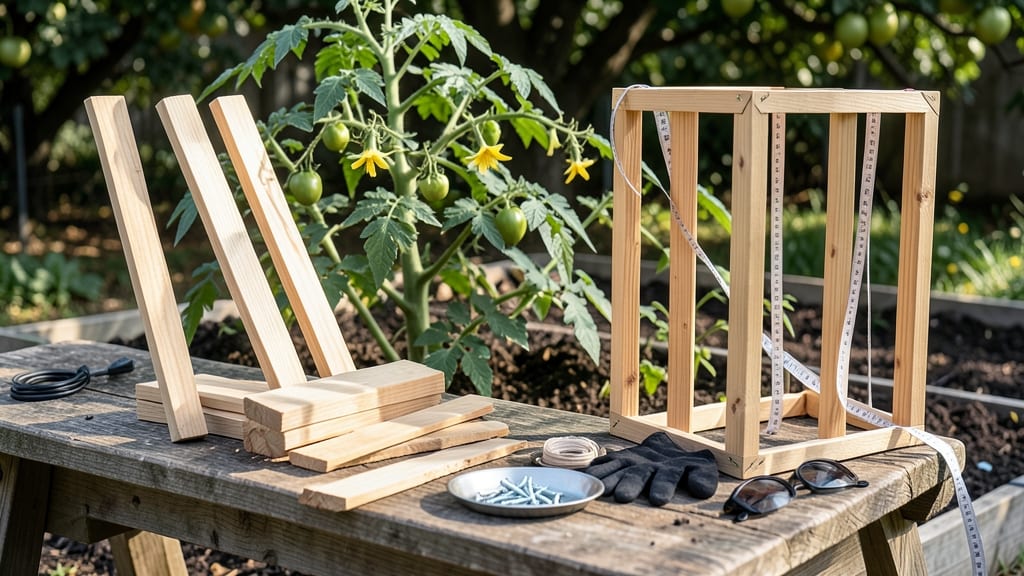
Building a wooden tomato cage transforms floppy vines into neat, productive towers. 🌱 I learned the hard way—last summer’s indeterminate tomatoes sprawled everywhere, breaking branches and attracting pests. This sturdy design keeps plants supported, maximizes space, and looks intentional in the garden.
You’ll need cedar or pine lumber (rot-resistant), basic tools, and about 2 hours for assembly. The key is reinforcing joints with screws and corner braces—no wobbly cages here. Cedar lasts years, while pine works for a single season if treated properly.
For indeterminate varieties, go taller (6-7 feet); determinate tomatoes thrive in 4-foot frames. Once built, your tomatoes will climb confidently, producing heavier fruit without snapping stems. The open design also improves airflow, reducing disease risk. Plus, it’s a space-saving game-changer for small gardens or balconies.
Customize the size or add trellis panels for extra support. The best part? You’ll never buy another flimsy store-bought cage again.
📚 In This Guide
- What you need
- Instructions
- Tips and common mistakes
- Wrapping up and next steps
What you need
- ● 2x4 lumber – 4 pieces, each 8 feet long (for the main frame)
- ● 1x2 lumber – 4 pieces, each 6 feet long (for cross supports)
- ● Wood screws – 2-inch and 3-inch screws (about 50 total)
- ● Wood glue – for extra reinforcement
- ● Sandpaper – 120-grit (to smooth rough edges)
- ○ Exterior wood stain or paint – optional but recommended for weather resistance
- ● Measuring tape
- ● Circular saw or miter saw
- ● Drill & drill bits
- ● Screwdriver (or impact driver)
- ● Speed square (for precise angles)
- ○ Clamps (optional, for holding pieces in place)
- ● Paintbrush or roller (if staining/painting)
- ● Galvanized hardware cloth – to deter pests from nesting inside
- ● Corner braces – for added stability in windy areas
- ● Non-toxic sealant – for extra protection against moisture
- ● Decorative lattice panels – for a garden-friendly aesthetic
Step-by-Step instructions for building a wooden tomato cage
Here's my go-to method for constructing a durable, vine-supporting tomato cage that stands up to heavy fruit loads.
🪴 Step 1: Gather Materials and Prep Wood
You'll need 2x4 lumber (4 pieces, 8 feet long), 1x2 lumber (8 pieces, 2 feet long), galvanized screws (2 inches, 50-count box), and wood glue. Cut the 2x4s into 4 vertical posts (6 feet tall) and 4 horizontal crossbars (3 feet long). Sand all edges to prevent splinters—nothing ruins a harvest faster than jagged wood scraping tender vines.
Pre-drill screw holes at each joint to prevent wood splitting. I like to mark the crossbar positions at 18 inches, 36 inches, and 54 inches on each post—this creates a sturdy pyramid shape that supports weight evenly. Use a square tool to ensure 90-degree angles at every connection.
🔨 Step 2: Assemble the Cage Frame
Start by screwing the bottom crossbar onto the four posts, flush with the bottom. Space the posts 2 feet apart to create a square base. Add the middle crossbar at 18 inches, then the top crossbar at 36 inches. This three-tier design distributes vine weight better than single-tier cages.
For extra stability, add diagonal braces (cut from 1x2 lumber) from the top of each post to the center of the middle crossbar. Test the frame by gently pushing the sides—it should hold firm without wobbling. If it feels loose, add another screw to each joint.
⏰ Step 3: Add the Top Support Structure
Cut 4 additional 1x2 pieces (3 feet long) to form the top ring. Space them 6 inches apart along the top crossbar, then screw them in place. This creates a cage-like top that prevents vines from escaping while allowing easy access for pruning. I like to leave a 4-inch gap between the top ring and the final crossbar—this gives vines room to grow upward without crowding.
For heavy varieties like Beefsteak tomatoes, reinforce the top ring with horizontal 1x2 slats every 6 inches around the perimeter. This extra support prevents the cage from bowing under fruit weight. Use stain or sealant to protect the wood from moisture and extend its lifespan.
☀️ Step 4: Position and Secure the Cage
Place the cage in the garden after transplanting seedlings to avoid disturbing roots. Drive 4 metal stakes (18 inches long) into the ground at a 45-degree angle from each corner, then screw the cage posts to the stakes for extra stability. This keeps the cage from leaning or toppling in windy conditions.
For wind-prone areas, add guy wires (thin nylon rope) from the top corners to sturdy garden posts. Stretch them taut but not tight—just enough to prevent swaying. Water the tomato plant deeply before securing the cage to encourage root establishment.
🌱 Step 5: Train Vines and Maintain Structure
Once the plant reaches 12 inches tall, gently weave the main stem through the bottom crossbar, then coil side shoots around the middle crossbar. Use soft garden twine to tie vines loosely to the frame—never pull tight, as this restricts growth. I like to prune suckers (side shoots below the first flower cluster) to direct energy upward.
Check the cage weekly for loose screws or leaning posts. Tighten any wobbly joints before heavy fruit sets. If the wood starts to warp, reinforce with additional screws or corner braces. A well-built cage lasts 3-5 seasons with proper care.
Tips & tricks for building a sturdy tomato cage
A few smart moves can turn your tomato cage from a flimsy afterthought into a garden workhorse that lasts seasons. Here's what I've learned the hard way—and how to avoid the same mistakes.
Precision Cuts Are Everything: When cutting your 2x4 posts to 6 feet tall, measure twice and cut once. A half-inch difference in height can throw off your entire cage's stability. I mark my cuts with a pencil and double-check with a tape measure before making any saw cuts—this ensures all four posts are identical. For the crossbars at 18, 36, and 54 inches, use a combination square to mark perfectly straight lines across all posts before cutting. This creates a perfectly level frame that won't wobble when weighted down with fruit.
Screw Placement Matters More Than You Think: The instructions mention pre-drilling screw holes, but here's the secret: space them 3 inches apart at each joint rather than just one screw per connection. This creates a stronger triangle of support that prevents the frame from bending under heavy tomato loads. For the diagonal braces in Step 2, use three screws per brace—one at each end and one in the center. This triple-point connection is what keeps your cage from collapsing when Beefsteak tomatoes start weighing it down.
Top Ring Reinforcement for Heavy Varieties: If you're growing large-fruited tomatoes like Brandywine or Cherokee Purple, don't skip the 6-inch slats around the top ring. These create a ladder-like structure that prevents the top from bowing inward when fruit sets. I've seen cages built exactly as instructed collapse under 10-pound tomatoes without this reinforcement. For extra peace of mind, add a horizontal crossbar between the top ring and the final crossbar—just 12 inches below the top—to create a second support layer.
Guy Wire Technique for Wind Protection: When adding guy wires in windy areas, use zip ties instead of knots at the top corners. This creates a cleaner, more professional finish that won't chafe the wood over time. For the anchor points, bury T-posts 12 inches deep rather than using existing garden posts. The deeper anchor prevents the entire system from being pulled out if a storm hits. I like to stretch the wires just tight enough that they're visible when pulled straight—this gives you that perfect tension without over-stressing the system.
Pro Tips for Build A Wooden Tomato Cage
- A few smart moves can turn your tomato cage from a flimsy afterthought into a garden workhorse that lasts seasons. He...
- Precision Cuts Are Everything: When cutting your 2x4 posts to 6 feet tall, measure twice and cut once. A half-inch di...
- Screw Placement Matters More Than You Think: The instructions mention pre-drilling screw holes, but here's the secret...
Frequently asked questions
Got questions about building your wooden tomato cage? You’re not alone! Here are some of the most common concerns—and their answers—to help you get started with confidence.
What’s the best wood to use for a tomato cage?
Opt for cedar, pine, or treated lumber (like pressure-treated wood) to balance durability and affordability. Avoid untreated woods—like raw lumber—that can rot quickly. Cedar resists pests naturally, while pine is budget-friendly. Just ensure any treated wood is labeled safe for vegetable gardens!
How long does it take to build a wooden tomato cage?
For a beginner, expect 1–3 hours depending on complexity. Simple A-frame cages take less time, while multi-tiered designs (like the "cage tower") may require extra effort. Pre-cutting materials and using screws instead of nails speeds things up. Pro tip: Gather tools first—nothing kills momentum like hunting for a drill mid-project!
Can I reuse a tomato cage for multiple years?
With proper care, a wooden cage can last 5–10 years. Clean it thoroughly after harvest (scrub with soapy water, let dry), and store it in a dry place. Avoid leaving it outside year-round—moisture and pests will shorten its lifespan. A fresh coat of non-toxic sealant every few years keeps it sturdy.
What if my cage collapses under the weight of tomatoes?
This usually means the frame isn’t sturdy enough. Reinforce weak spots with extra corner braces or thicker wood (2x2s or 2x4s). For heavy vines, add horizontal supports every 2 feet. If using lightweight wood, consider metal rebar stakes buried 12 inches deep for extra stability.
Are there alternatives if I don’t want to build from scratch?
No problem! Buy pre-made cages (plastic, wire, or wood) or DIY with repurposed materials like old ladders, pallets, or even PVC pipes. For a no-build option, try tomato trellises (leaning stakes or stakes with twine) if space is tight. Just ensure any alternative supports 20+ pounds per plant!
Wrapping up and next steps
Building your own wooden tomato cage is a rewarding project that gives your plants the support they need for a thriving harvest! With just a few tools, some lumber, and a little patience, you’ve got a sturdy, custom-made solution that’s both practical and satisfying. 🌱
Now that you’ve got the know-how, it’s time to roll up your sleeves and create your dream garden setup. Ready to watch those tomatoes climb and flourish? Grab your materials and start building! 🛠️✨