
Propagation
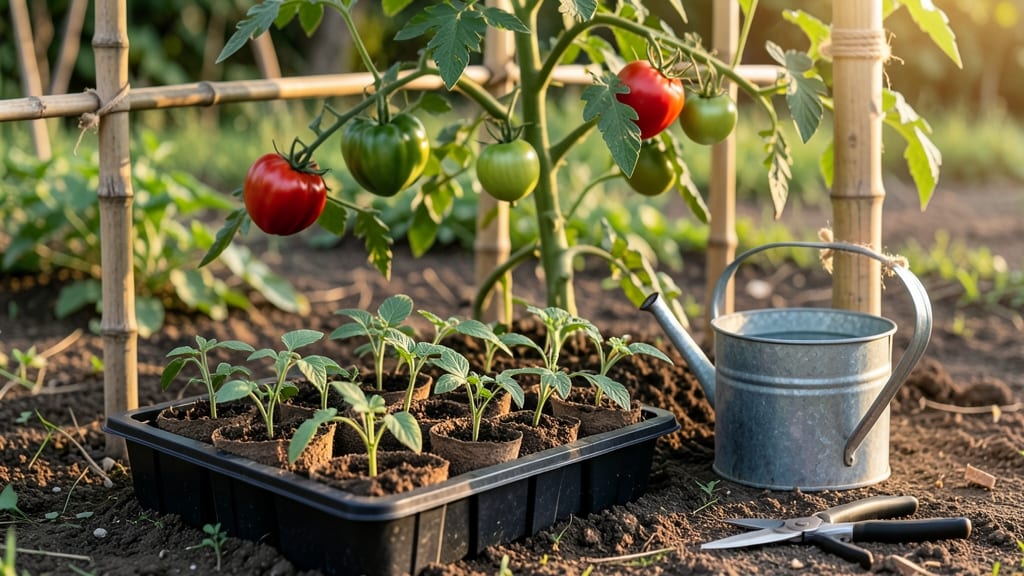
How to grow beefsteak tomatoes from seed means sun-ripened giants on your vine by summer. 🌱 I’ve grown these massive heirlooms for years, and the first time I bit into a homegrown beefsteak—juicy, meaty, and bursting with flavor—it changed how I garden forever. The key? Starting early and giving them the right conditions from day one.
Most beginners struggle with leggy seedlings or damping off, but I’ll show you how to avoid those pitfalls. You’ll need a sunny windowsill or grow light, seed-starting mix, and patience—because beefsteaks take 8-10 weeks indoors before they’re ready for the garden.
The payoff? Plants that reach 6+ feet tall and produce 1-pound fruits each.
By midsummer, you’ll be harvesting tomatoes so large they’ll make your neighbors jealous. The trick is consistent watering, sturdy staking, and pruning to focus energy on those monster fruits. Even if you’ve failed before, this method works—guaranteed—if you follow the steps.
Whether you’re growing in pots or a raised bed, beefsteaks thrive with the right care. Let’s get those seeds started so you can taste the difference between store-bought and homegrown by July.
📚 In This Guide
- What you need
- Instructions
- Tips and common mistakes
- Wrapping up and next steps
What you need
- ● Beefsteak tomato seeds: Choose heirloom or hybrid varieties like 'Brandywine,' 'Cherokee Purple,' or 'Big Beef.' Aim for 10-20 seeds (more if you’re experimenting!).
- ● Seed-starting mix: A lightweight, sterile blend (e.g., 50% peat moss, 30% perlite, 20% vermiculite) or a pre-mixed seed-starting soil (5-10 lbs).
- ● Containers: Biodegradable pots (2-3 inches deep), peat pellets, or cell packs (1-2 per seed).
- ● Grow lights or sunny windowsill: A full-spectrum LED grow light (12-16 hours/day) or a south-facing window with 6-8 hours of direct sunlight.
- ● Watering can or spray bottle: With a fine rose nozzle to avoid disturbing seeds.
- ● Plastic wrap or humidity dome: To retain moisture during germination.
- ● Fertilizer: A balanced, water-soluble fertilizer (e.g., 10-10-10) or organic options like fish emulsion (diluted to ½ strength).
- ● Heating mat: Speeds up germination (set to 70-80°F).
- ● pH meter or test kit: Ideal soil pH for tomatoes is 6.0-6.8.
- ● Plant labels: Mark varieties and dates (e.g., wooden stakes or plant markers).
- ● Pruning shears: For future transplanting or staking.
- ● Garden journal: Track progress, soil conditions, and watering schedules!
Step-by-Step instructions for growing beefsteak tomatoes from seed
These sun-loving giants start small but deliver rewards worth the wait.
🌱 Step 1: Start Seeds Indoors with Proper Warmth and Light
Fill 2-3 inch deep seedling trays with sterile seed-starting mix and press it down lightly—just firm enough to hold shape when tapped. Plant 2-3 seeds per cell at a depth of ¼ inch, about the width of a pencil eraser. Cover with a thin layer of the same mix, then mist gently until the surface looks evenly damp but not soggy.
Place the tray in a warm spot—75-85°F is ideal. I use a seedling heat mat under my trays, which cuts germination time by nearly half. Keep the mix consistently moist (not wet) by covering with a humidity dome or plastic wrap. You'll see sprouts in 7-14 days, depending on your home's warmth.
☀️ Step 2: Provide Strong Light to Prevent Leggy Seedlings
The moment those first true leaves appear, move seedlings under 14-16 hours of bright light daily. A south-facing window rarely provides enough intensity, so I supplement with a full-spectrum LED grow light positioned just 2-3 inches above the plants. Raise it as they grow to maintain that gap—you want the light to hover like a gentle shadow.
Leggy seedlings (thin stems with widely spaced leaves) mean your light is too weak or far away. Rotate the tray quarter-turn daily so plants grow straight. Once seedlings have 2 sets of true leaves, thin to the strongest plant per cell. Snip the extras at soil level with clean scissors—don't pull, or you'll disturb roots.
🪴 Step 3: Harden Off and Transplant After Last Frost
Two weeks before your last frost date, begin hardening off by placing seedlings outside in a sheltered spot for 1-2 hours the first day. Gradually increase time over 10-14 days
Choose a sunny spot with 6-8 hours of direct sun and well-draining soil. Bury seedlings deeper than their original pots—up to the first set of leaves. This encourages strong root growth. Space plants 2-3 feet apart in rows 3-4 feet apart to allow airflow and prevent disease. Water deeply 1-2 times weekly, aiming for 1-2 inches of water per week. Let the top inch of soil dry between waterings—consistent moisture prevents cracking in those massive fruits. Install sturdy cages or stakes at planting time to support the vines as they grow. I use 6-foot bamboo stakes tied with soft plant ties to avoid damaging stems. Fertilize when flowers appear with a balanced 10-10-10 or 5-5-5 formula, following package rates. Too much nitrogen early on will produce leafy growth at the expense of fruit. Watch for early signs of disease like yellowing leaves or spots—remove affected foliage immediately and space plants to improve airflow. Prune suckers (the small shoots in the leaf axils) regularly to direct energy into fruit production. Remove leaves touching the soil to prevent rot. When fruit sets, pinch off the first few blooms if plants are small—this lets the remaining flowers develop larger tomatoes. You'll know they're ready to pick when they're fully colored and slightly soft to the touch. Harvest beefsteaks when they're uniformly colored and just beginning to yield to gentle pressure. Use pruning shears to cut stems, leaving a short piece attached. Store at room temperature until fully ripe—these beauties can weigh 12+ ounces each! Keep plants healthy through the season by continuing to water deeply and fertilize lightly every 3-4 weeks.💧 Step 4: Maintain Consistent Moisture and Support
✂️ Step 5: Prune and Harvest for Maximum Yield
Tips & tricks for perfect beefsteak tomato growth
Growing beefsteak tomatoes from seed is a rewarding journey—here's how to avoid common pitfalls and maximize your harvest.
Seed Starting Wisdom: In Step 1, don't rush the germination process. While the instructions call for 75-85°F warmth, I've found that maintaining consistent moisture is just as critical. After planting your 2-3 seeds per cell at ¼-inch depth, use a spray bottle to mist the surface rather than pouring water directly. This prevents soil compaction and ensures even moisture distribution. The humidity dome helps maintain that perfect damp-but-not-soggy environment, which is key for those first sprouts appearing in 7-14 days.
Light Management Secret: When your seedlings develop their first true leaves in Step 2, the 14-16 hours of light becomes non-negotiable. I recommend setting a timer for your grow light—this prevents over-lighting, which can stress seedlings. Position the light just 2-3 inches above the plants and raise it daily as they grow. Watch for leggy seedlings (thin stems with widely spaced leaves) as your first warning sign that light intensity needs adjustment. Rotating the tray quarter-turn daily ensures even growth rather than plants leaning toward the light source.
Transplanting Technique: During Step 3's hardening off process, I've learned that patience pays off. Start with just 1-2 hours outside on day one, then gradually increase exposure over 10-14 days. The key visual cue is leaf color—healthy leaves will deepen to a rich green as they toughen. When transplanting, bury seedlings up to their first set of leaves; this buried stem encourages robust root development. For the 2-3 foot spacing mentioned, I use a simple measuring tape to mark rows before planting—this prevents overcrowding that leads to disease.
Ongoing Care Strategy: In Step 4, the 1-2 inches of weekly water is crucial for preventing cracked fruits. I've found that watering deeply in the morning allows foliage to dry completely by evening, reducing disease risk. For support, I install 6-foot bamboo stakes at planting time and use soft plant ties that won't cut into stems as vines grow. The 3-4 week fertilization schedule should begin only after flowers appear—early nitrogen promotes leafy growth at the expense of fruit development.
Pro Tips for Grow Beefsteak Tomatoes From Seed
- Growing beefsteak tomatoes from seed is a rewarding journey—here's how to avoid common pitfalls and maximize your har...
- Seed Starting Wisdom: In Step 1, don't rush the germination process. While the instructions call for 75-85°F warmth, ...
- Light Management Secret: When your seedlings develop their first true leaves in Step 2, the 14-16 hours of light beco...
Frequently asked questions
Got questions?
Growing beefsteak tomatoes from seed is rewarding, but it’s natural to have a few uncertainties along the way. Here are answers to some of the most common queries to help you grow like a pro!
How long does it take for beefsteak tomato seeds to germinate?
Beefsteak tomato seeds typically germinate in 7–14 days when kept in warm, moist soil (around 70–85°F). For faster results, use a seedling heat mat or place the tray in a sunny windowsill. Patience is key—don’t overwater or disturb the soil while waiting!
When is the best time to transplant seedlings outdoors?
Wait until after the last frost and when nighttime temperatures stay above 50°F (10°C). Seedlings should be 4–6 inches tall with 3–4 true leaves before transplanting. Harden them off for 7–10 days by gradually exposing them to outdoor conditions to avoid shock.
Why are my beefsteak tomato seedlings leggy or weak?
Leggy seedlings usually mean too little light or overcrowding. Move them to a sunny window or under grow lights (12–16 hours/day). Thin seedlings to 2 inches apart and ensure they’re in well-draining soil. A balanced fertilizer (like 5-5-5) can also help them bulk up!
Can I grow beefsteak tomatoes in containers, and what size pot do I need?
Beefsteak tomatoes thrive in 5-gallon containers or larger—at least 18–24 inches deep to support their deep roots. Use a high-quality potting mix with compost, and add tomato cages or stakes for support. Just ensure the pot has drainage holes to prevent root rot.
What are the most common pests for beefsteak tomatoes, and how do I prevent them?
Watch out for hornworms, aphids, and whiteflies. Handpick hornworms (they’re easy to spot!) and use neem oil or insecticidal soap for smaller pests. Row covers can deter flying insects early in the season. Healthy plants with proper spacing and pruning are less attractive to pests!
Wrapping up and next steps
Growing beefsteak tomatoes from seed is a rewarding journey that brings sun-ripened, flavor-packed giants straight to your kitchen.
With patience, the right conditions, and a little love, you’ll soon be harvesting juicy, vine-ripened tomatoes that outshine store-bought varieties. Now’s the time to celebrate your green thumb—why not share your success by swapping seeds or gifts with fellow gardeners? 🌱✨
Ready for more? Experiment with varieties, try companion planting, or even preserve your harvest! Your garden adventure is just getting started.