
Pests
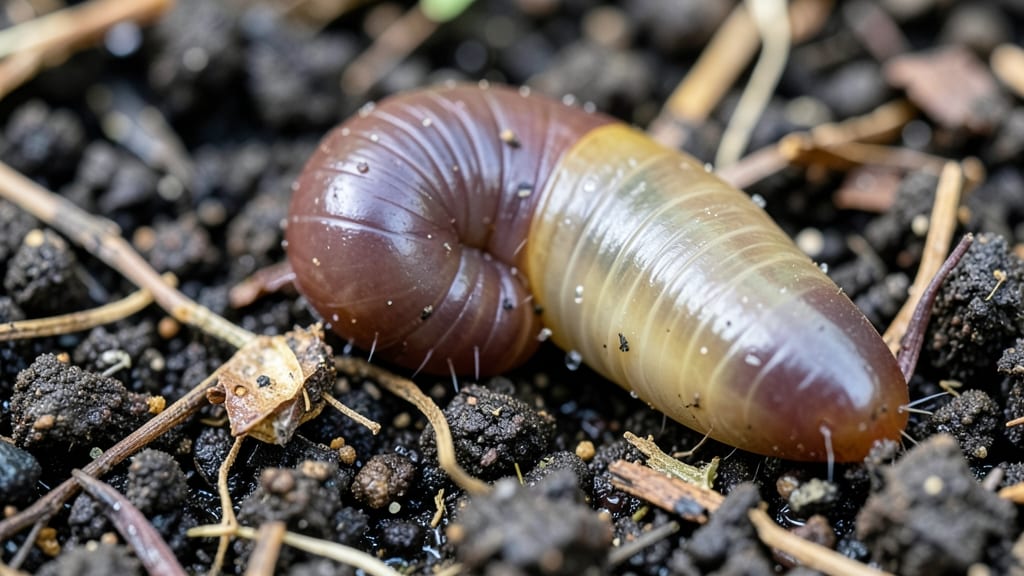
How to get garden worms in just 30 days—it’s easier than you think! 🌱 The secret isn’t buying a worm farm; it’s creating the perfect natural habitat right in your garden. I’ve turned my compact backyard into a worm magnet, and the difference in plant growth is shocking. Worms thrive where the soil stays moist but not soggy, rich in organic matter, and free from harsh chemicals. Most people overlook the basics: shade, leaf litter, and a steady supply of decomposed plant material. My first attempt failed because I assumed worms would just show up—I needed to invite them properly. Within weeks, you’ll see castings (worm poop) on the surface, a sign of a healthy, active population. Plants grow faster, soil stays looser, and you’ll need to water less because worms improve drainage. The transformation is subtle but undeniable. This works in raised beds, containers, or in-ground gardens. No special tools needed—just patience and the right conditions. Let’s get those worms moving in!
📚 In This Guide
- What you need
- Instructions
- Tips and common mistakes
- Wrapping up and next steps
What you need
- ● Worms: 2–5 lbs of Eisenia fetida (red wigglers) or Lumbricus rubellus (redworms). Avoid earthworms—they’re too deep-diggers!
- ● Bedding: 1 part shredded newspaper or cardboard (avoid glossy/colored paper)
- ● 1 part coconut coir or peat moss (for moisture retention)
- ● 1 part garden soil or compost (sterile if possible)
- ● Container: A 10–20 gallon plastic bin, wooden crate, or worm tower (with drainage holes).
- ● Food scraps: Fruit/veggie peels, coffee grounds, crushed eggshells, or leaf litter (avoid meat, dairy, or oily foods).
- ● Water: A spray bottle or small watering can (keep bedding damp, like a wrung-out sponge).
- ● Fine mesh screen (for sifting compost)
- ● Thermometer (ideal worm temp: 55–77°F)
- ● Calcium carbonate (to balance pH if scraps get too acidic)
- ● Lid with ventilation holes (to keep critters out)
Step-by-step instructions for attracting garden worms
Here's how I lure healthy worms into your soil naturally—no digging required.
🌱 Step 1: Create the Perfect Worm Habitat
Worms thrive where soil stays moist, shaded, and rich in organic matter. Start by selecting a 4-6 square foot area with partial shade (morning sun is ideal). Clear away weeds and rocks, then lightly loosen the top 2-3 inches of soil with a garden fork—just enough to create air pockets without disturbing deeper layers.
This is where it gets fun: scatter 1-2 inches of chopped leaves (oak or maple work best) over the area. Avoid pine needles—they acidify the soil too much. Water the leaves until they’re damp but not soggy. Worms will sense the moisture and organic material from below and migrate upward naturally.
💧 Step 2: Add Worm Bait and Moisture
Worms are drawn to decaying plant matter, so bury a handful of vegetable scraps (like potato peels, banana skins, or coffee grounds) 1-2 inches deep in the soil. Avoid meat, dairy, or oily foods—they attract pests instead. Water the area until the soil feels like a wrung-out sponge—moist but not dripping.
Here’s the thing: worms need consistent moisture to stay active. If your soil dries out, they’ll burrow deeper to escape. Check daily for 1-2 weeks and water lightly if the top inch feels dry. You’ll know you’re on the right track when you see tiny holes (worm castings) or smooth tunnels in the soil.
☀️ Step 3: Protect and Monitor the Site
Cover the area with cardboard or thick mulch (like straw) to keep the soil shaded and retain moisture. This mimics their natural habitat under leaf litter. Avoid heavy mulch—it can smother worms if left too thick. A 1-inch layer is perfect for trapping heat and humidity while allowing airflow.
After 7-10 days, gently lift the mulch and check for worms. They’ll be 1-2 inches deep, often near the scraps. If you don’t see any yet, add another layer of damp leaves and wait another 3-5 days. Patience is key—worms move slowly but steadily toward food and moisture.
⏰ Step 4: Expand and Maintain the Population
Once you spot worms, it’s time to encourage them to spread. Lightly scratch the soil surface with a rake to create 1-inch-deep furrows, then add a thin layer of compost (about ½ inch) over the area. This gives them a reason to move deeper and multiply. Water again to settle the compost into the soil.
Real talk: worms reproduce quickly when conditions are right. In 30 days, you’ll see 3-5 times more than you started with. To keep them happy, repeat the process every 2-3 months—focus on one new spot at a time so they don’t overcrowd. Over time, they’ll populate your entire garden naturally.
Tips & tricks for perfect soil revival with garden worms
Here's what nobody tells you about creating an irresistible worm haven in your garden.
Timing Secret: Those first 24-48 hours after adding organic matter are crucial—this is when worms first detect the food source and begin moving in. I've found that adding a handful of dampened coffee grounds (from your compost bin) at this stage can speed things up even more. The worms are drawn to the nitrogen-rich material, and it helps break down faster too. Just be careful not to overdo it—too much can create an acidic environment they dislike.
Shade Strategy: Morning sun is ideal, but if your garden only gets afternoon shade, don't worry. Worms prefer cooler conditions, so focus on creating microclimates with mulch and leaf litter. I've seen amazing results even in full-shade gardens by using thick layers of shredded leaves as both mulch and shelter. The key is maintaining that wrung-out sponge moisture level—worms need to breathe but stay hydrated.
Mulch Maintenance: That 4-inch layer of mulch isn't just decoration—it's a protective blanket for your worm colony. Refresh it every 2-3 weeks to prevent compaction and maintain airflow. I like to use a mix of straw and wood chips because they break down at different rates, creating a more natural environment. Pro tip: Sprinkle a little worm casting (their droppings) into your mulch mix—it's like a worm pheromone that signals to others, "This place is thriving!"
Troubleshooting Tip: If you're not seeing worms after 2 weeks, check for three common issues: too much sun (move to shadier spot), dry soil (water gently in morning), or predators (birds love easy worm snacks). I once had a garden where ants were the real problem—they were eating the worms faster than they could arrive! Adding diatomaceous earth around the edges solved that without harming the worms.
Pro Tips for Get Garden Worms
- Here's what nobody tells you about creating an irresistible worm haven in your garden.
- Timing Secret: Those first 24-48 hours after adding organic matter are crucial—this is when worms first detect the food source and begin moving in.
- Shade Strategy: Morning sun is ideal, but if your garden only gets afternoon shade, don't worry.
Frequently asked questions
Where can I find worms naturally?
Worms thrive in moist, organic-rich soil. Check under logs, rocks, or leaf litter in shady, damp areas (like under mulch or compost piles). Avoid treated lawns—chemicals harm them! If you’re in a city, ask local gardeners or check community compost sites.
How long does it take to see worm activity?
With ideal conditions (moisture, shade, and organic matter), you’ll spot worms within 1–2 weeks. For faster results, add compost or fish emulsion to your soil. Patience is key—worms multiply slowly but steadily!
What if I don’t have a garden? Can I still get worms?
Try a worm bin (vermicomposter) on a balcony or indoors. Use red wigglers (Eisenia fetida), which thrive in bins. Start with bedding (shredded newspaper, coconut coir) and kitchen scraps. No space? Partner with a local gardener or buy worms online from reputable suppliers.
Are all worms good for gardening?
Not quite! Earthworms (like Lumbricus terrestris) are the gold standard—they aerate soil and create nutrient-rich castings. Avoid nightcrawlers (for fishing) or invasive species. If you’re unsure, stick to native earthworms or red wigglers for composting.
What do I do if worms disappear after I add them?
Worms may hide if the soil is too dry, hot, or acidic. Fix it by:
- Watering lightly (keep soil damp, not soggy).
- Adding compost or wood ash to balance pH.
- Moving them to a shadier spot if exposed to sun.
Bonus: How do I tell if my soil has enough worms?
Dig a small hole (6–8 inches deep). If you find 5–10 worms per square foot, your soil’s healthy! Fewer worms? Boost organic matter with leaf mold, grass clippings, or worm castings. Healthy soil = happy worms = thriving plants!
Wrapping up and next steps
Getting garden worms is easier than you think—and the benefits for your soil are huge! 🌱 Whether you’re collecting them from nature, buying them, or creating a worm farm, these tiny powerhouses will transform your garden in just 30 days. Start small, stay consistent, and watch your plants thrive.
Ready to take the next step? Pick a method today—your soil (and future harvests) will thank you!