
Flowers
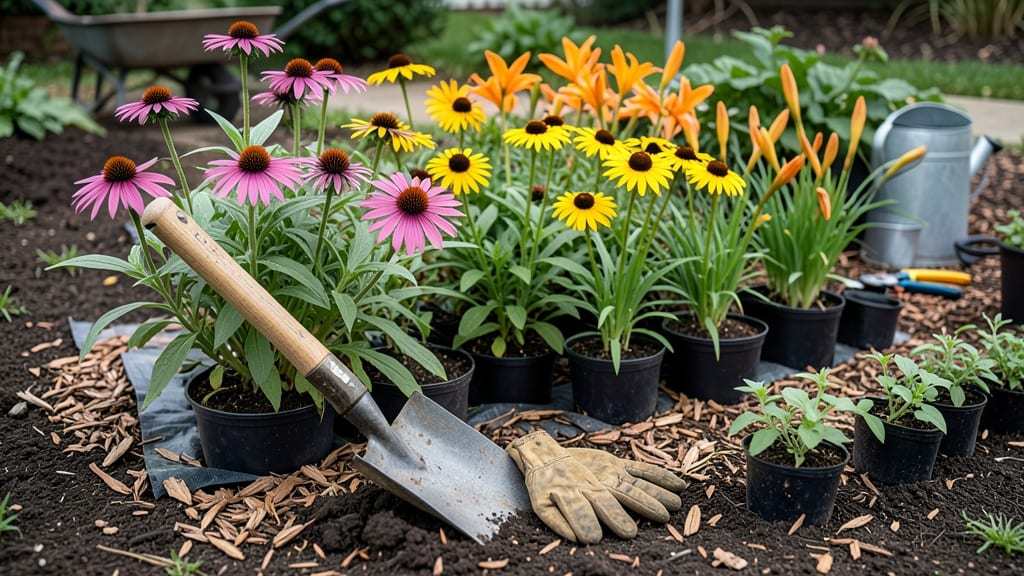
Creating a new flower bed transforms blank space into a showstopper that brings color and life to your yard. 🌸 I’ve designed beds that last for years—not just one season—by focusing on soil layers, plant placement, and smart planning that saves time (and money) down the road.
The secret starts with prepping the soil like a pro: remove weeds, loosen compacted earth, and mix in compost or aged manure to give roots room to breathe. Skipping this step means struggling with poor drainage or plants that refuse to thrive—don’t let that happen to yours.
By the end, you’ll have a bed that’s low-maintenance yet stunning, with plants that bloom in waves from spring through fall. The right combo of perennials, annuals, and foliage plants ensures year-round interest without constant replanting.
This method works for any size bed, from a cozy 3-foot square to a sprawling border. Whether you’re filling a sun-drenched patch or a shady corner, the principles stay the same—just tweak the plant choices.
📚 In This Guide
- What you need
- Instructions
- Tips and common mistakes
- Wrapping up and next steps
What you need
- ● Measuring tape – 25-foot roll for precise dimensions.
- ● String or garden twine – To mark out your flower bed shape.
- ● Shovel or spade – A sturdy heavy-duty shovel (16–18 inches) for digging.
- ● Garden fork or tiller – For breaking up compacted soil (rent or buy a rototiller for large areas).
- ● Wheelbarrow or large bucket – 3–5 cubic feet capacity for hauling soil and amendments.
- ● Garden hose with nozzle – For wetting soil before digging (avoids clumping).
- ● Knee pads or cushion – Because your knees will thank you!
- ● Garden gloves – Heavy-duty, waterproof gloves to protect your hands.
- ● Soil amendments (pick 2–3 based on your soil test): Compost – 2–3 inches of well-aged compost (avoid fresh manure).
- ● Peat moss or coconut coir – 1–2 inches to improve drainage in clay soil.
- ● Perlite or vermiculite – 1–2 cups per square foot for sandy soil.
- ● Organic matter – Leaf mold or well-rotted wood chips (1–2 inches).
- ● Topsoil or garden soil mix – 3–4 inches of high-quality topsoil (avoid cheap fill dirt).
- ○ Mulch – 2–3 inches of shredded bark, pine straw, or straw mulch (optional but recommended).
- ● Soil test kit – DIY test or send a sample to your local extension office for pH and nutrient analysis.
- ● Edging tools – Flexible metal or plastic edging to define borders neatly.
- ● Landscape fabric – If planting in a high-weed area (lay under mulch, not soil).
- ● Slow-release fertilizer – Balanced 10-10-10 or organic options like bone meal or fish emulsion.
- ● Drip irrigation kit – For low-maintenance watering (especially in dry climates).
- ● Plant markers or stakes – To label and support new plants.
Step-by-step instructions for creating a beautiful flower bed
Here's how I build a flower bed that thrives year after year—no guesswork, just proven layers.
🪴 Step 1: Mark and Prepare the Bed Location
Use a garden hose or spray paint to outline your 4-foot-wide by 8-foot-long bed shape. Step back often to check proportions—you'll want it wide enough for easy access but not so large that weeds dominate. Clear all grass, weeds, and debris from the marked area using a shovel or garden fork. I like to work in small sections, removing soil down to about 6 inches deep—this prevents grass from growing back through the new bed.
For curved edges, use a garden knife or half-moon edger to cut clean lines. Smooth the soil surface with a rake, removing any large rocks or roots. This prep work ensures your plants have a clean slate to grow in, and those crisp edges make all the difference in the finished look.
🌱 Step 2: Build the Soil Layers for Drainage and Fertility
Start with a 2-inch layer of coarse gravel at the bottom. This creates essential drainage—water shouldn't pool at the roots. Spread it evenly across the entire bed area, then add a 3-inch layer of compost. I use a mix of aged compost and peat moss for structure. This middle layer feeds your plants while keeping the soil loose and breathable.
Next, add 4 inches of high-quality topsoil. I prefer a blend that includes perlite or vermiculite for extra aeration. Sift it through a coarse screen to remove clumps—smooth, fine soil prevents air pockets that can suffocate roots. Lightly tamp down each layer with your hands or a board to settle it without compacting too tightly.
🌿 Step 3: Choose and Plant Your Flowers in Layers
Design your bed in three layers: tall plants at the back, medium-height in the middle, and low-growing or spreading plants at the front. For a 4-foot-wide bed, I typically use 3-5 plants per square foot—enough to fill in quickly but not so crowded they compete for nutrients. Dig holes twice as wide as the root ball and just as deep—this encourages roots to spread outward rather than staying tight.
Gently remove plants from their containers and loosen any circling roots with your fingers. Place them in the holes, then fill around the roots with soil, pressing lightly to eliminate air gaps. Water each plant deeply right after planting—this helps settle the soil and removes any air pockets. I always plant on a cloudy day to reduce transplant shock.
☀️ Step 4: Mulch and Protect for Long-Term Success
Spread 2-3 inches of mulch over the entire bed, keeping it 2 inches away from plant stems to prevent rot. I use shredded bark or wood chips—it breaks down slowly, improving soil over time while suppressing weeds. Water the bed thoroughly after mulching to help it settle and begin protecting your plants.
For the first few weeks, check the soil moisture daily. You'll want it to stay consistently moist but not soggy—stick your finger 1 inch deep into the soil. If it feels dry, water gently until moisture reaches 3-4 inches down. This establishes strong root systems before the first hot spell hits.
⏰ Step 5: Maintain and Refresh Seasonally
Every spring, add a 1-inch layer of fresh compost over the mulch and work it lightly into the top inch of soil. This replenishes nutrients without disturbing roots. Deadhead spent blooms regularly to encourage continuous flowering—pinch off faded flowers with your fingers or small pruners. I also check for weeds weekly, pulling them before they compete with your plants.
In late fall, remove any dead or diseased plants and add a thick layer of mulch (up to 3-4 inches) to protect roots over winter. This insulation keeps soil temperatures stable and reduces freeze-thaw cycles that can damage roots. By spring, your bed will be ready to burst back into color with minimal effort.
Tips & tricks for perfect flower bed layers
These little details make the difference between a bed that thrives and one that struggles—trust me, I've seen both.
Prep Like a Pro: Before marking your bed, walk around it and visualize how you'll access it for maintenance. Leave at least 18 inches of walking space around the edges—this prevents soil compaction from foot traffic. I also recommend testing your soil's pH before building; most flowers prefer a neutral to slightly acidic range (6.0-7.0). A simple soil test kit from your garden center will tell you if you need to adjust with lime or sulfur before planting.
Layering Secret: When building your soil layers, don't skip the gravel base—this is your bed's drainage system. If you're working with heavy clay soil, consider adding a 1-inch layer of sand between the gravel and compost to improve drainage even more. For the topsoil layer, mix in 1 cup of bone meal per 10 square feet to give your plants a phosphorus boost for strong roots. This is optional but makes a noticeable difference in plant vigor.
Planting Precision: The "twice as wide" rule for planting holes isn't just about roots—it's about creating space for soil microbes to thrive. When loosening circling roots, don't pull them apart; instead, gently tease them outward with your fingers. This prevents root damage while encouraging outward growth. For the first watering, use a gentle rain setting on your hose—this helps settle the soil without displacing newly planted roots.
Mulch Magic: That 2-inch clearance around plant stems when applying mulch isn't arbitrary—it prevents moisture buildup that leads to rot. For extra weed suppression, consider using cardboard or newspaper under your mulch layer (remove tape and glossy coatings first). This creates a natural barrier that breaks down over time, adding to your soil's organic matter.
Pro Tips for Make A New Flower Bed
- These little details make the difference between a bed that thrives and one that struggles—trust me, I've seen both.
- Prep Like a Pro: Before marking your bed, walk around it and visualize how you'll access it for maintenance. Leave at...
- Layering Secret: When building your soil layers, don't skip the gravel base—this is your bed's drainage system. If yo...
Frequently asked questions
Got questions about creating your dream flower bed? You’re not alone! Here are some of the most common concerns—and their easy solutions—to help you avoid pitfalls and plant with confidence.
What’s the best time of year to start a new flower bed?
The ideal time depends on your climate! In mild winters, spring (after the last frost) or early fall (6–8 weeks before frost) are perfect. In harsh climates, spring is best—it gives plants time to establish roots before summer heat. Avoid planting in extreme heat or deep freeze.
Can I use just topsoil, or do I need other soil amendments?
Topsoil alone often lacks nutrients and structure. For a thriving bed, mix in compost (20–30%) for fertility, sand or perlite (10–20%) for drainage, and peat moss or coconut coir (10–15%) for moisture retention. Test your soil first—many garden centers offer affordable kits!
How do I keep weeds and pests out of my new flower bed?
Prevention is key! Lay down landscape fabric before adding soil to block weeds, or use cardboard/mulch as a natural barrier. For pests, opt for neem oil or companion planting (e.g., marigolds repel nematodes). Regularly inspect plants and remove pests manually when possible.
What if my flower bed looks uneven or lumpy after planting?
Don’t stress—it’s normal! Use a rake or leveling tool to smooth the surface, then gently tamp down the soil with your hands or a board. For deeper lumps, mix in more compost or sand to break up compacted areas. A light layer of mulch will also help hide minor imperfections while protecting roots.
How often should I water a new flower bed?
Newly planted beds need consistent moisture—water deeply 2–3 times per week (or daily in extreme heat) for the first 2–3 weeks. After that, taper to 1–2 times weekly, focusing on the base (not leaves) to encourage deep root growth. Drip irrigation or soaker hoses work best!
Wrapping up and next steps
Creating a stunning, thriving flower bed is all about layered soil prep and a little patience—your garden will thank you! 🌸 By choosing the right plants, enriching your soil, and adding mulch, you’ve set the stage for year-round beauty that will make your neighbors green with envy.
Don’t forget to water wisely and monitor your progress—soon, your flower bed will be the showstopper of your yard.
Ready to watch your hard work bloom? Start by sketching your design or browsing seasonal plant varieties to keep your bed vibrant all year. Happy gardening! 🌿