
Companion Plants
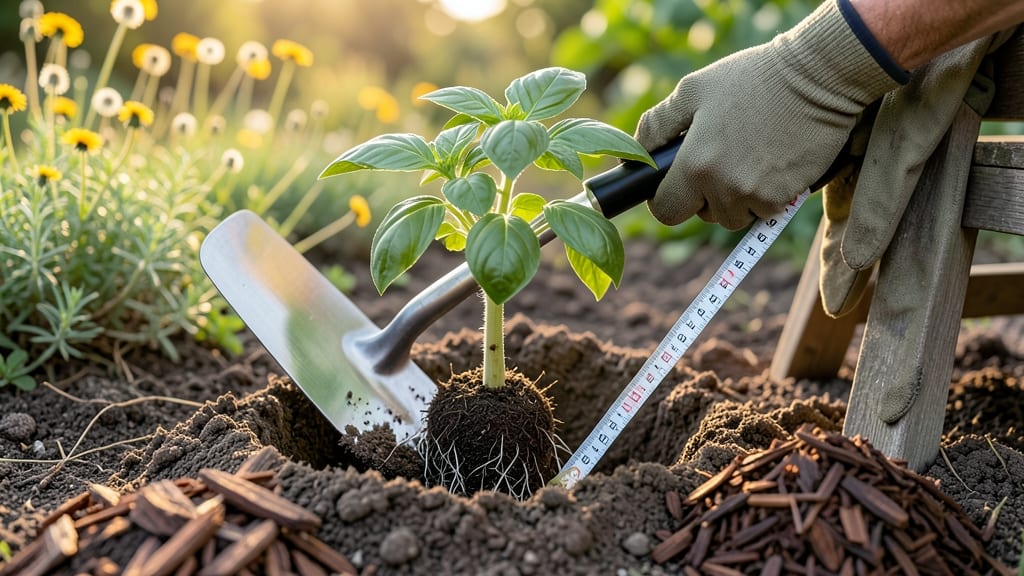
Digging holes the wrong way kills plants before they even start. 🌱 I’ve watched roots circle in tight, compacted soil because the hole was too shallow or cramped—don’t let that happen to your garden.
The secret isn’t brute strength; it’s precision in depth, width, and soil prep that gives roots room to spread and breathe.
Start with the right tools: a sturdy shovel, a trowel for fine-tuning, and a measuring tape. For most plants, the hole should be twice as wide as the root ball and 1-2 inches deeper than the container.
Loosen the sides of the hole so roots can splay out naturally—no need to dig a perfect crater, just break up compacted soil with your hands or a garden fork.
You’ll see the difference immediately: plants settle in without stress, water drains properly, and roots grow outward instead of circling. For shrubs and trees, add a handful of compost to the bottom to boost nutrients, and always backfill with native soil—not fresh amendments—that can burn tender roots.
This method works for everything from delicate annuals to massive oaks, and it’s the one thing that separates thriving gardens from struggling ones. Once you master it, you’ll never go back to guesswork digging.
📚 In This Guide
- What you need
- Instructions
- Tips and common mistakes
- Wrapping up and next steps
What you need
- ● Shovel or Trowel: Round-point shovel (for larger holes, 12–18 inches wide)
- ● Hand trowel (for smaller plants or precision digging, 6–8 inches wide)
- ● Measuring Tape or Ruler: (10–25 ft for spacing, 12–24 inches for depth)
- ● Garden Gloves: (Durable, water-resistant for comfort and protection)
- ● Stakes or Markers: (Wooden, bamboo, or plant labels to mark hole locations)
- ● Watering Can or Hose: (For post-planting hydration)
- ● Post-Hole Digger: (For deep or narrow holes, 12–24 inches deep)
- ● Soil pH Tester: (To check and adjust soil conditions if needed)
- ● Compost or Fertilizer: (Mix into the hole for nutrient-rich soil)
- ● Level or String Line: (For ensuring even spacing in rows)
- ● Knee Pads or Stool: (For comfort during long digging sessions)
Step-by-step instructions for digging plant holes
Here's the method I use to dig holes that give plants the perfect start—no more guessing on depth or spacing.
🪴 Step 1: Measure Hole Depth Based on Root Ball
Start by examining the root ball of your plant—this determines your hole depth. For container-grown plants, dig a hole twice as deep as the root ball and twice as wide. For bare-root plants, the hole should be 3-4 inches deeper than the longest root. I always check the plant tag for specific instructions, but this rule covers 90% of cases.
Use a measuring tape or stick to mark the depth before digging. You'll see the soil level on the root ball—this is your guide. If the plant has a thick taproot (like tomatoes or carrots), dig 1-2 inches deeper to encourage root growth downward. For shallow-rooted plants (like herbs or strawberries), keep it closer to the original soil line.
🌱 Step 2: Dig the Hole with Proper Spacing
Space holes based on the plant's mature size. Check the plant tag for recommended spacing—this prevents future crowding. For most shrubs, dig holes 3-5 feet apart, while vegetables like peppers need only 12-18 inches between plants. I use a garden hose to mark spacing on the ground before digging to avoid misalignment.
Dig the hole with a shovel or trowel, loosening the soil at the sides to create a slightly flared base. This helps roots spread outward instead of circling. Avoid stepping on the hole—compacted soil at the bottom will restrict root growth. If your soil is heavy clay, add a handful of compost to the hole to improve drainage.
☀️ Step 3: Prepare the Hole for Planting
Before placing the plant, mix the soil you removed with compost or aged manure to enrich the hole. This ensures the roots have access to nutrients immediately. For sandy soil, add a scoop of organic matter to help retain moisture. I like to create a small mound of amended soil in the center of the hole—this prevents the plant from sitting too low.
Gently loosen the root ball if it's tightly packed. For container-grown plants, run your fingers along the edges to encourage roots to grow outward. If the plant is root-bound (roots circling the pot), make a few vertical cuts with a knife to break up the roots. This step is critical for preventing girdling as the plant matures.
✂️ Step 4: Place the Plant and Backfill Carefully
Set the plant in the hole so the top of the root ball sits 1 inch above the surrounding soil level. This prevents water from pooling around the stem, which can cause rot. Use your fingers to gently spread any circling roots outward into the hole. Press the soil lightly around the edges to eliminate air pockets.
Backfill the hole in stages, tamping down the soil gently with your hands or a shovel handle. Stop halfway and water the plant deeply to settle the soil. This helps eliminate air gaps and ensures good root-to-soil contact. Finish backfilling and create a small watering basin around the base to direct moisture to the roots.
💧 Step 5: Water and Mulch for Long-Term Success
After planting, water the hole thoroughly until water flows out the bottom. This helps settle the soil and encourages roots to grow downward. I like to add 2-3 inches of mulch around the base, keeping it 2-3 inches away from the stem. Mulch conserves moisture, regulates soil temperature, and suppresses weeds—three critical factors for young plants.
Let the soil dry slightly before mulching to prevent fungal growth. Avoid piling mulch against the stem, as this can trap moisture and harm the plant. Step back and admire your work—properly dug holes set the stage for healthy, thriving plants that will reward you for years.
Tips & tricks for perfect plant hole digging
These simple strategies will transform your planting routine from guesswork to precision gardening.
Root Ball Inspection: Before digging, gently squeeze the root ball to check for tightness. If it feels compacted, soak the container in water for 10-15 minutes to loosen roots. I've learned this the hard way—root-bound plants struggle to establish in tight soil. For container-grown plants, if the roots are circling the pot, make 2-3 vertical cuts with a knife to encourage outward growth. This simple step prevents girdling as the plant matures.
Soil Modification Secrets: When preparing the hole, I always mix the native soil with about 25% compost or aged manure by volume. For heavy clay soils, add a handful of perlite or coarse sand to improve drainage. The key is to create a nutrient-rich environment that mimics the plant's original growing conditions. If you're planting in sandy soil, add a scoop of organic matter to help retain moisture and nutrients.
Precision Spacing Tools: For large gardens, use a garden hose to mark spacing patterns before digging. The hose creates natural curves that follow the natural flow of your landscape. For straight rows, use a string line with stakes at each end. This ensures perfect alignment and prevents future crowding issues. I've saved myself hours of replanting by planning spacing before the first shovel goes into the ground.
Watering Strategy: After backfilling, water the hole thoroughly until water flows out the bottom—this is your signal that the soil is properly settled. Then, create a watering basin around the base to direct moisture to the roots. I've found that adding a slow-release fertilizer tablet during this watering helps jumpstart root growth. This two-step watering method ensures the plant establishes quickly without drowning the roots.
Pro Tips for Dig Holes For Plants
- These simple strategies will transform your planting routine from guesswork to precision gardening.
- Root Ball Inspection: Before digging, gently squeeze the root ball to check for tightness.
- Soil Modification Secrets: When preparing the hole, I always mix the native soil with about 25% compost or aged manure by volume.
Frequently asked questions
Got questions about digging holes for your plants? You’re not alone! Here are some of the most common queries—plus straightforward answers to keep your gardening game strong.
How deep should I dig holes for different plants?
The depth depends on the plant’s root system. For most shrubs and perennials, aim for a hole twice as wide as the root ball and as deep (or slightly deeper to encourage roots to spread). Shallow-rooted plants (like herbs) need holes just deep enough to cover their roots, while deep-rooted trees (e.g., oak) may require holes 3x wider and 18–24 inches deep.
When is the best time of day to dig holes?
Morning or late afternoon is ideal—soil is cooler and less compacted, making digging easier. Avoid midday heat, which can dry out soil and make it harder to work with. If digging in clay, water the area the day before to soften it.
What if my shovel keeps hitting rocks or roots?
First, mark the area with a garden marker or stakes to avoid damaging existing plants. If you hit rocks, gently remove them (if small) or redirect the hole. For stubborn roots, use a pruning saw to cut them cleanly. Pro tip: Rent a post-hole digger for tough spots!
Can I reuse soil from the hole when planting?
Mix the original soil with compost or amended soil (especially if your native soil is poor). Pure backfill can compact around roots, restricting growth. For heavy clay or sandy soil, replace half the hole with high-quality potting mix or native soil blended with organic matter.
How do I measure spacing between holes accurately?
Use a measuring tape or stakes to mark spacing based on the plant’s mature size. For example, tomatoes need 18–24 inches apart, while fruit trees require 20–30 feet. A simple trick: Lay a hose or rope between stakes to visualize rows before digging.
Wrapping up and next steps
Digging the perfect holes for your plants is all about precision, patience, and a little know-how—and now you’ve got it! Remember, the right depth and spacing give your plants the strong foundation they need to thrive.
Whether you’re planting flowers, veggies, or shrubs, taking the time to prep the soil and space them correctly will pay off in lush, healthy growth. 🌱✨
Ready to get your hands dirty? Grab your tools, follow these steps, and watch your garden flourish! Next up: Choose the perfect companion plants to maximize your space and boost growth—stay tuned for our guide!